How do you make the Ultimate Nerd Raspberry Pi cluster case better!?!
I wrote this article sometime in late 2019 or early 2020… apparently I forgot to click publish. Woops! So basically this post is about how I made my Pi cluster even better!
One way is to make it twice as big!
If you haven’t read my first article on this project, stop and go check it out first. It’s right here Then come back and check out the upgrades.
Version 2.0!
I won’t make you wait… here it is! I had to reprint all of the faceplates because my wife didn’t like all the different colors. I also added a new power source, a screen, and some SSD “shelves”.
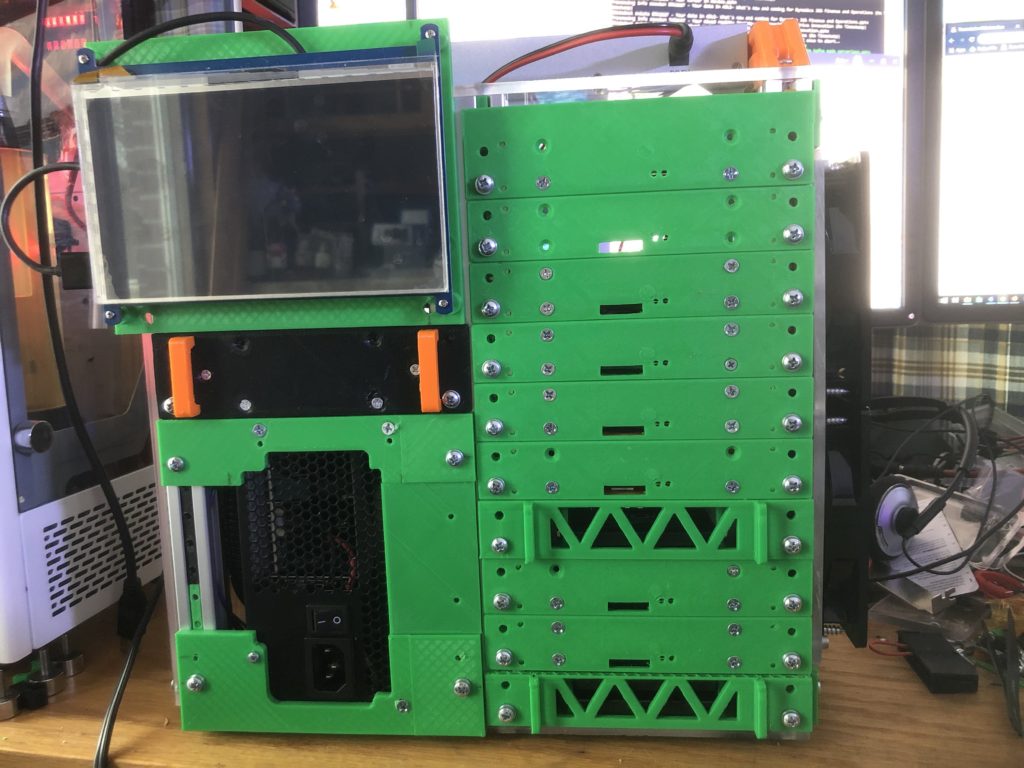
The last picture is of some custom 120mm fan shrouds that allow me to put filters in front of the fans to cut down on dust inside the case.
What’s New
Some of it is obvious, but some of the best parts are harder to see.
Power Supply
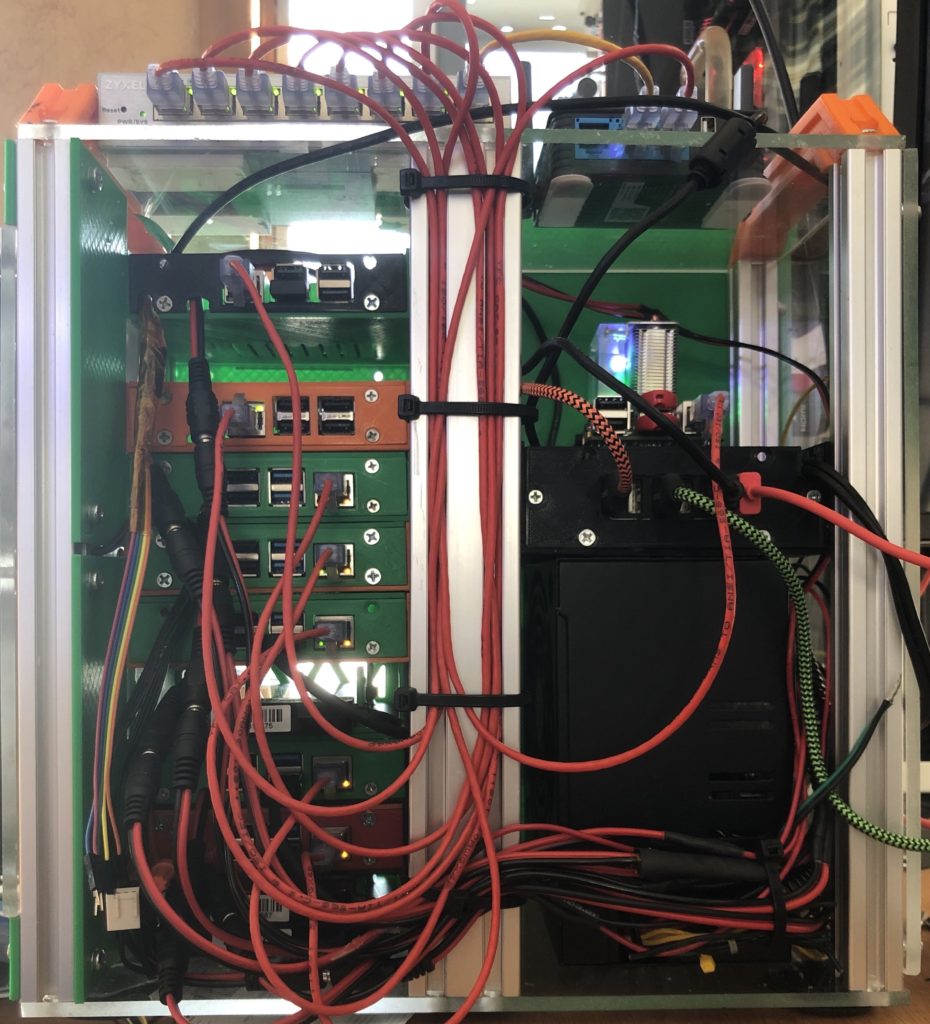
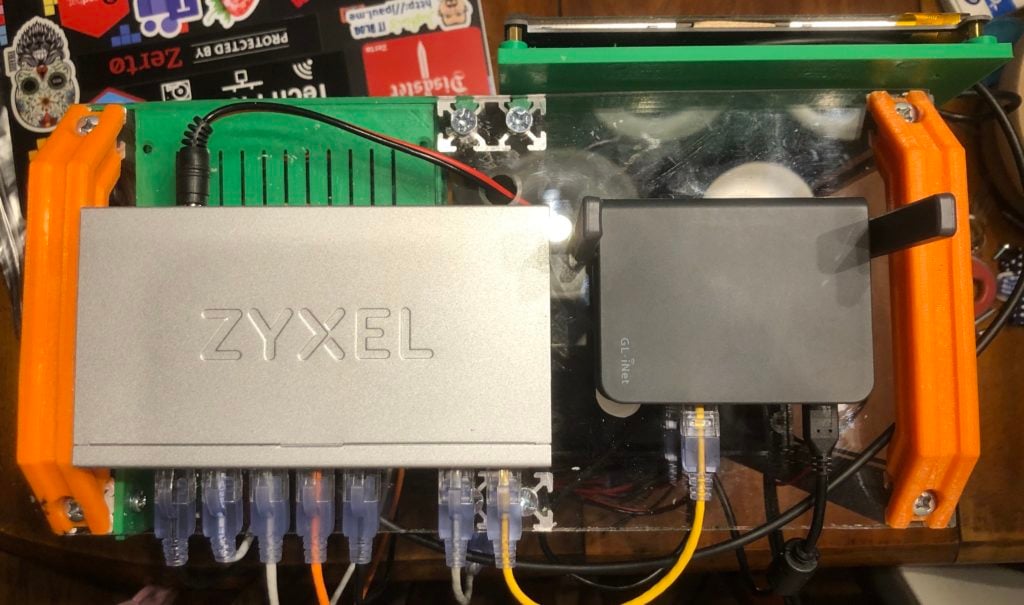
First, there is an ATX power supply powering all of the Pis in the cluster. I was using a RAVPower USB power supply, but it was only rated to 60watts. The ATX power supply also allowed me to install DC Barrel power connectors in the Pi cases as well as on the ATX power supply side.
The ATX power supply also allows me to supply 12v to the 120mm cooling fans, and I even had an extra connector for the Zyxel switch (it’s 5V too!). I thought about switching out the GL.iNet router for a Ubiquiti ER-X which is 12v so I installed a 12v DC connector in the top for that too if I ever go that route.
The RAV USB power supply still powers the GL.iNet Router and the screen.
20×40 Aluminum Chassis Rails
The original “rack” was built from 20×20 Aluminum bars that I stole from an old 3d printer. But when I decided to add the ATX power supply I didn’t want to go taller, instead, I thought it would be more stable as two “racks” side by side. So Amazon came through and 20×40 bars were added as the middle part of the rack.
SSD Shelves
You can use the Pi’s SSD’s as well as NFS storage if you want to make your container data persistent, but wearing out an SD card isn’t really something I wanted to do. Since the Raspberry Pi 4 has USB3 I decided to add some USB to SATA adapters and some disk shelves to the rack. Since these pictures I have added another shelf of disks, so 6 – 4GB Raspberry Pi 4b’s – each with a 120GB ssd.
Monitoring
The screen is easily seen, but driving that screen is an “old” Raspberry Pi 3b+. It also monitors all of the Pis in the cluster via a custom REST API to get their temperature. Based on that temperature data I use the GPIO pins to control the 120mm Fan’s speed. Most of the time I can slow the fans down to 40% and it makes the whole thing silent. Under a full load in a warm room, it will speed the fans up to 80% and quickly cool the Pis back down to 30-35 degrees Celcius.
Looks cool, but WTF does it do?
My blog is almost 10 years old, and until I started posting about Docker and containers, it’s probably safe to say that 100% of the readers are virtualization or storage folks. So I completely understand if all this talk of Kubernetes, and containers is another language.
At a high level, this cluster runs Kubernetes (K3s from Rancher.io to be exact). Kubernetes is a container scheduler (plus more but let’s leave it there for now).
So in TL;DR VMware guy speak, this is a 6 node hyper-converged cluster. But instead of running VM’s it runs containers. and instead of running VMware or HyperV it runs a form of Kubernetes called K3s from Rancher.io
I plan to do some more posts about K8s (shorthand for kubernetes BTW), so stay tuned.
![]()