This post is about recycling old hardware that you might never consider using for a lab. It won’t be a super technical post, but since Kubernetes requirements are not the same as virtualization hosts you might be surprised at the hardware you can use!
Having fun doesn’t have to cost a lot of money, and neither should learning something new. While I have built Kubernetes / K8s / K3s / whatever you want to call it – clusters from Virtual machines and Raspberry PI’s, I wanted a true bare-metal Kubernetes cluster that was also AMD64 based for ease of use. I also didn’t want to spend any money on it!
The Hardware
If you recall from my previous posts I don’t have a home lab. What was my home lab got moved to a colo years ago. So I don’t have an abundance of hardware at my house, and I’d like to keep it that way. But for this project I’m breaking that rule and getting hardware.
I thought about getting a few HP EliteDesk 800 G2 Mini’s… I have a couple of them and I love them. In fact, I’m not sure why anyone would pay so much for an Intel NUC when these and other brands exist on the cheap! But as cheap as they are… they are still pricey when you want 4 of them!
So what did I go with instead?
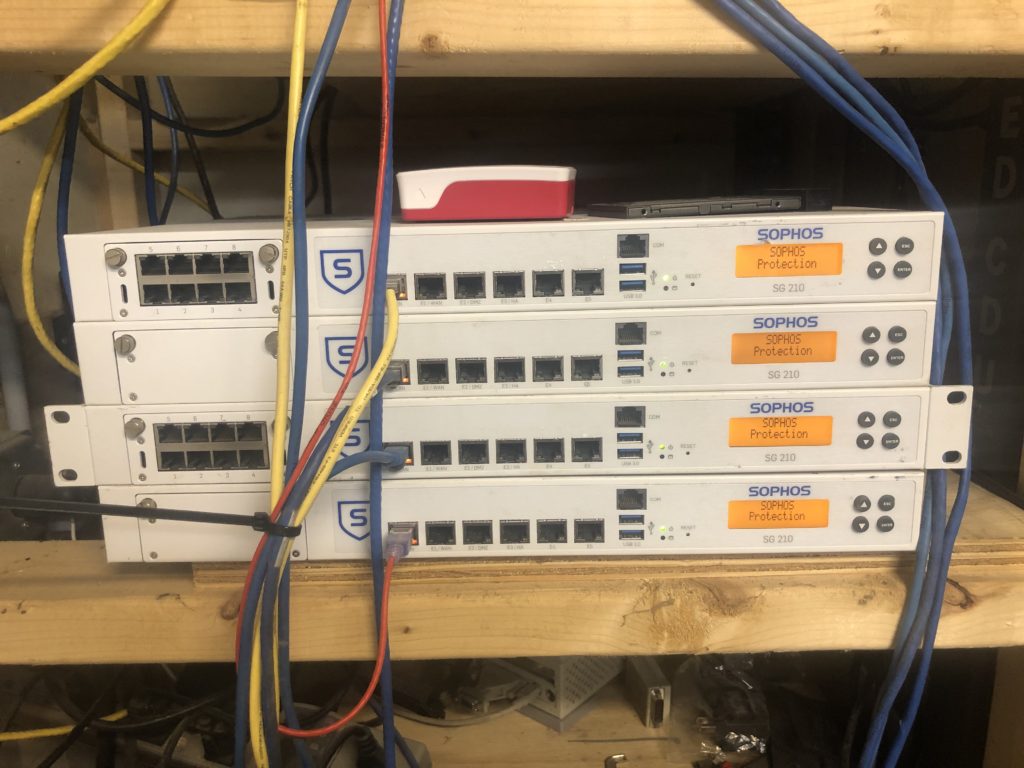
Sophos SG210 Firewalls!
Don’t laugh! They were FREE and they are actually OK little Linux boxes. They have a VGA port, USB3, DDR3 RAM (8GB standard, but could be upgraded to 16GB), 320GB HDD, and they take standard Intel processors. Mine have simple dual-core Intel Celeron G1820s in them, not speed daemons, but again, enough for a lab.
I was able to load Ubuntu 20.04 on them without any issues at all. From there I put Ranchers K3s, MetalLB.
Opening it up
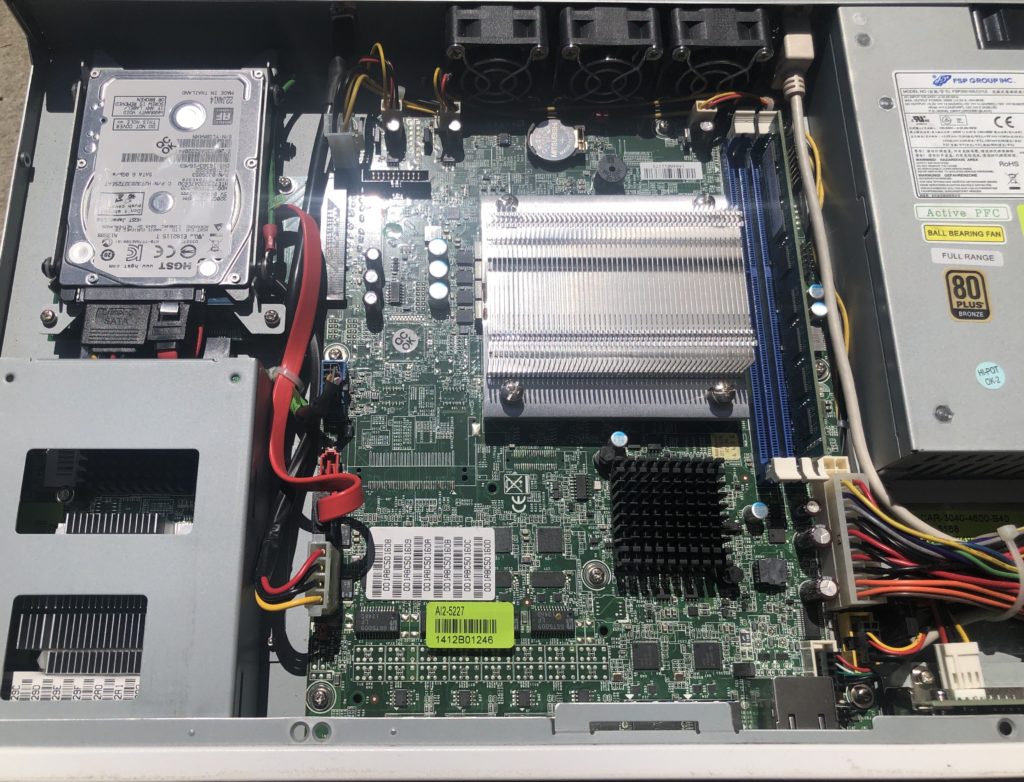
Inside of the SG-210 you will find a pretty standard x64 based PC, the only thing that is specialized is the PCIe connector for the expansion card slot.
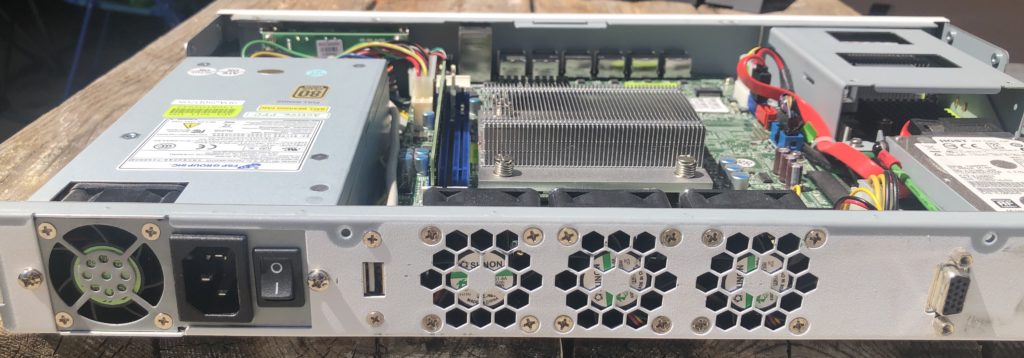
The rear is pretty simple, PSU, 1 USB port, VGA, and three cooling fans.
There is one 320GB SATA disk that ships with the SG-210, but there are two SATA ports internally. However, there is only one spot to mount a 2.5″ disk. You might be able to mount a second one inside of the expansion card slot if you don’t have it populated with a NIC.
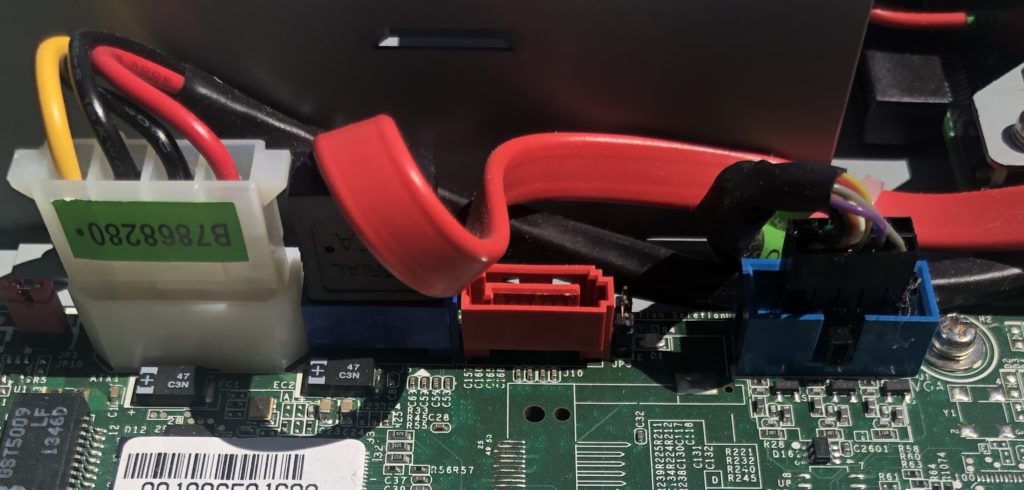
There is also one additional SATA port connector, but you would need some sort of extension if you want to use it.
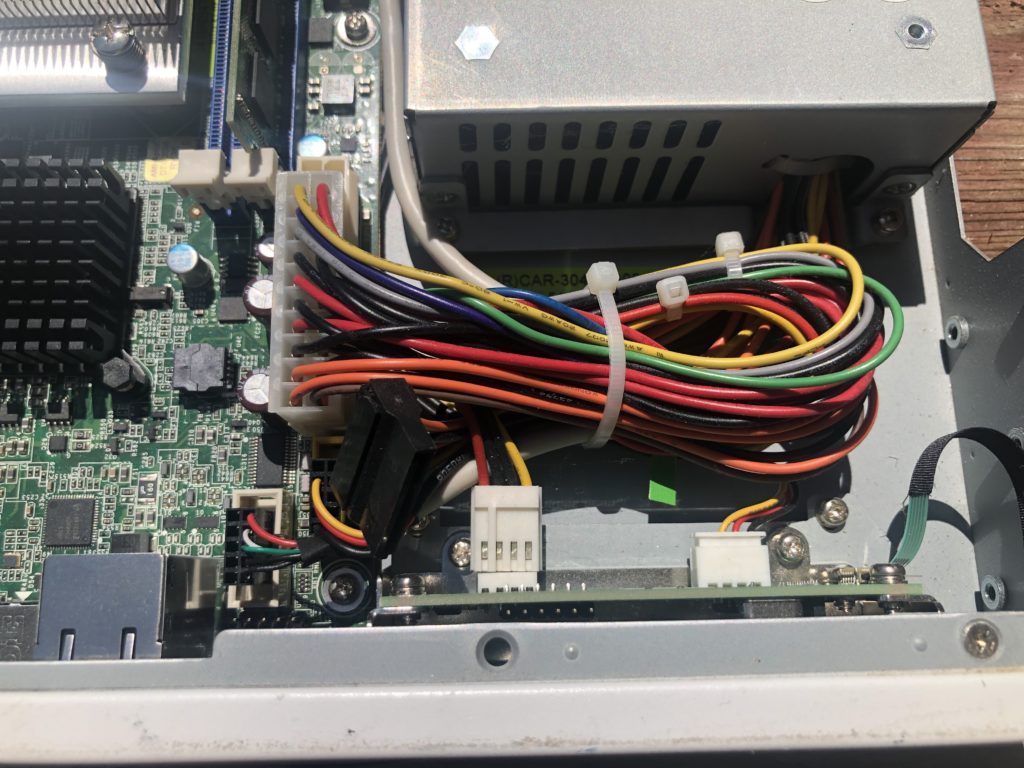
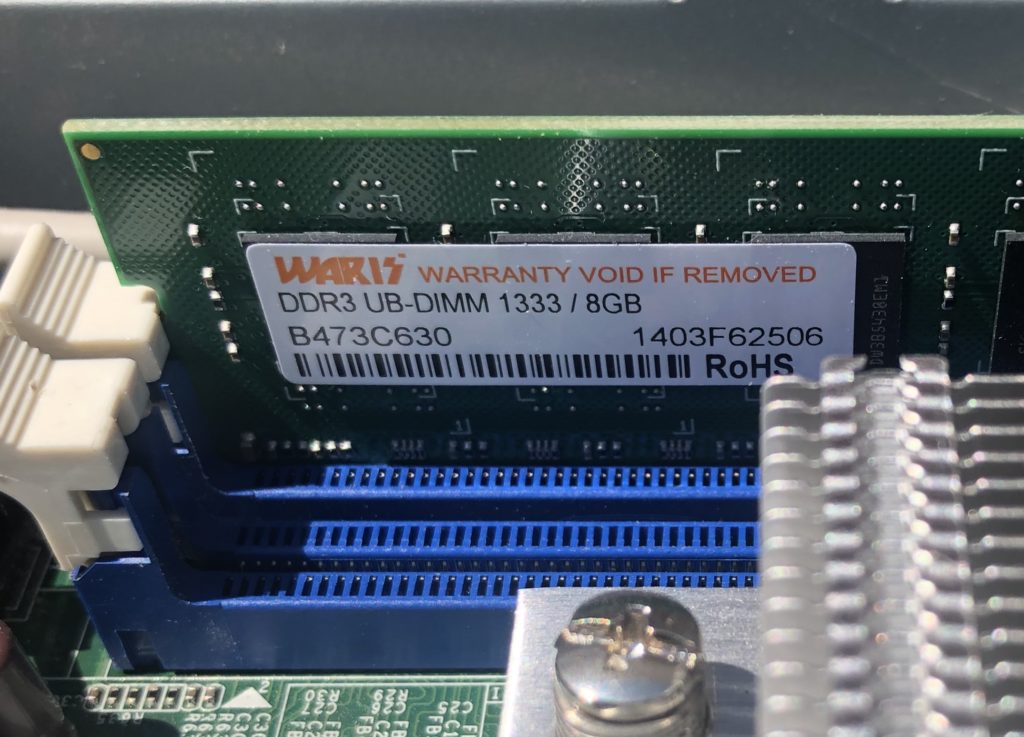
The RAM is standard unbuffered DDR3. The motherboard only has two slots, but since the spec sheet says this processor family maxes out at 16GB it’s not a big deal.
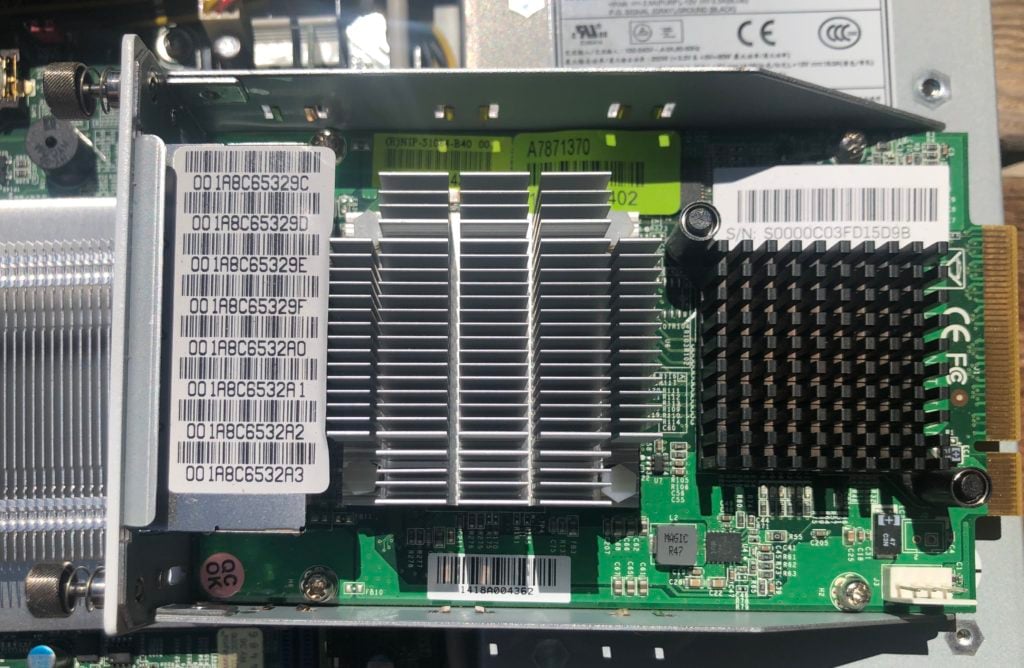
Here is the 8 port expansion NIC. Seems like a standard PCIex4 connector, but I haven’t tried to plug it in to a normal board 🙂
Network Interfaces
If you are looking for a box with a stupid amount of NICs this is also a pretty good choice. The motherboard has 6-gigabit ports embedded, but as shown above, you can also find this box with an 8 port Gigabit expansion card. Ubuntu has no problem detecting all 14! (or 6 in the models without the expansion card)
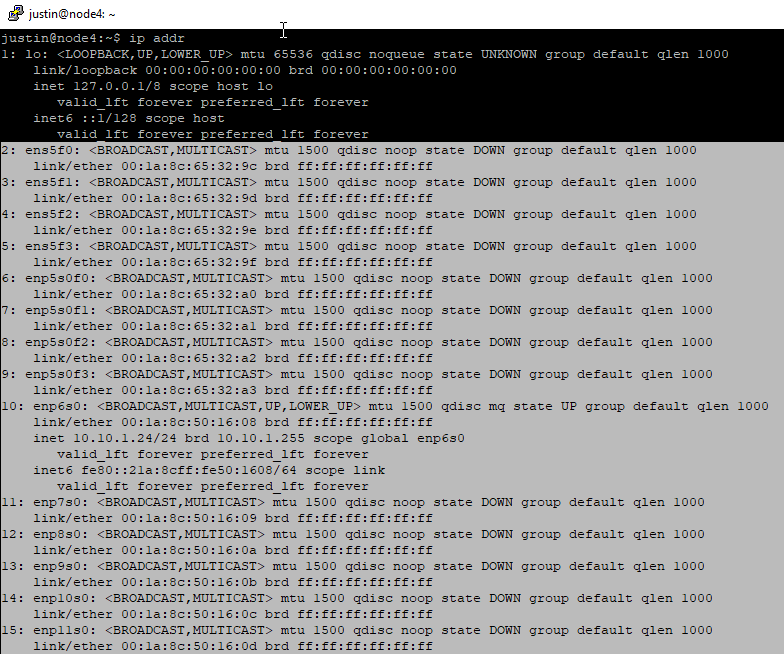
You can also get 10gbps expansion cards and IIRC they even have a model with SFP ports too. They are not standard PCIe though. My guess is that anyone else who might use these will use them with whatever they come with from the dumpster though… (eBay prices are stupid expensive btw).
Storage
K3s by default uses the local-path provisioner for volumes, so I can take advantage of the internal SATA disk. I also added some external storage too.
I have an old Synology 2-bay NAS sitting around, so I added it as a storage classc with a dynamic NFS provisioner.

This allows pods to restart on other nodes without data loss. (Assuming my Synology doesn’t die 🙂 )
To get the dynamic NFS provisioning and associated storage class going, I used this article https://blog.exxactcorp.com/deploying-dynamic-nfs-provisioning-in-kubernetes/
GUI Management
I’m a huge fan of the command line, but I also like having a GUI for things that I don’t completely understand. It’s a nice backup for when you are stuck, and I like to use it as a get out of jail card.
I’ve written before about Portainer for Docker, but now they have Portainer for Kubernetes. I highly recommend it!
The one thing that I will point out is that by default the persistent configuration data for Portainer is stored on local-path provisioned storage. This means that if your Portainer pod gets restarted on a different node, it will act as though its a new install. Therefore, I recommend that you create a storage class that spans all nodes, as I did with NFS so that Portainer data is persistent across nodes.
I will put together another blog post about how I set up my Synology NFS storage and Portainer in a separate post. I’ll link to it here once it’s been posted.
Take away
Maintaining an enterprise quality lab is something I’ve done for many years. Yet it seems like every time a new version of vSphere is released I’m told my lab equipment will be unsupported soon. Go figure right?
With Kubernetes I don’t have to worry about this (as much)… I just need something capable of running a modern flavor of Linux. Which in turn means that machines I would have normally dumpstered can now be used for longer. Kubernetes also doesn’t run full copies of an OS for each workload, which means that you don’t really need 64GB of ram per node for a cluster. Raspberry Pi’s or in this case… a 5 year old firewall can work just fine!
What hardware are you learning Kubernetes on?
![]()

