Possible problems you will face
In my experience, moving a VMware based CentOS virtual machine to Azure can become quite the headache compared to
Assumptions
This tips and tricks page will assume that you are using Zerto to migrate an on-premises VMware VM into Azure. It is entirely possible that these same steps will apply if you are using a different tool, but I have not tested any other tool and have no intention of doing so.
If you are only looking to use Azure as a Disaster Recovery platform, and plan to continue running your VM’s in VMware or HyperV that is perfectly fine. These steps simply prepare a VM to run in Azure, if that never happens, the modification will remain harmless while running on VMware. It is MUCH easier to do this before a failover than it is after.
I also assume that if you have found this page, then you have probably seen this Microsoft article: https://docs.microsoft.com/en-us/azure/virtual-machines/linux/create-upload-centos
That article is great if you are trying to build your own custom CentOS “golden image” that you can then create templates from in Azure. It is also a HORRIBLE guide for migrating a production VM to Azure, why?, because several of the steps will absolutely thrash a production VM. Most of the steps in this guide were taken from that page, but the steps that were harmful or unneeded were left out.
Tested Versions of Linux
Tested means, the steps in this article were performed on a machine, and then that machine was failed over to Azure (from VMware) with Zerto.
Working:
RedHat Enterprise Linux: 6.5, 6.6, 6.7, 6.8, 6.9, 6.10
Untested (this just means I haven’t gotten around to testing):
RedHat Enterprise Linux: 6.0, 6.1, 6.2, 6.3, 6.4
The Tips
On the production virtual machine, the one running in VMware that you are planning to failover or move to Azure, you will want to do the following steps.
Modify Grub Options
These steps will enable a serial console so if something goes wrong you can leverage the Microsoft Serial Console for troubleshooting. In my opinion, you should NOT skip this step.
User VI or nano to edit /boot/grub/grub.conf. Look for the line that starts with “kernel” under your default Kernel boot option… see screenshot below
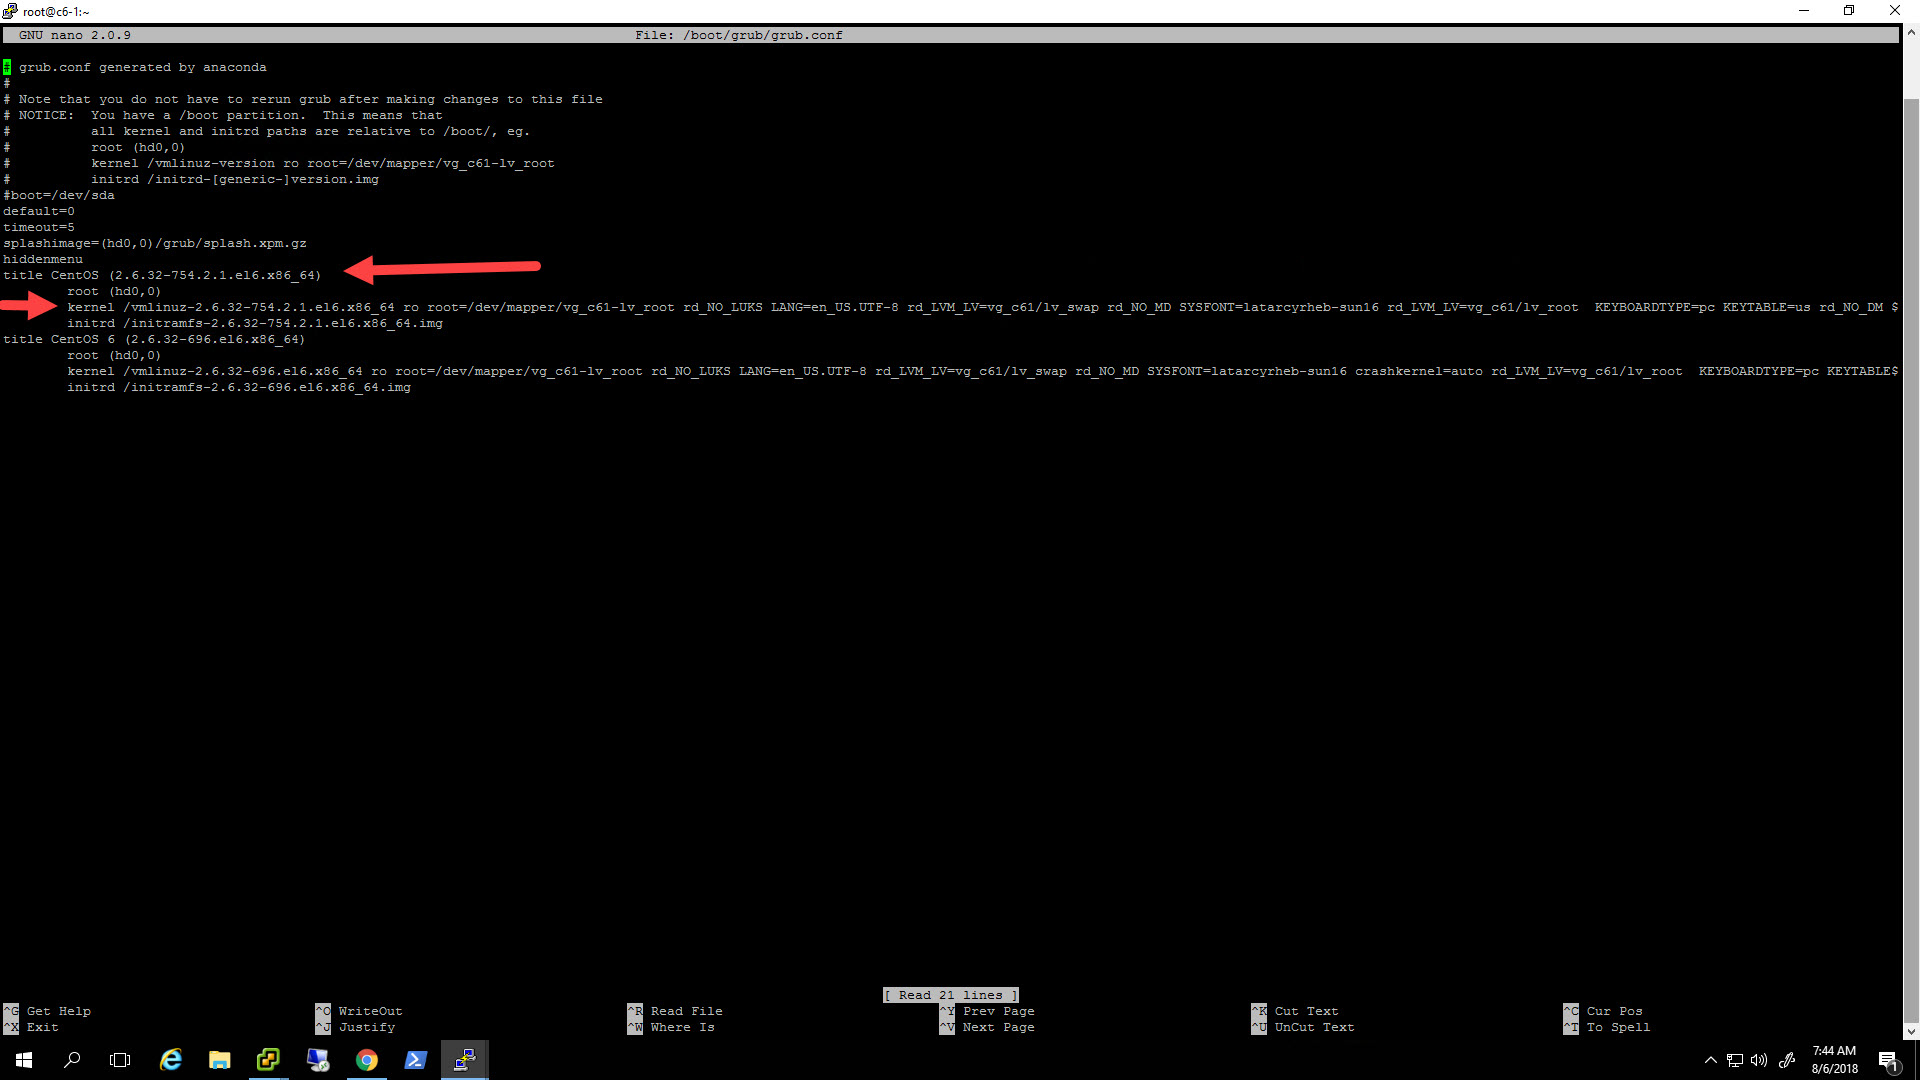
Remove the following options
rhgb quiet crashkernel=autoThese options told grub to use the graphical bootloader and to use verbose kernel output to the console. Microsoft says they are not used for public cloud VMs. Crashkernel consumes about 128MB of ram, it can be left according to Microsoft, but they recommend removing it to save RAM.
Now add these options
rootdelay=300 console=ttyS0 console=tty0 earlyprintk=ttyS0These options tell grub to wait for 300 seconds for the root volume and turns on both the local console and serial console for boot output messages.
Save and exit your text editor.
Configure agetty serial console
The configuration above will enable all of the kernel boot debug to go to the serial console. If you want an interactive login prompt to also be on the serial console after boot up, you need to do this step too.
Use a text editor to create a file at /etc/init/ttyS0.conf
Then paste in the following text
#This service maintains a agetty on ttyS0. stop on runlevel [S016] start on [23]
respawn exec agetty -h -L -w /dev/ttyS0 115200 vt102
Add HyperV drivers to the dracut config
Using your favorite text editor, edit /etc/dracut.conf
Paste the following line into the file. (Make sure to leave the spaces before and after the driver names)
add_drivers+=" hv_vmbus hv_netvsc hv_storvsc nvme ena xen_blkfront xen_netfront mptbase mptscsih mptspi "Next, update your initramfs by running the following command.
dracut --force -vIf possible, it is a good idea to reboot the machine to make sure everything is working ok.
Check to see if Hyper-V modules are loaded
If you can reboot the VM after running all the commands above, you should check to see if the Hyper-V modules have been loaded.
lsinitrd | grep hvYou should see something like the following:

If those commands worked you should be good to go for failover or migration. I recommend performing a test failover into Azure just to double check, and I would also recommend running a test failover after each kernel upgrade just to make sure all is still working well.
Add persistent rule for Azure Nics
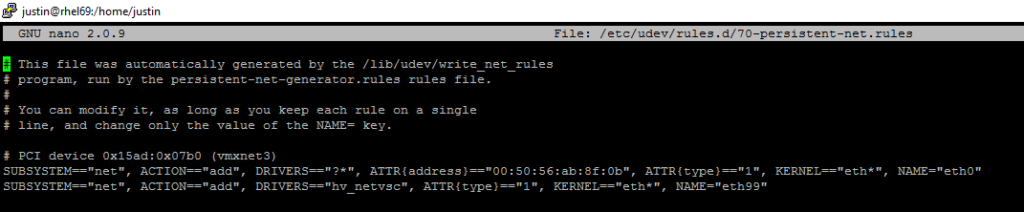
Next edit /etc/udev/rules.d/70-persistent-net.rules
We want to add a new line that will map the network card using the HyperV driver to an unused “eth” name. I will use eth99, but you can use whatever you would like as long as its not already used.
Add this line at the bottom of the file:
SUBSYSTEM=="net", ACTION=="add", DRIVERS=="hv_netvsc", ATTR{type}=="1", KERNEL=="eth*", NAME="eth99"(If you are using nano, I recommend just copying the line that is already in this file for eth0, and then modifying it to look like the line above. Doing it that way will eliminate Copy/Paste errors of Windows text to Linux text.)
What it should look like now (assuming you only had one rule to start):
Now we can create an ifcfg-eth99 file and set it up for DHCP.
NOTE: If you want to be able to automatically fail back from Azure, and have the VMware NIC reattach to your original eth0 configuration you need to also edit the top line. You need to remove the ‘ATTR(address)==”YOUR:MAC:ADDRESS”, ‘
This will allow non-Azure nics to be eth0.
Creating an ifcfg-eth file for the Azure nic
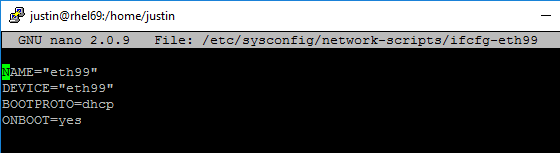
Create a new file at /etc/sysconfig/network-scripts/ifcfg-eth99
Then add the following to the file:
NAME="eth99"
DEVICE="eth99"
BOOTPROTO=dhcp
ONBOOT=yes
Make sure that the ” ” marks look like the file below. If they do not, manually type them. Sometimes Copy/Paste from a browser does funny things to text in LINUX.
It should look like this:
Note: If you want to automatically fail back from Azure and have the VMware NIC reattach to eth0, you will need to edit /etc/sysconfig/network-scripts/ifcfg-eth0 as well.
Find the line that starts with “HWADDR=” and remove the entire line.
Enable ssh if it isn’t already
In Azure you only have access to a serial console and via the network. So if you don’t already have the ssh server turned on, I highly recommend doing so.
service sshd startchkconfig sshd onTesting in Azure
Once you have your machine prepped, create a VPG to Azure, and then kick off a test failover.
After the VM is listed in your Virtual Machine inventory click it and go to Boot Diagnostics then the Serial Log tab.
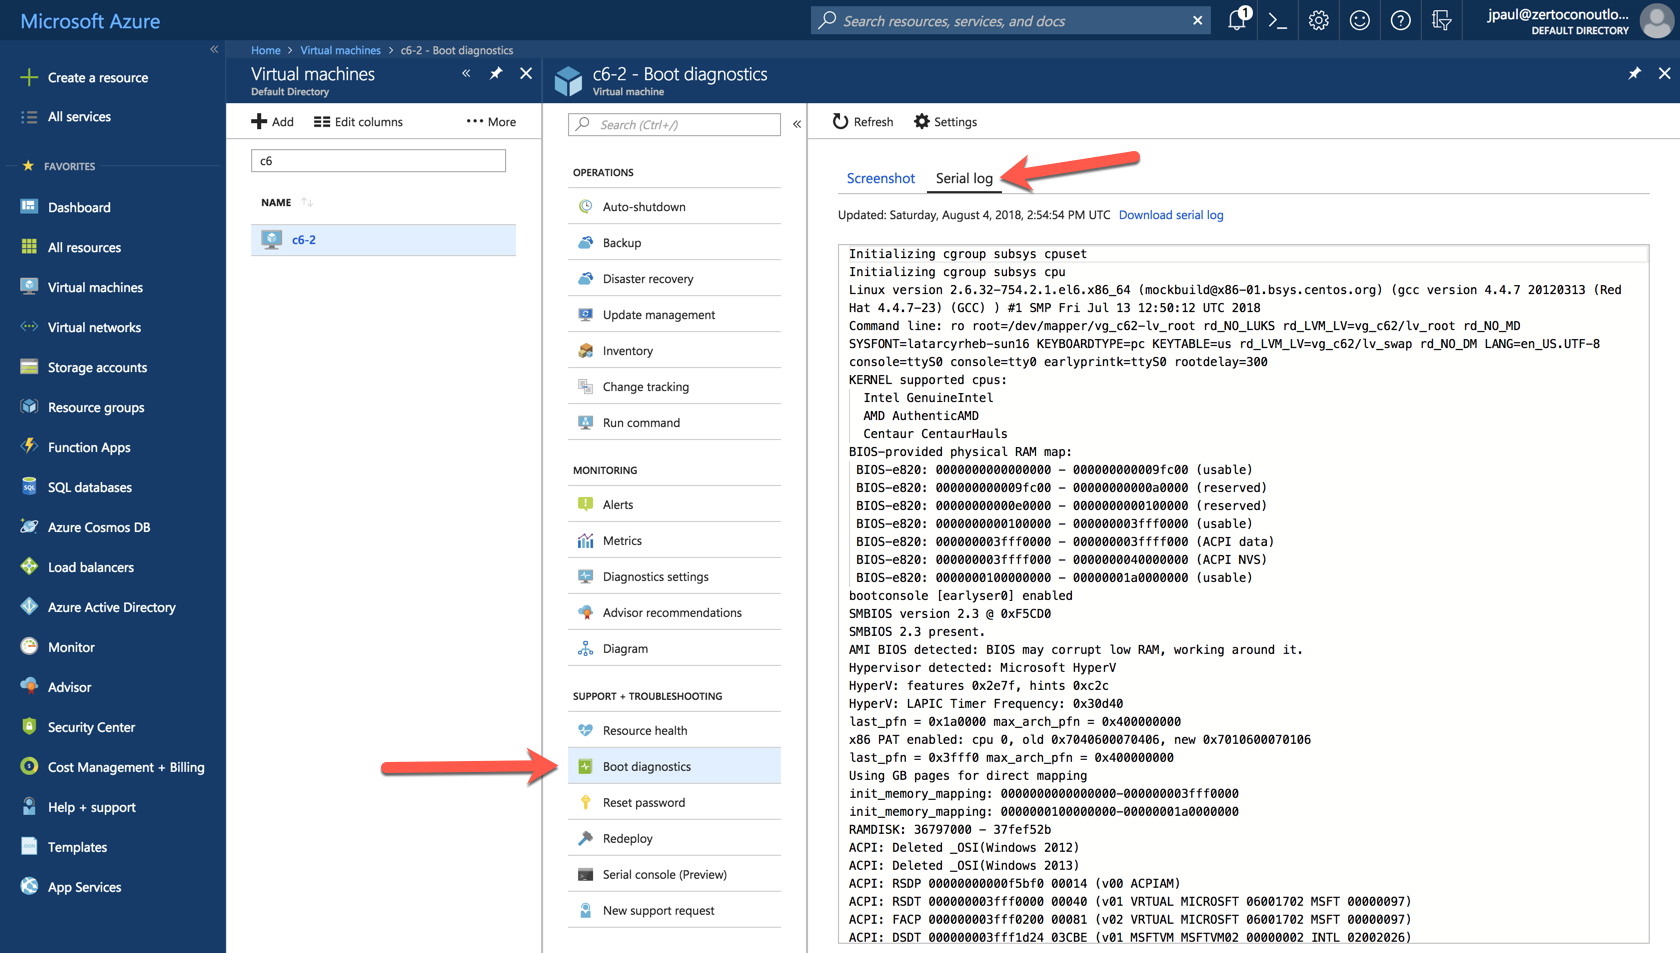
You can scroll through the serial output, and look for any issues.
Assuming routing is set up between where you are and your VM and proper network security rules are configured, you should also now be able to SSH into it or interact with other services that it has running.
Next Steps
You will probably notice that I did not install the WAAgent into the VM, it is technically not needed to get the VM up and running in Azure. Therefore, I believe it can be installed later after you have migrated or failed over. For a Zerto customer who only plans to use Azure while their production site is offline, there may be no reason to install it.
Comments are enabled, and feedback is appreciated. Let me know if your mileage varies.
![]()