With the release of Zerto 9.5u1 comes something pretty exciting for Zerto customers. It’s been something that customers have been asking for – for a long time.
Zerto Virtual Manager Linux Appliance or Linux ZVM for short. It’s been a huge project which started before I rejoined Zerto, but the first version is finally here!
Looking under the hood
I won’t go into all the marketing stuff, we have a whole team that will do that, but under the hood is where all the awesome sauce is.
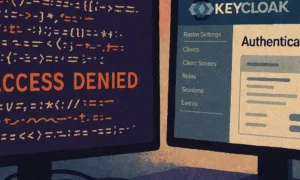
The Windows-based ZVM is distributed as a standard Windows installer that is compiled and contains all of the server code in one massive codebase, developers call it a “monolith”. The Linux-based ZVM is built on “microservices”, this conversion is huge in terms of development, but it sets Zerto up for some really cool things in the future. This also means that ZVM now runs on top of Docker too!
Here is an example of the difference:
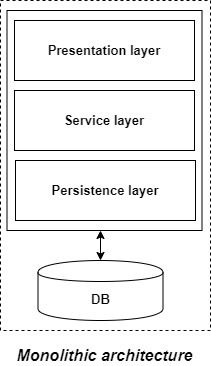

Splitting Zerto functionality into microservices means that the dev team can work on one microservice without having to worry about breaking other microservices (at least in theory).
Most customers will never notice docker, or the microservices that make up ZVM, it will just be the same experience they are used to.
Getting started
If you aren’t a Linux guru, don’t worry! Getting started is as easy as downloading some OVF files and deploying them to your VMware cluster, just like any other OVF-based appliance.
But wait, what about configuration or troubleshooting?
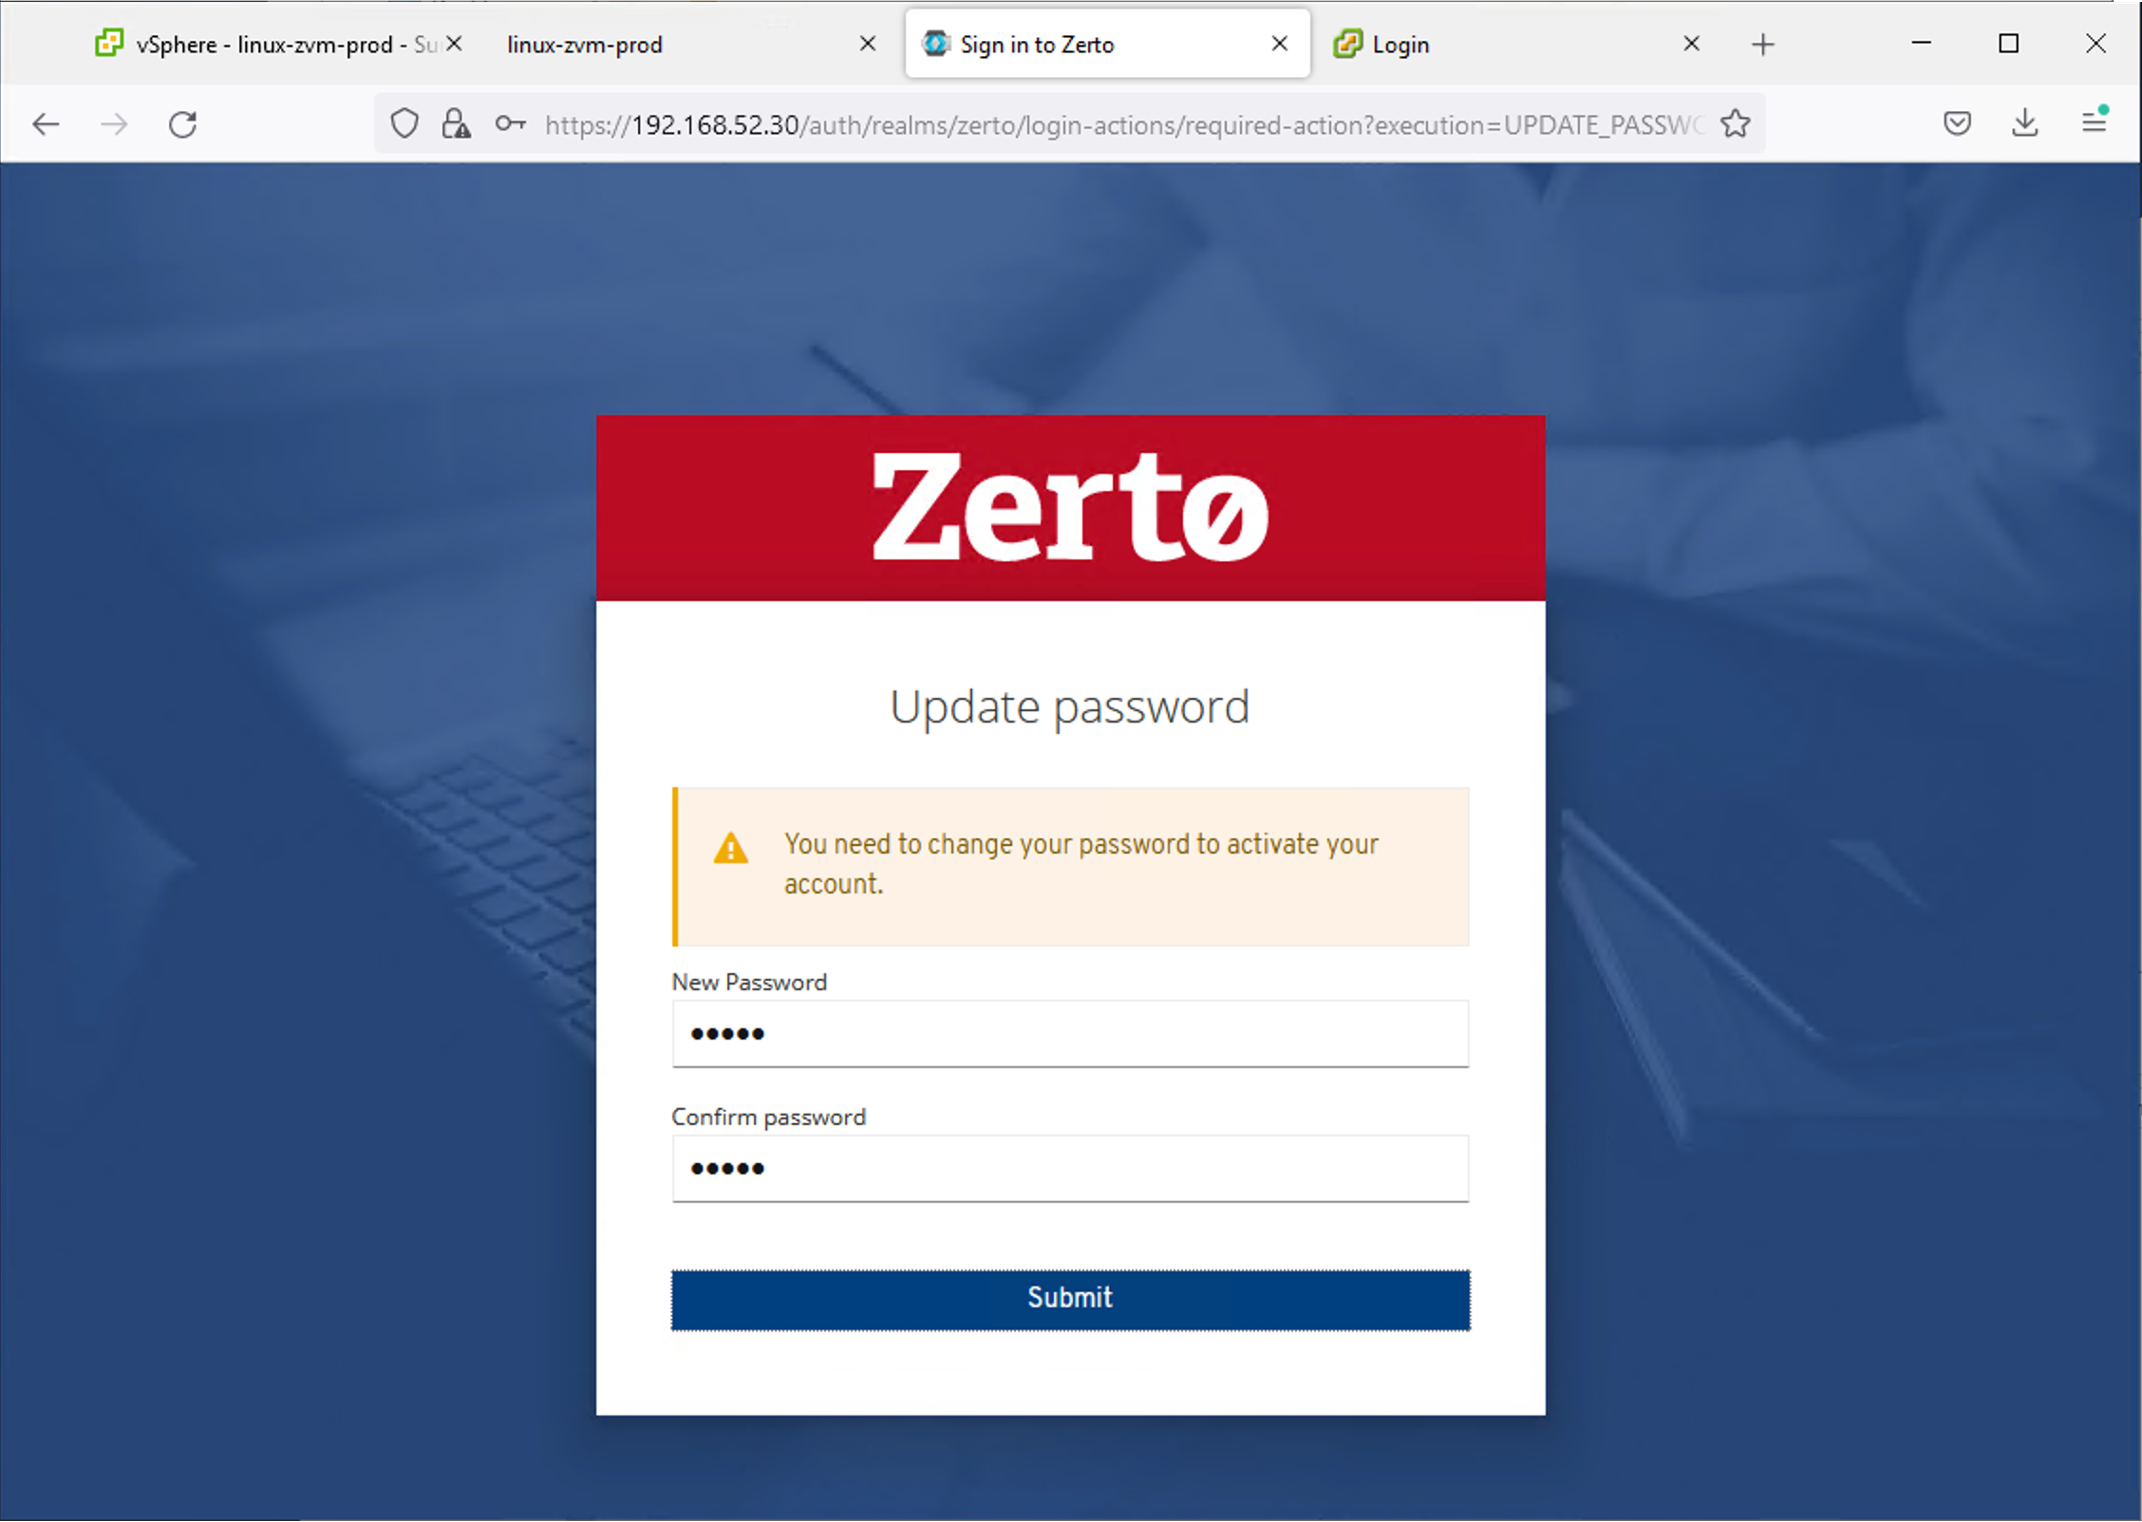
Windows ZVM machines came with a diagnostics tool and a log collection tool that you ran from the desktop of the ZVM. Obviously, we don’t want to run a Linux Desktop! So how will this work!? (I’m glad you asked!)
The new Linux ZVM comes with several new web interfaces that you can use to fully control the ZVM. One of which is used for configuration tasks as well as log collection and even tweak management. The other is for managing Keycloak, the new authentication source for Linux ZVM.
Configuration
After deploying the OVF appliance you can open your browser and go to the IP address of the appliance. (you can set a static IP during deployment) You can login with admin for both the username and password.
On that first boot, you are automatically redirected to the new configuration interface where you can enter your vCenter information.
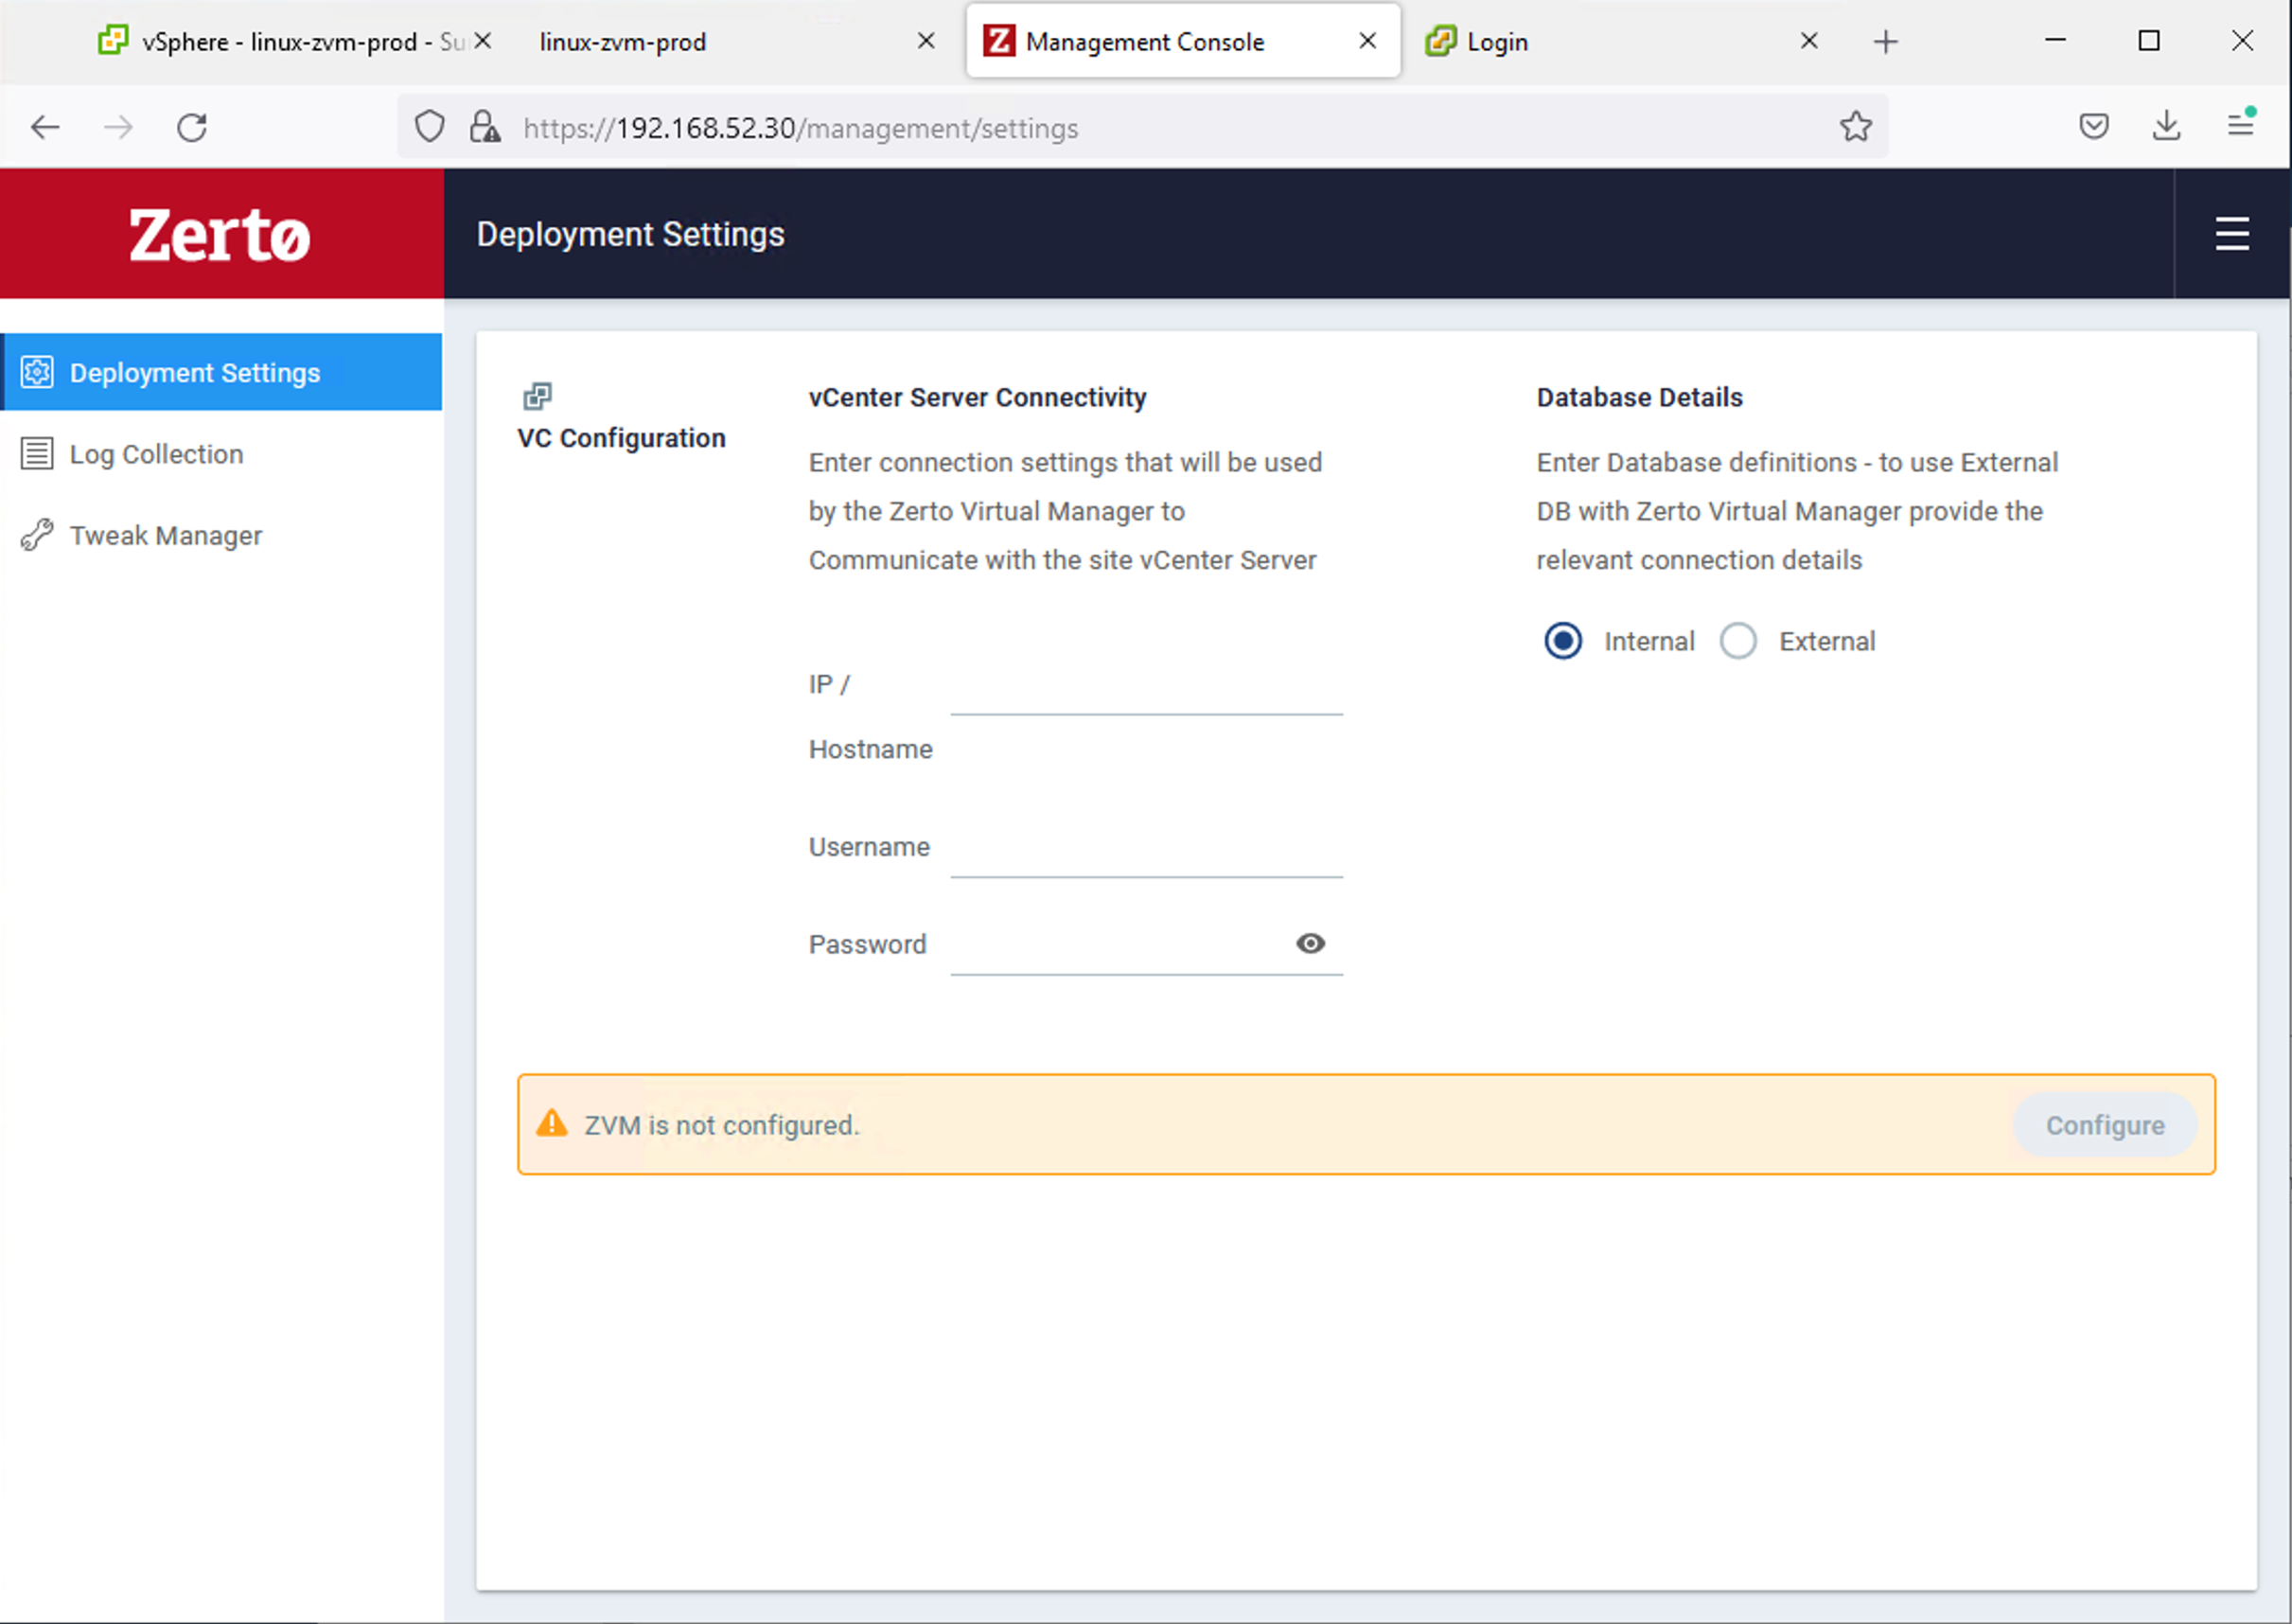
Note: Linux ZVM ships with SQL Express 2019 (in a docker container) so it is much more scalable than previous embedded ZVM databases, so external database use cases are generally fewer.
Once the configuration has finished the bottom ribbon will turn green and you can click the “Launch ZVM” link. This will take you to the Zerto web interface, and the configuration from here is the same as it was on Windows-based ZVMs.
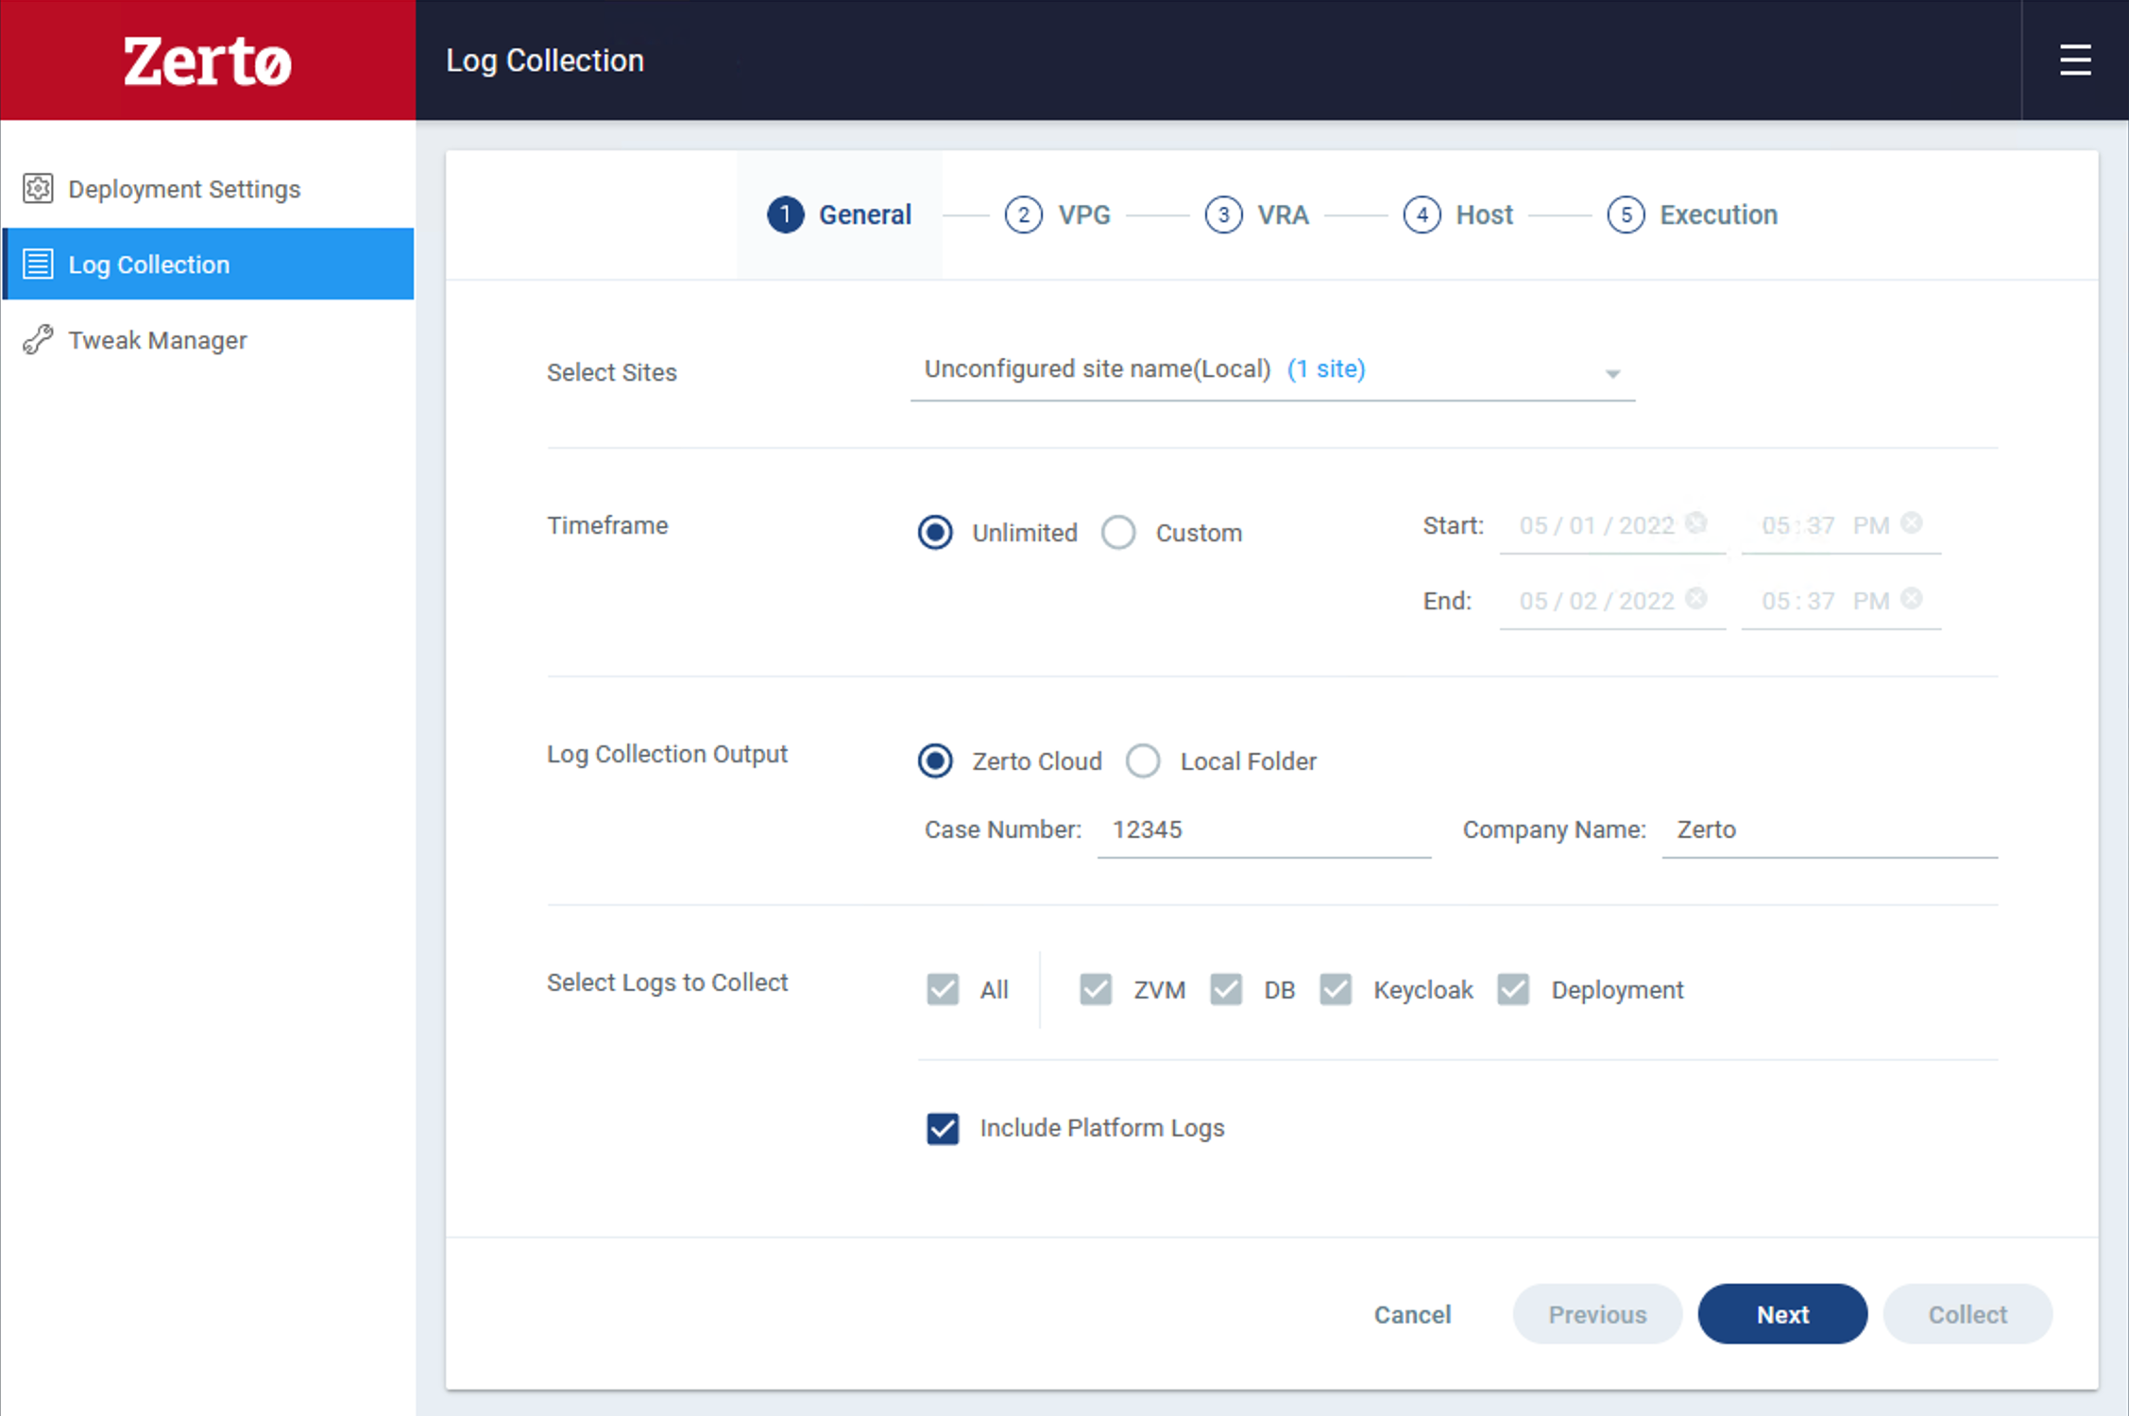
Log Collection
Log collection is also located in the configuration web interface, to start a collection or download a bundle click the Log Collection item in the left menu. If you already have a log collection running you will see a list of bundles that you can download, or if it’s the first time or you need a new bundle there is a simple wizard to gather the required information then click “Collect”.
Tweak Management
In case you need to install a Zerto tweak to change the behavior of some advanced settings, you can now do it right from the Configuration interface. Right below the Log Collection link is the Tweak Manager link.
Note: Only Zerto support should recommend which tweaks to configure.

Tweaks that are already installed are listed in the interface, but you can click “New Tweak” to add more if needed.
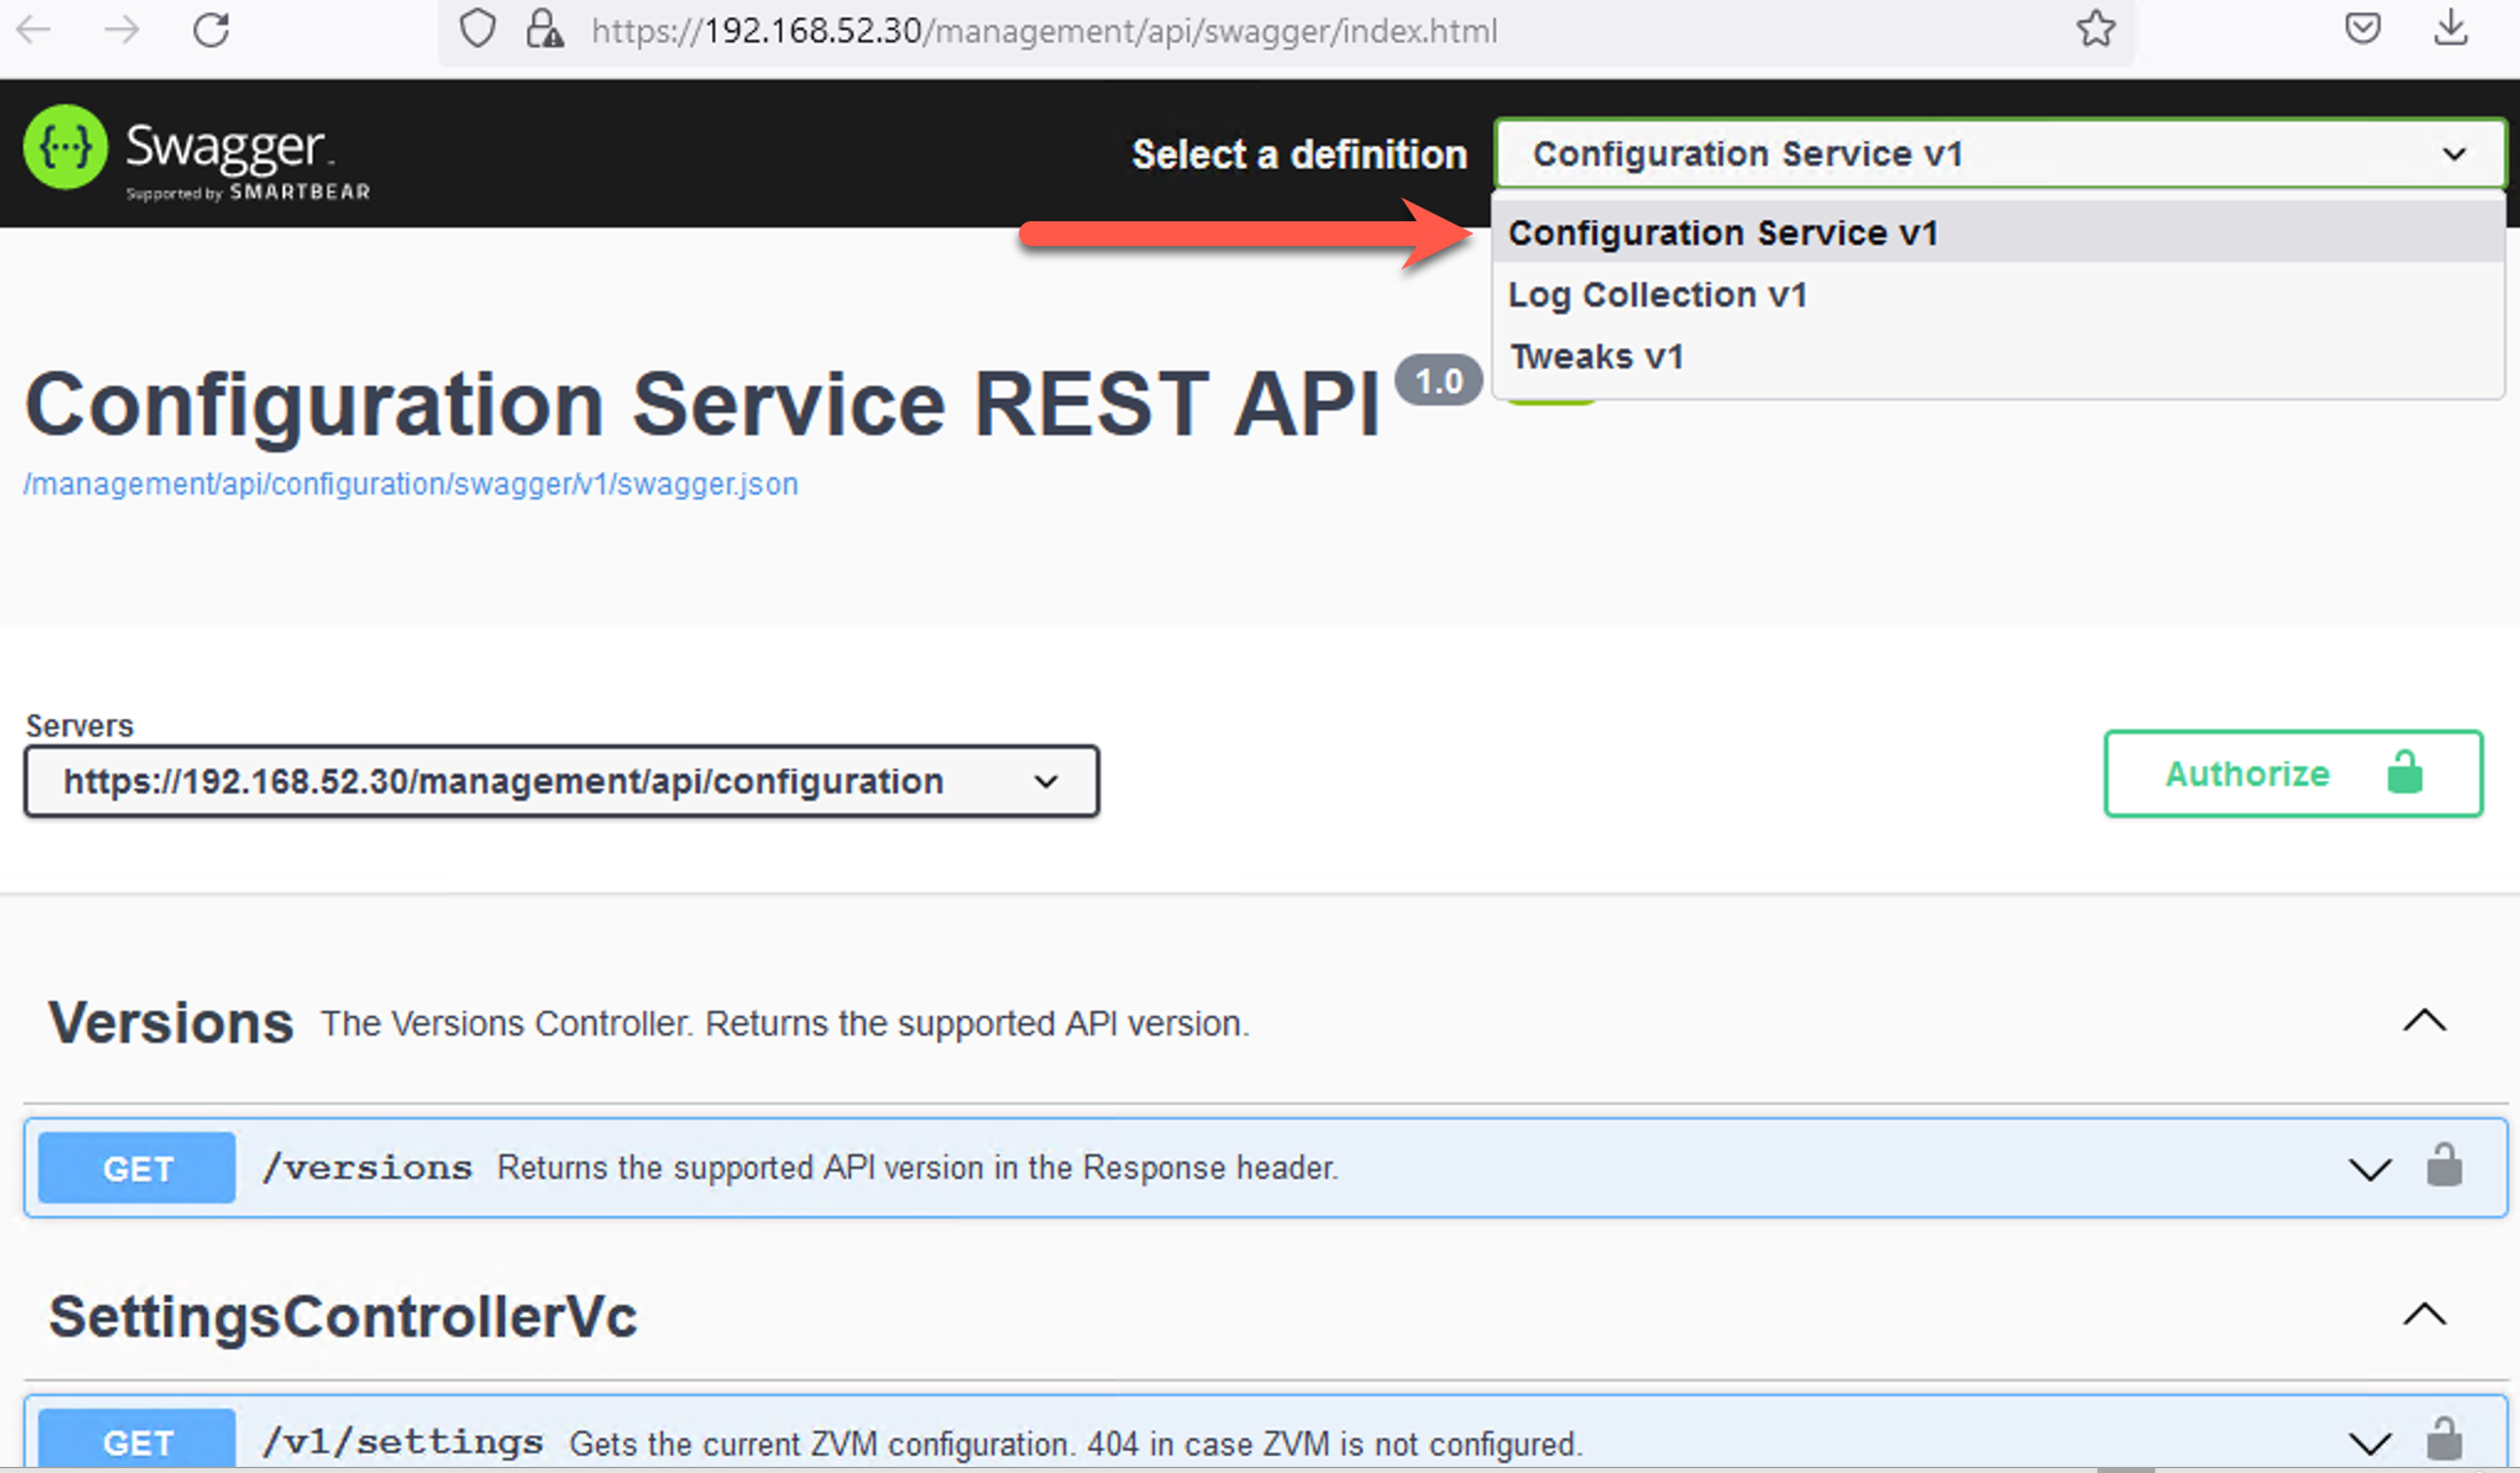
API FIRST
All of these new configuration interfaces are pretty nice, but if you need to deploy a bunch of ZVMs or if you just like to use infrastructure as code tools, you can now do all of your configurations via REST api too!
In the top right corner of the interface click the menu icon and you will find “APIs”.
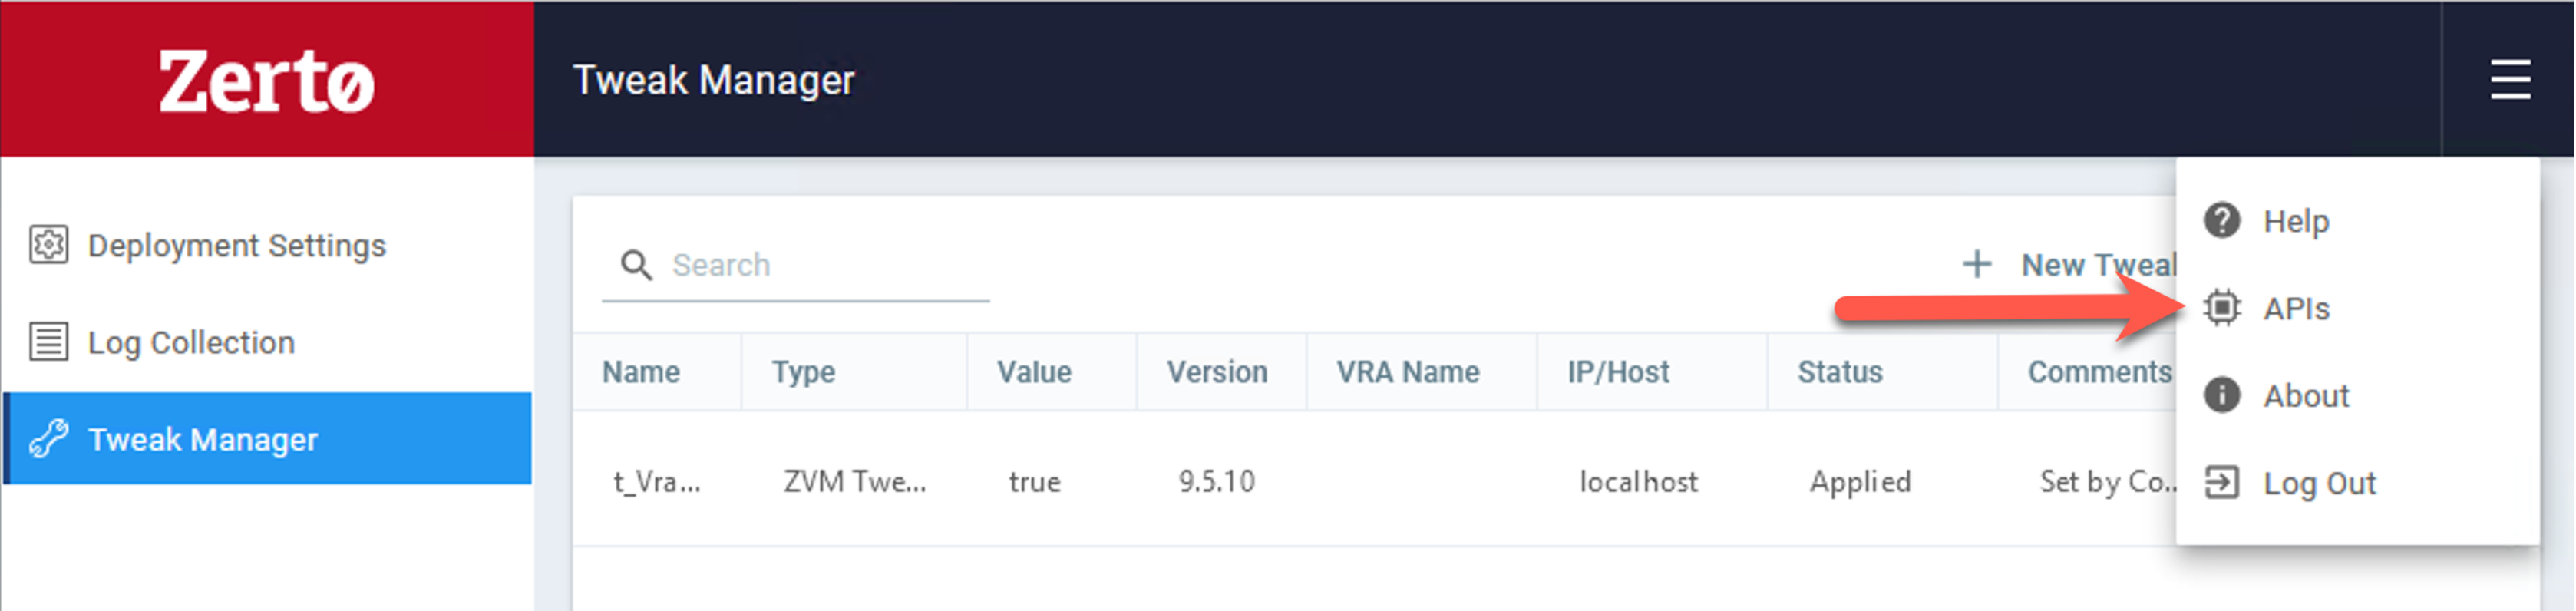
This link will take you to the Swagger interface for deployment configuration, log collection, and tweak management APIs.
But how do I get access to all this?
The main goal of releasing a Linux ZVM is security. Let’s face it, Windows is the most attacked operating system in the world, so moving to Linux just makes sense so that it’s less vulnerable to ransomware and various other attacks.
In addition to securing the OS, customers also wanted better security when accessing Zerto services. Enter Keycloak. Keycloak is an open-source software project that allows single-sign-on and identity access management to applications such as Zerto. It also allows integration with SAML and OpenID-based authentication services, so no longer are you stuck with just Active Directory (through vCenter).
In order to configure Keycloak, you access the web interface at https://yourzvm.host.or.ip/auth/
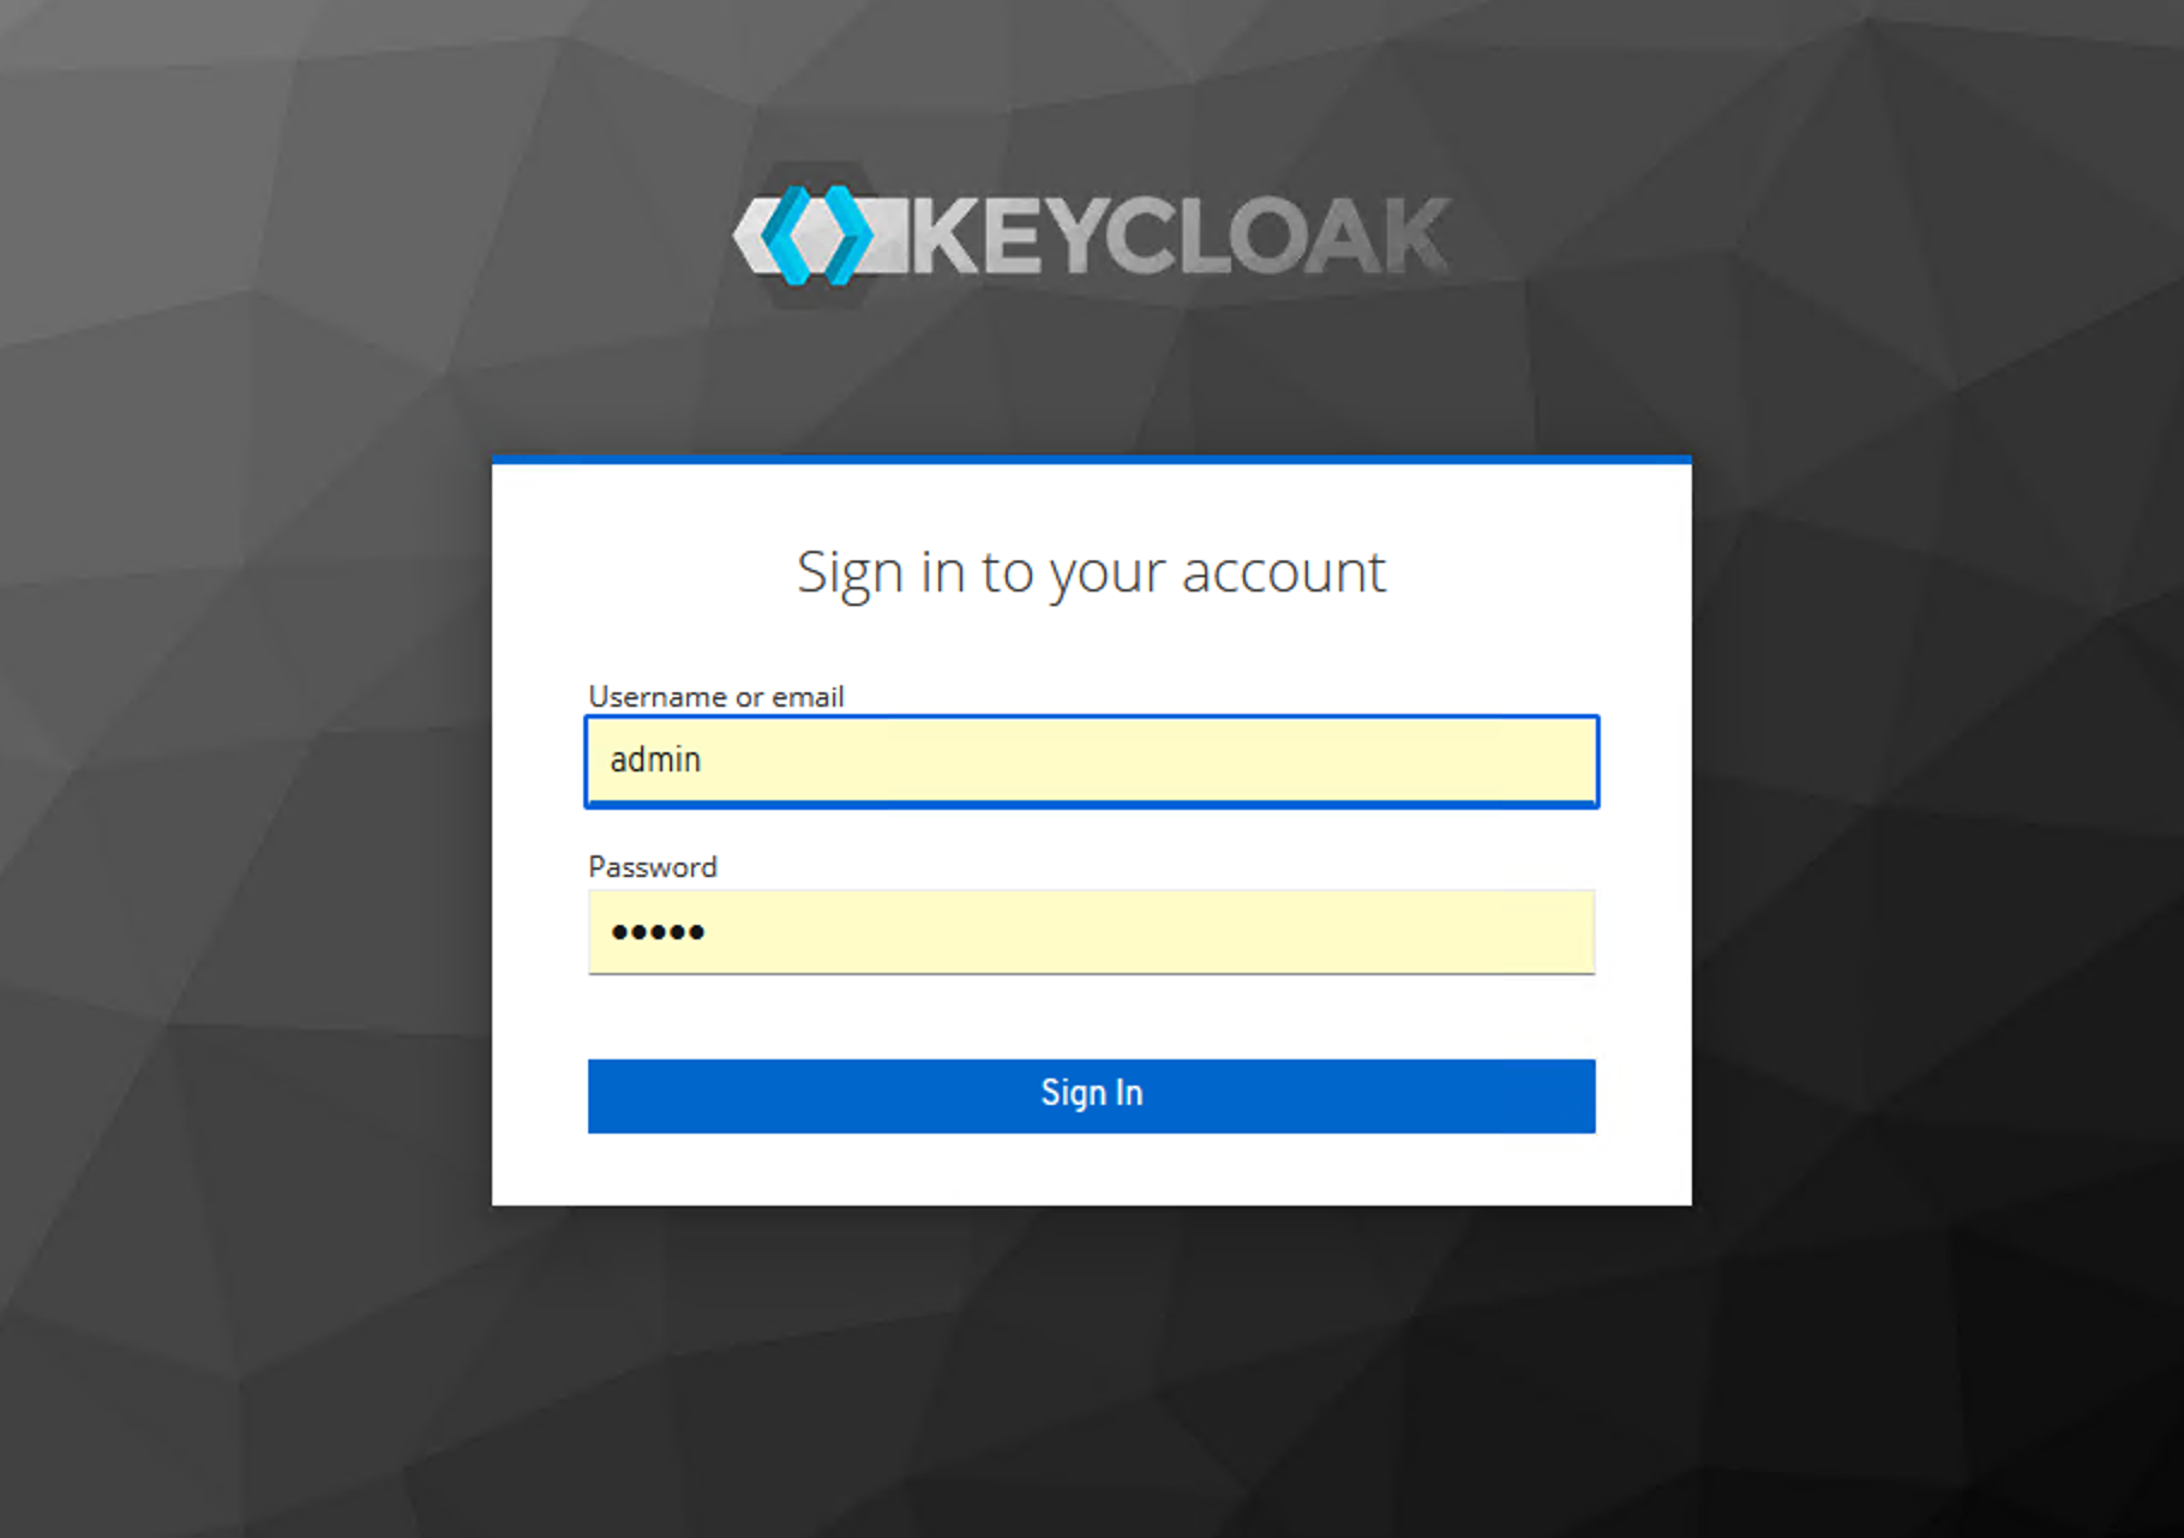
Login with admin/admin and then you are ready to configure new “clients” or configure SAML or OpenID or whatever else Keycloak supports.
Zerto will have some integration guides for the most common use cases, but since Keycloak is an open-source product there are hundreds of ways to configure it.
Day 2 Operations
After you have a Linux ZVM configured and running, your experience day to day will not differ too much from the Windows ZVM. The biggest difference is that there are some limitations (because this is version 1.0 on Linux) for features that haven’t been ported over to Linux, but those will come in time.
Migration from Windows to Linux
In this first release we have not introduced a way to migrate an existing Windows ZVM to this Linux appliance. This is due to the fact that there are still things you can do on the Windows ZVM that you cannot do on Linux. So Migration will come after we reach feature parity with Windows ZVM.
So for now, if you are an existing Zerto customer, keep using your Windows ZVM, but if you have a lab, or if you are standing up some new sites, give the Linux ZVM a try!
Documentation / Getting Started
If you are ready to kick the tires, please check these documentation links first, they will give you all the info you need to be successful.
FAQ – https://help.zerto.com/bundle/Linux.ZVM.HTML/page/Content/AdminVC/ZVM_Linux_FAQs.htm
Prerequisites – https://help.zerto.com/bundle/Linux.ZVM.HTML/page/Content/Intro/Book_in_Portal_-_Prerequisite_for_ZVM_Linux.htm
Deployment Guide – https://help.zerto.com/bundle/Linux.ZVM.HTML/page/Content/AdminVC/ZVM_Linux_Deployment_Guide.htm
Deployment Settings – https://help.zerto.com/bundle/Linux.ZVM.HTML/page/Content/AdminVC/ZVM_Linux_Deployment_Settings.htm
I would LOVE your feedback!
Good or bad, I want to know what you think of this new direction that Zerto is embarking on. My job, as the product manager, is to make sure we point the product in the direction our customers want to go. I cannot do that without feedback.
There are plenty of ways to contact me:
Zerto / HPE email: [email protected]
Personal Email: justin@jpaul-me
Twitter: @recklessop
Or you can leave a feature request in MyZerto
![]()


It’s May 2023 – Do we have a migration tool in Beta yet?
Better than that…. I’ll be approving it for G.A. release yet this month.