This post will help you when converting REST API scripts for Windows ZVM for use with ZVM appliances. Spoiler alert – every script that uses the Windows ZVM REST API will need (some) modifications before it will work with the ZVM Appliance.
NOTICE
I have created an updated article with a much simplier process. You can still follow the process below, but I recommend going to the new article https://www.jpaul.me/2024/08/converting-rest-api-scripts-for-zvm-appliance-v2/
The new method doesnt require all of the Keycloak modifications, and is ready to interact with ZVM out of the box.
What has changed?
The ZVM Appliance, which is replacing the Windows-based ZVM, is a complete overhaul. I won’t cover everything that has changed here, but here are the major changes that affect automation with the REST API.
- New HTTPS port – 443 replaces 9669
- New Authentication Process – Keycloak replaces “session” API
- Login credentials sources – Keycloak replaces vCenter
Why were the changes made?
First, let’s address the port change – ZVM is now deployed as a microservices-based architecture. This means that there are many services running which provide some of the ZVM experience. To make these services all appear as one thing they now run behind a proxy server. This proxy server listens on port 443, and then forwards requests to the appropriate container running behind the scenes.
Next let’s talk about authentication – Windows-based ZVMs had a “session” API. This API allowed us to pass credentials to Zerto, Zerto then checks with vSphere to see if the credentials are valid. If authentication and authorization look good, ZVM will return a token called “x-zerto-session” to the requestor. Then we can include that token with all future API requests.
The ZVM appliance no longer handles authentication or authorization with the session API. Instead, we leverage Keycloak, which has its own APIs and returns a standard JWT (java web token). After we authenticate to Keycloak and receive a JWT, we pass it with future API calls to prove our identity.
So ZVM authentication is sorta the same process, just implemented differently. The BIG advantage of Keycloak is that it is open source, and integrates with 100’s if not 1000’s of other products. This means that you can still federate with Active Directory like before… but now you can also add MFA, and/or SSO!
Creating Keycloak credentials
For scripts that will run all the time, the best thing to do is create a Keycloak client and then use the client_id and client_secret in your script. This is very simple to do, let’s walk through it.
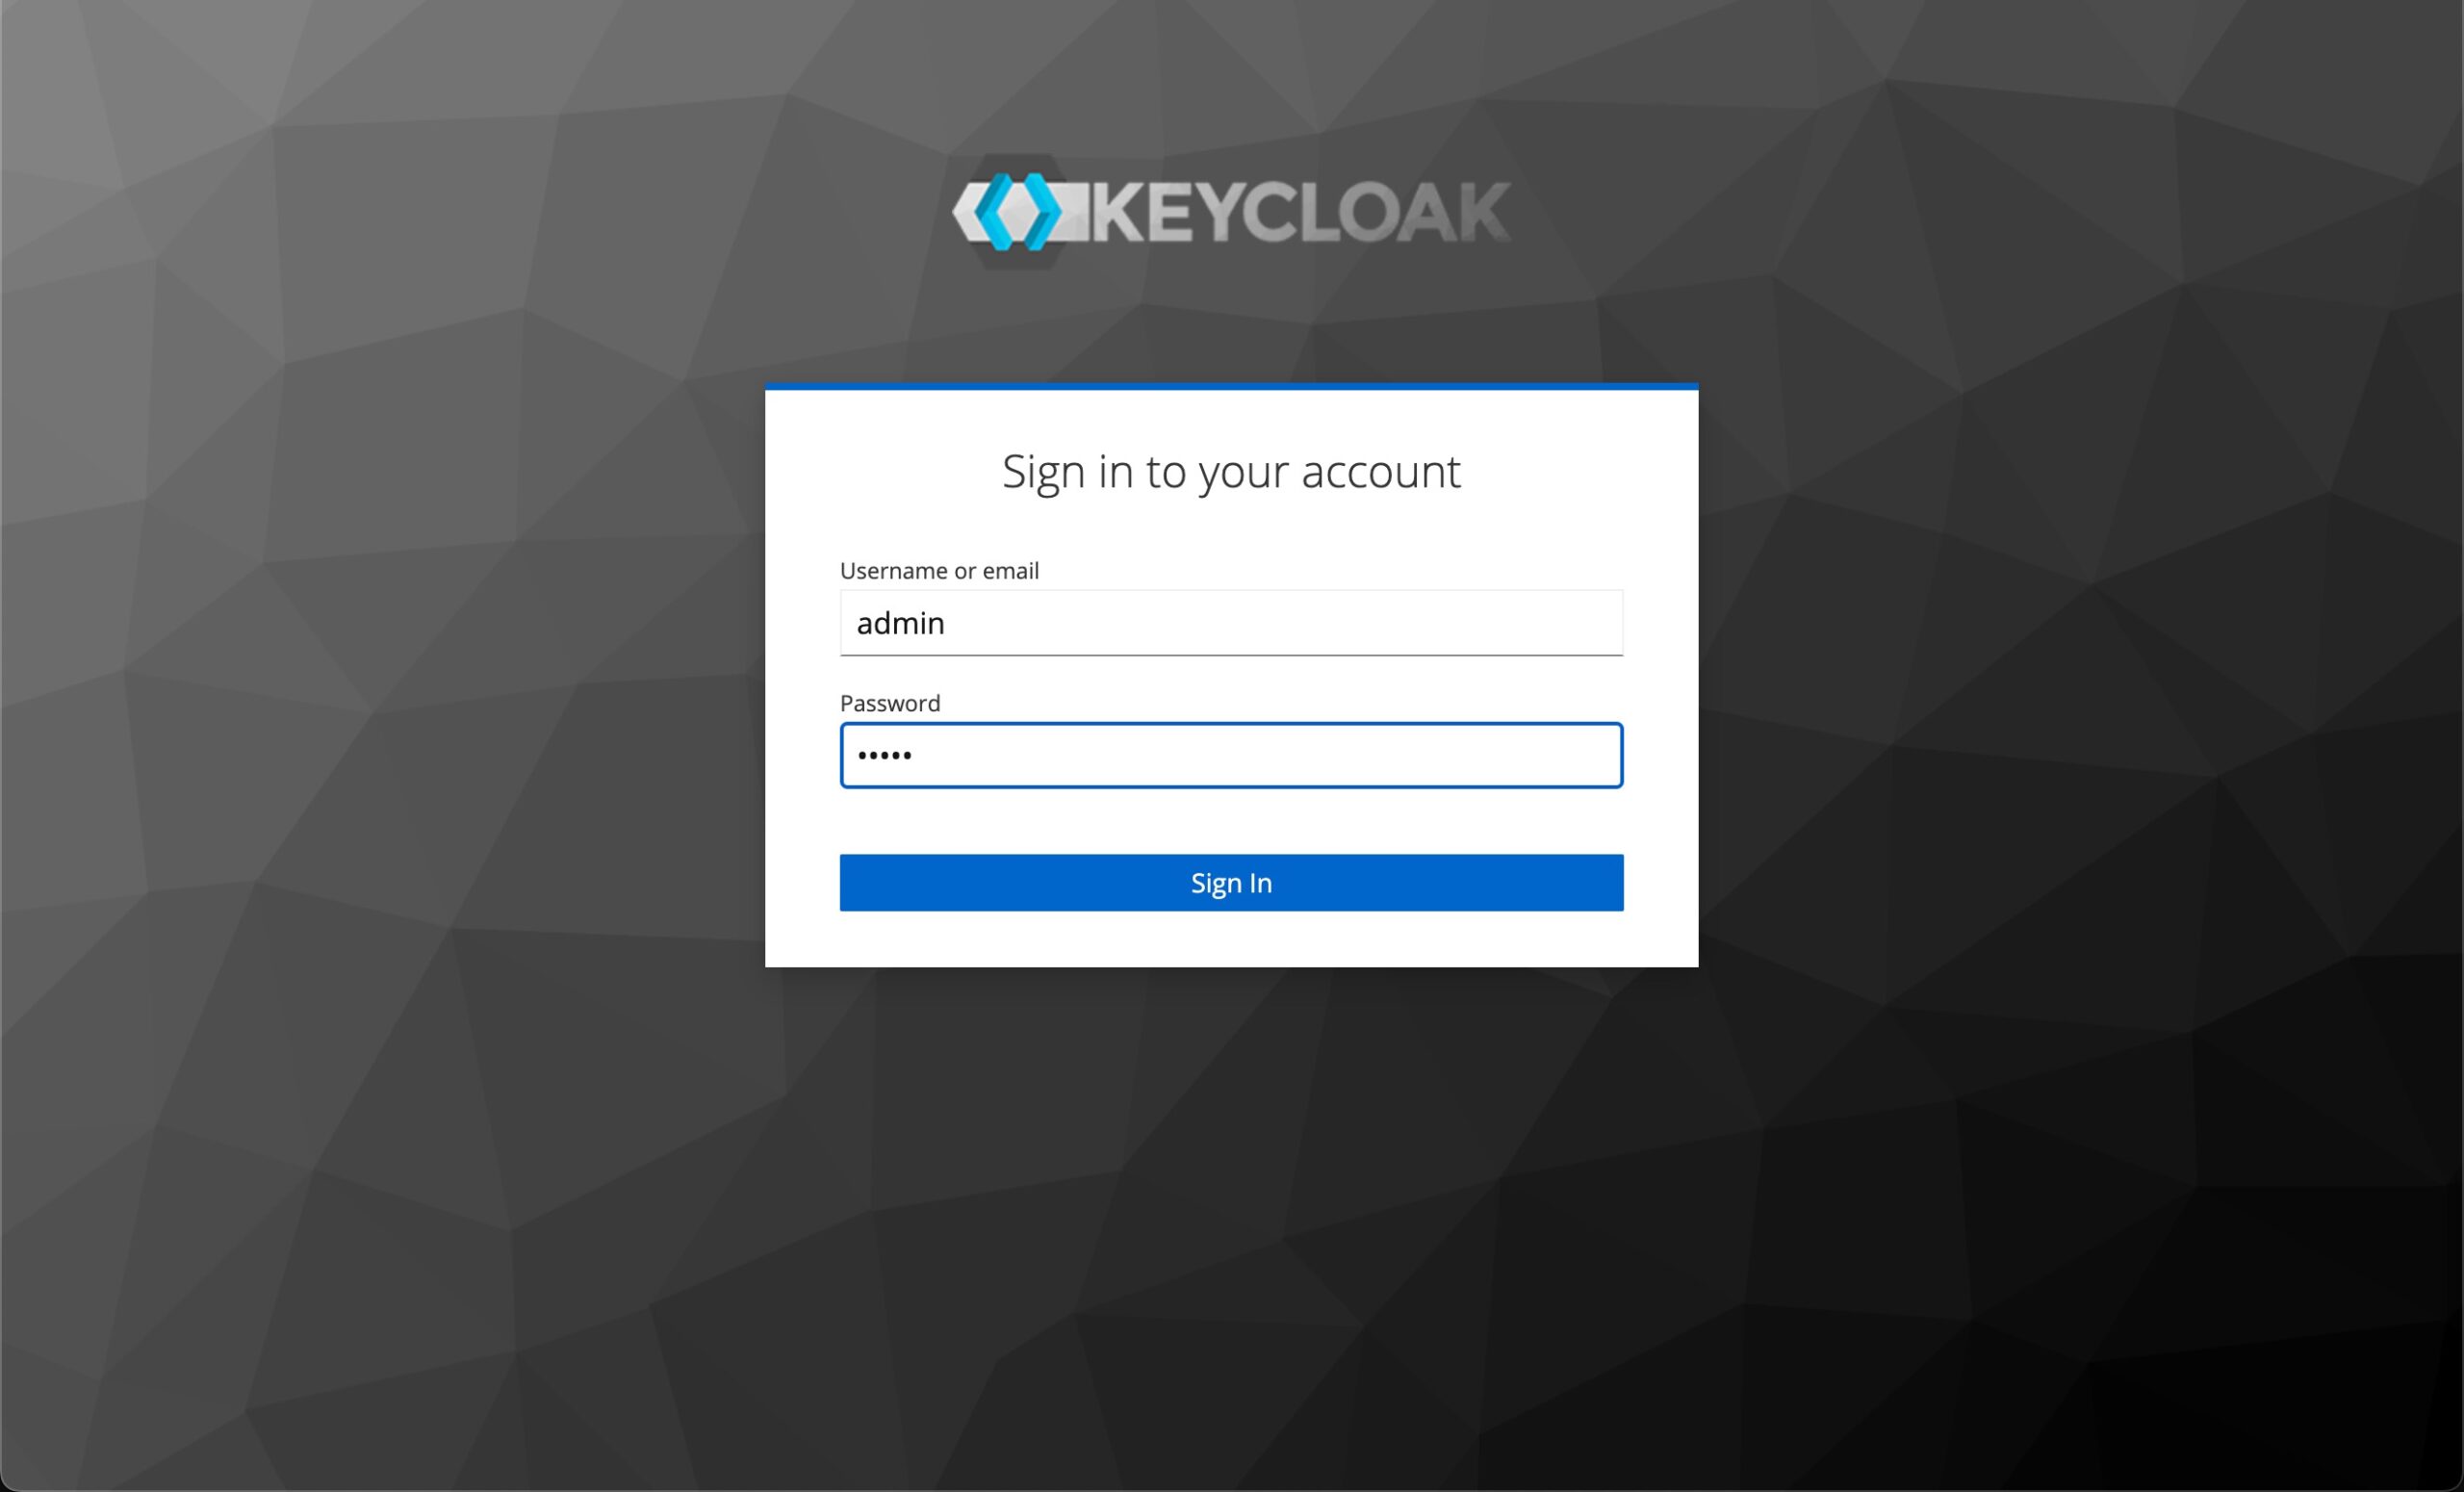
Step 1 – Login to Keycloak
Navigate to https://<zvmipaddress>/auth
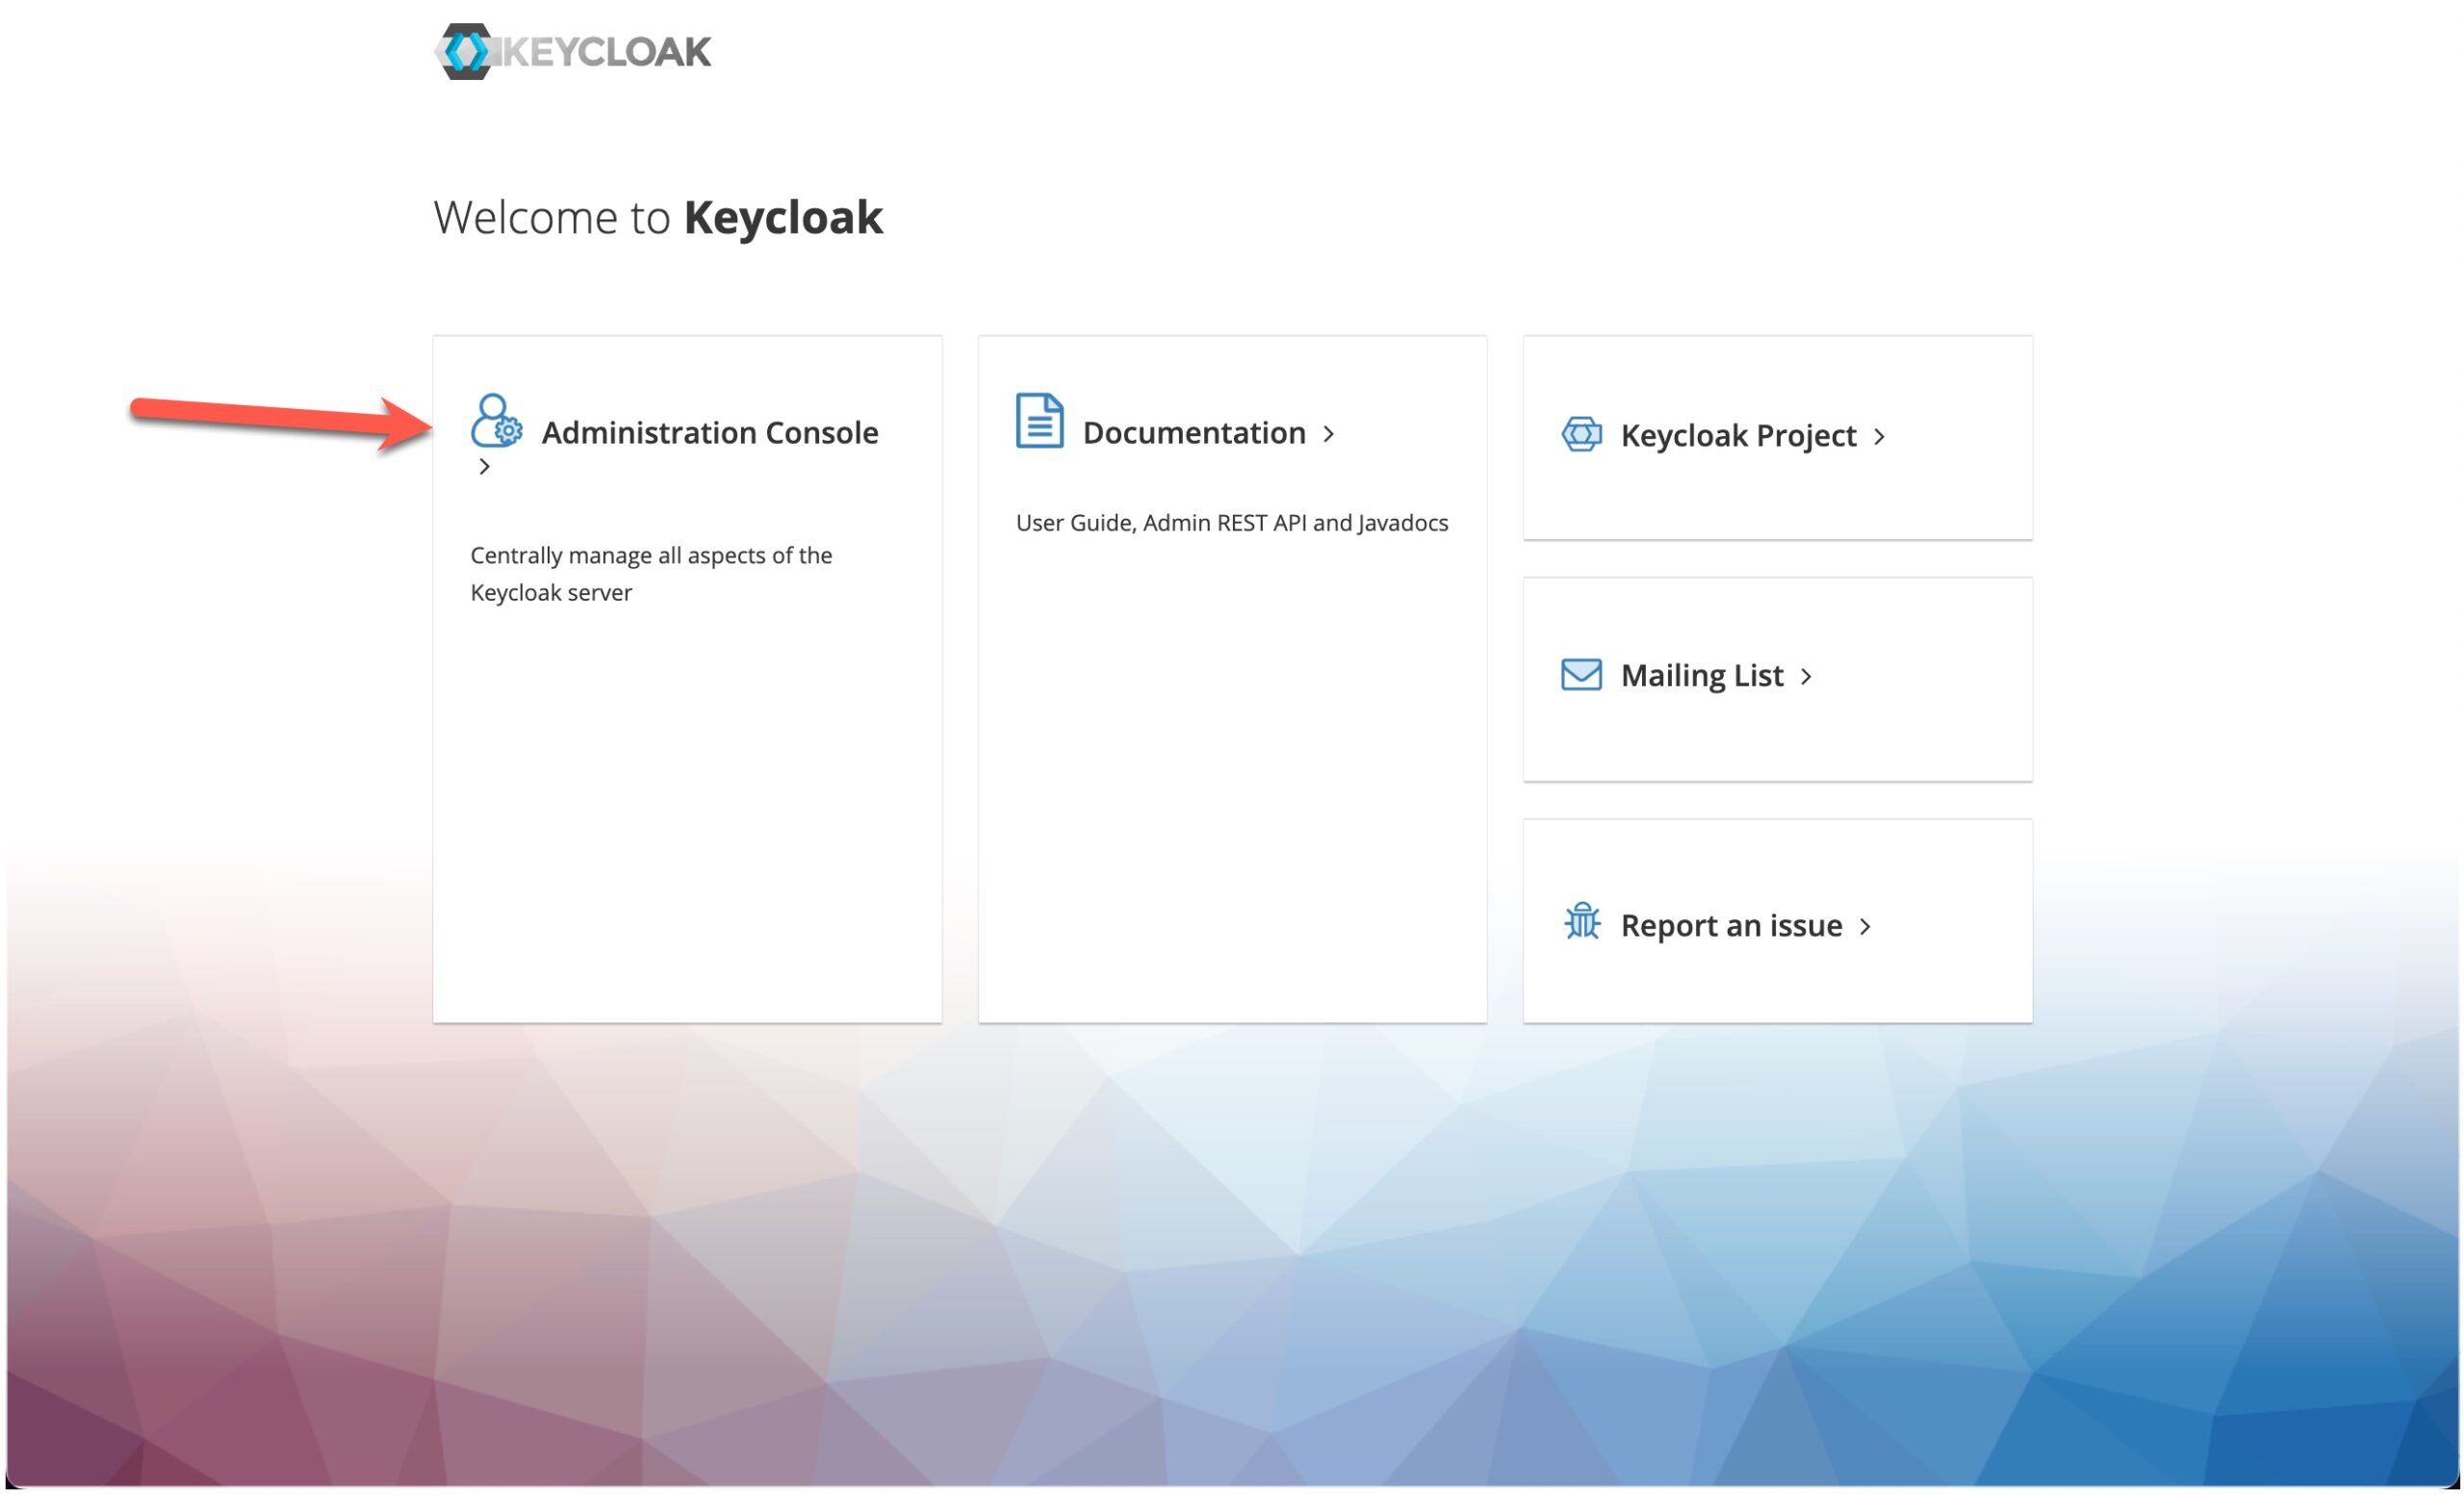
If this is your first time logging in, and you didn’t already change the password, use admin / admin.
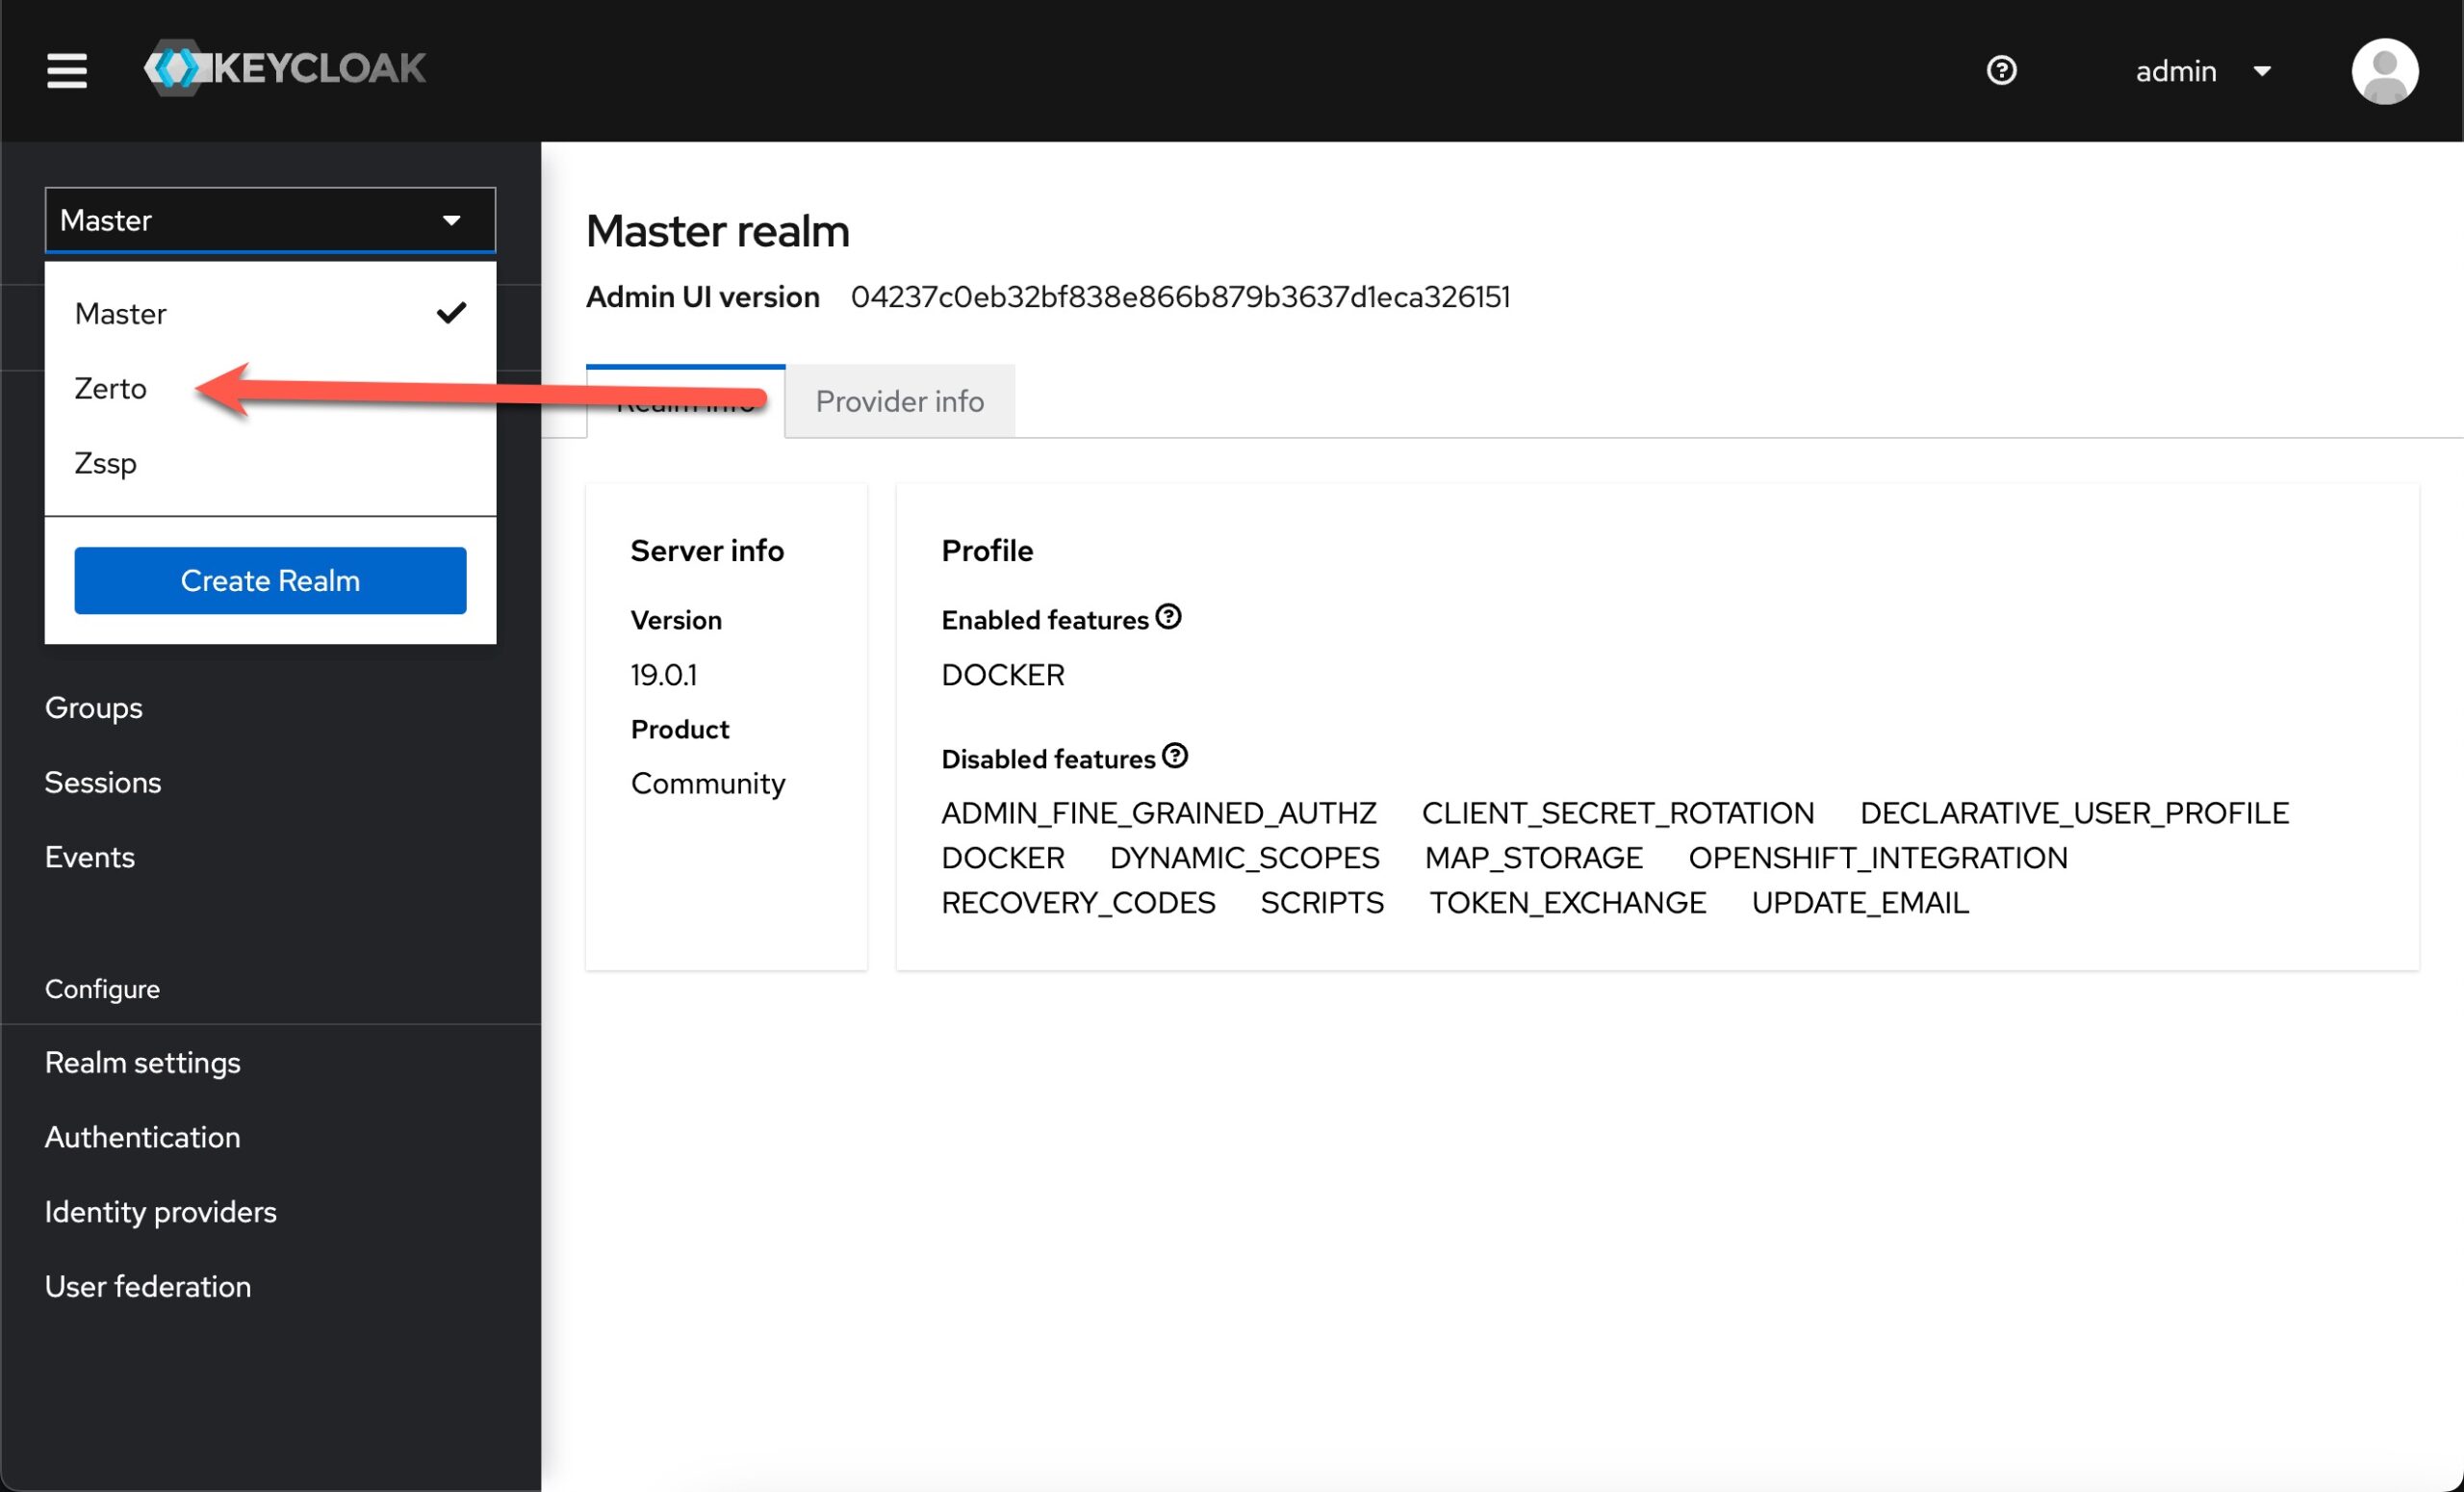
Once logged in you are going to make sure you are in the “Zerto” realm. Keycloak has several realms, but for scripting and web gui authentication everything is configured in the Zerto realm.
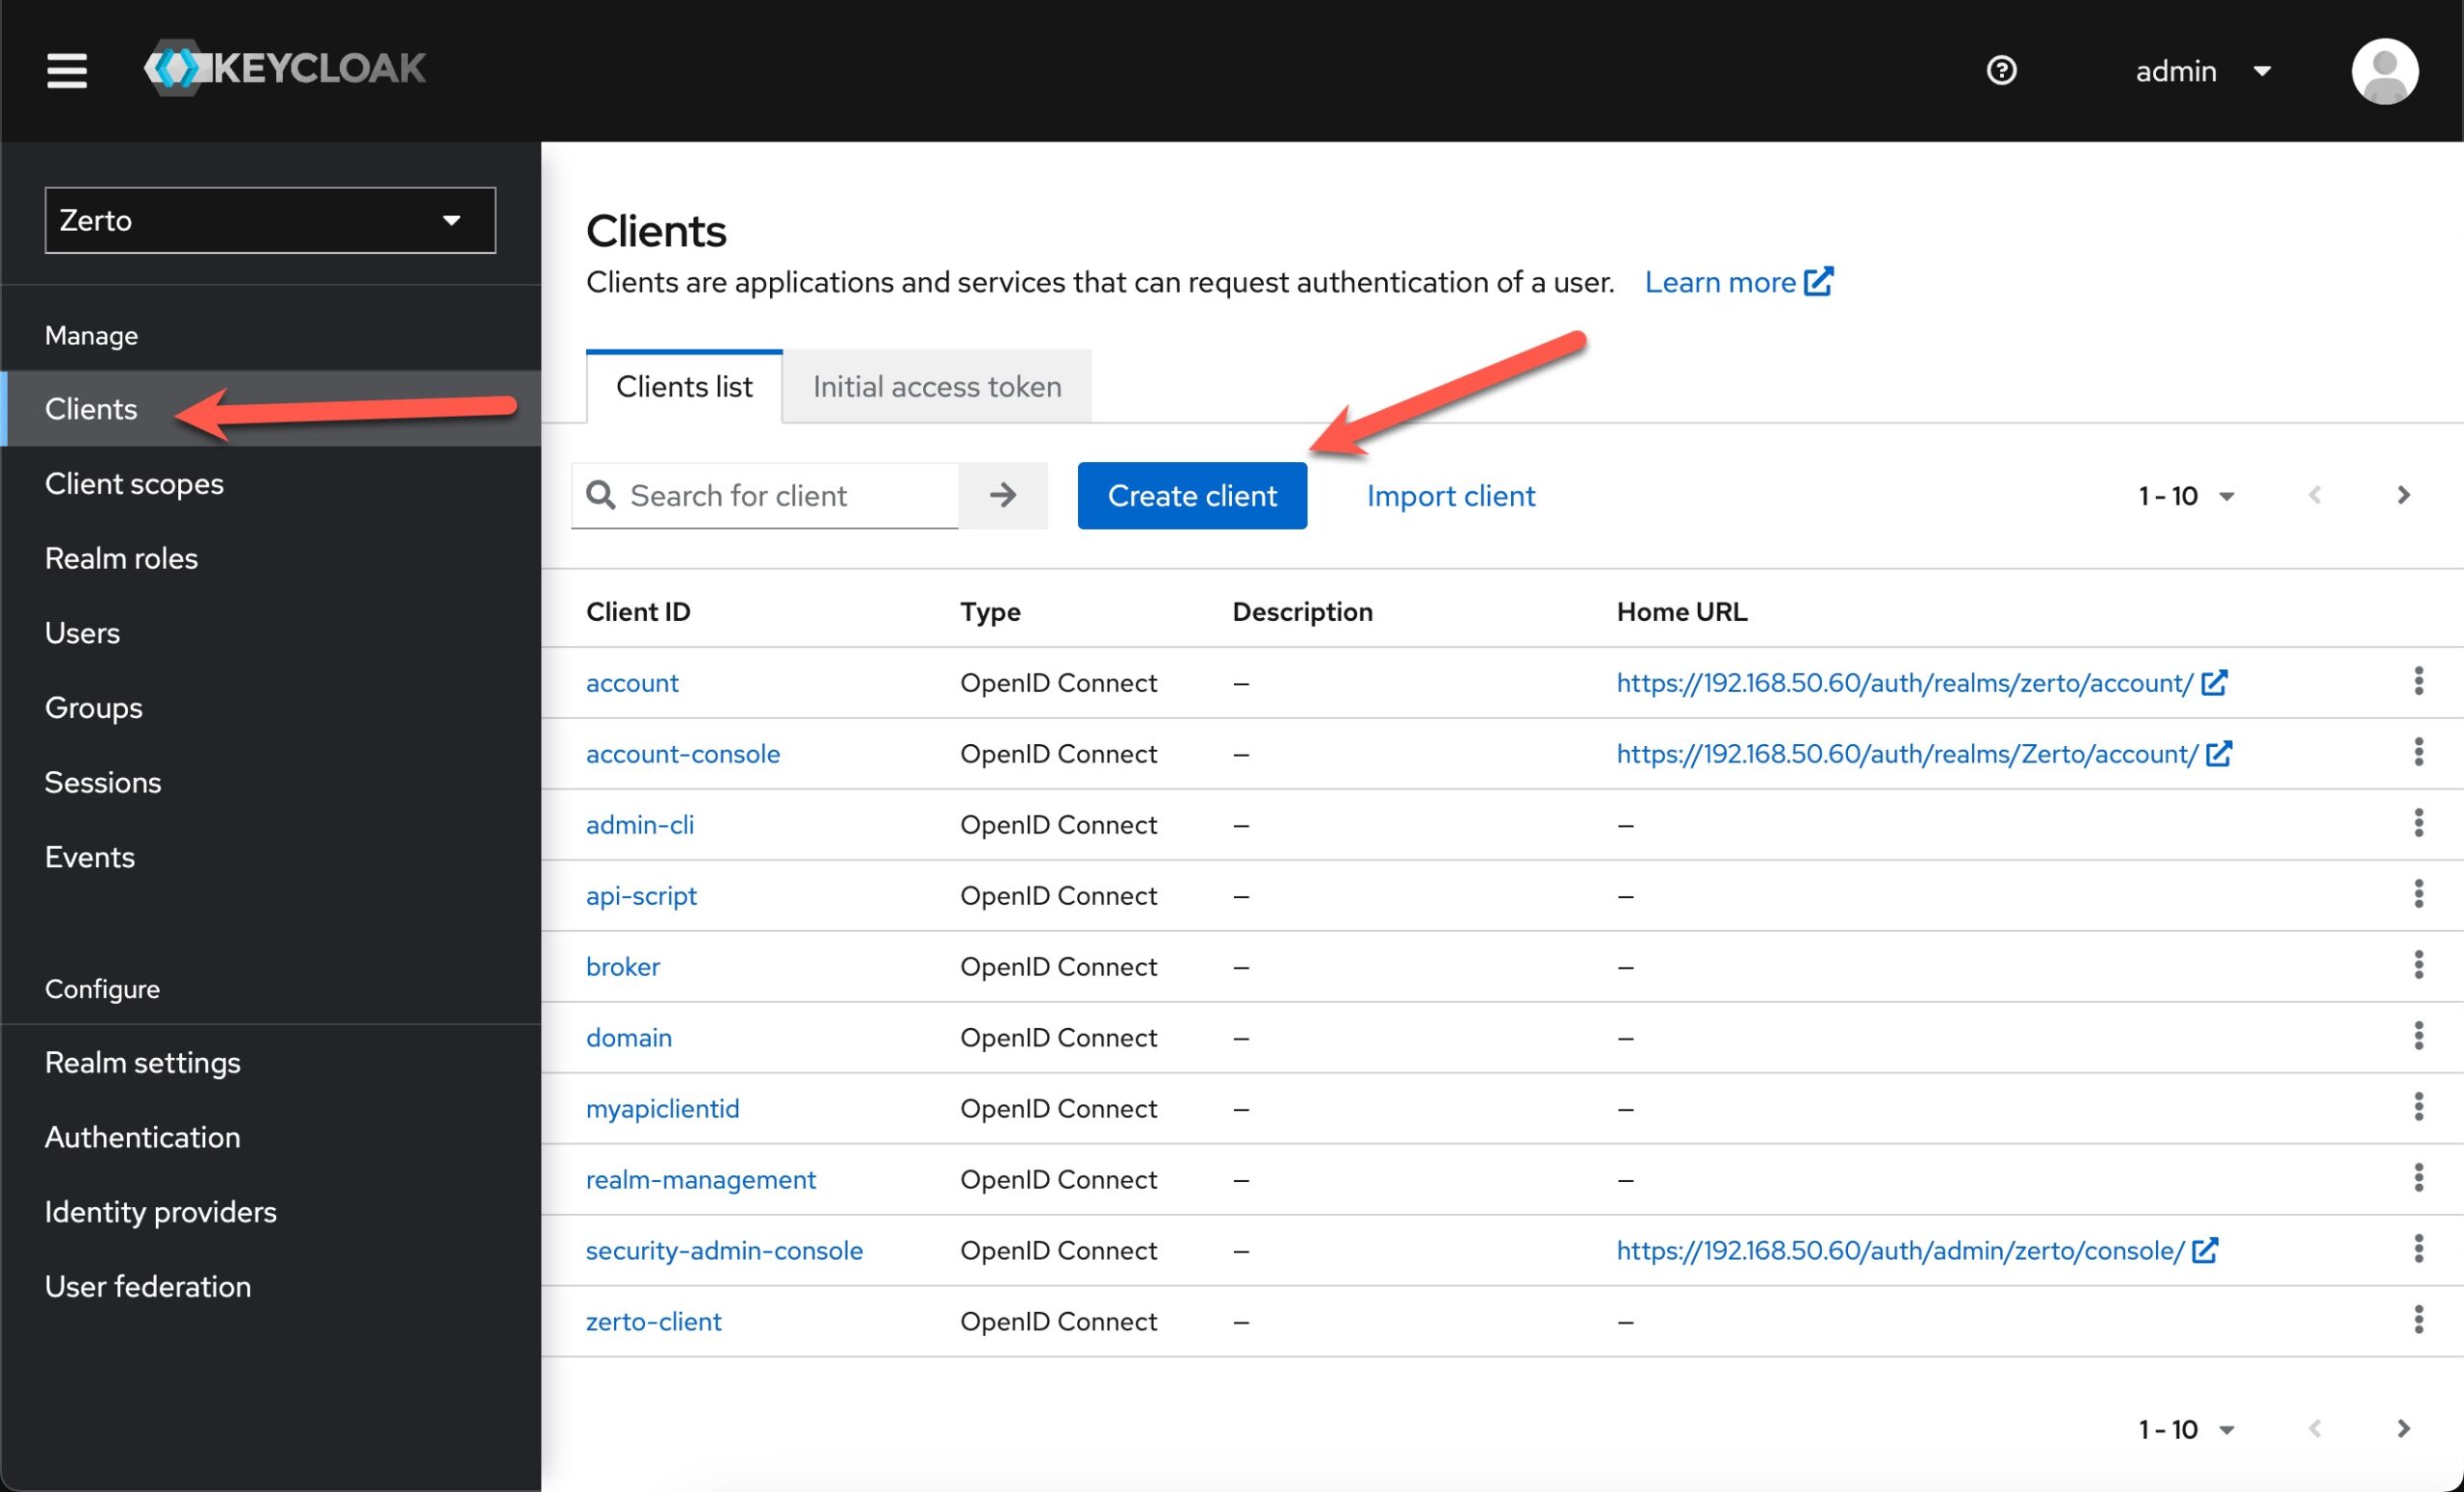
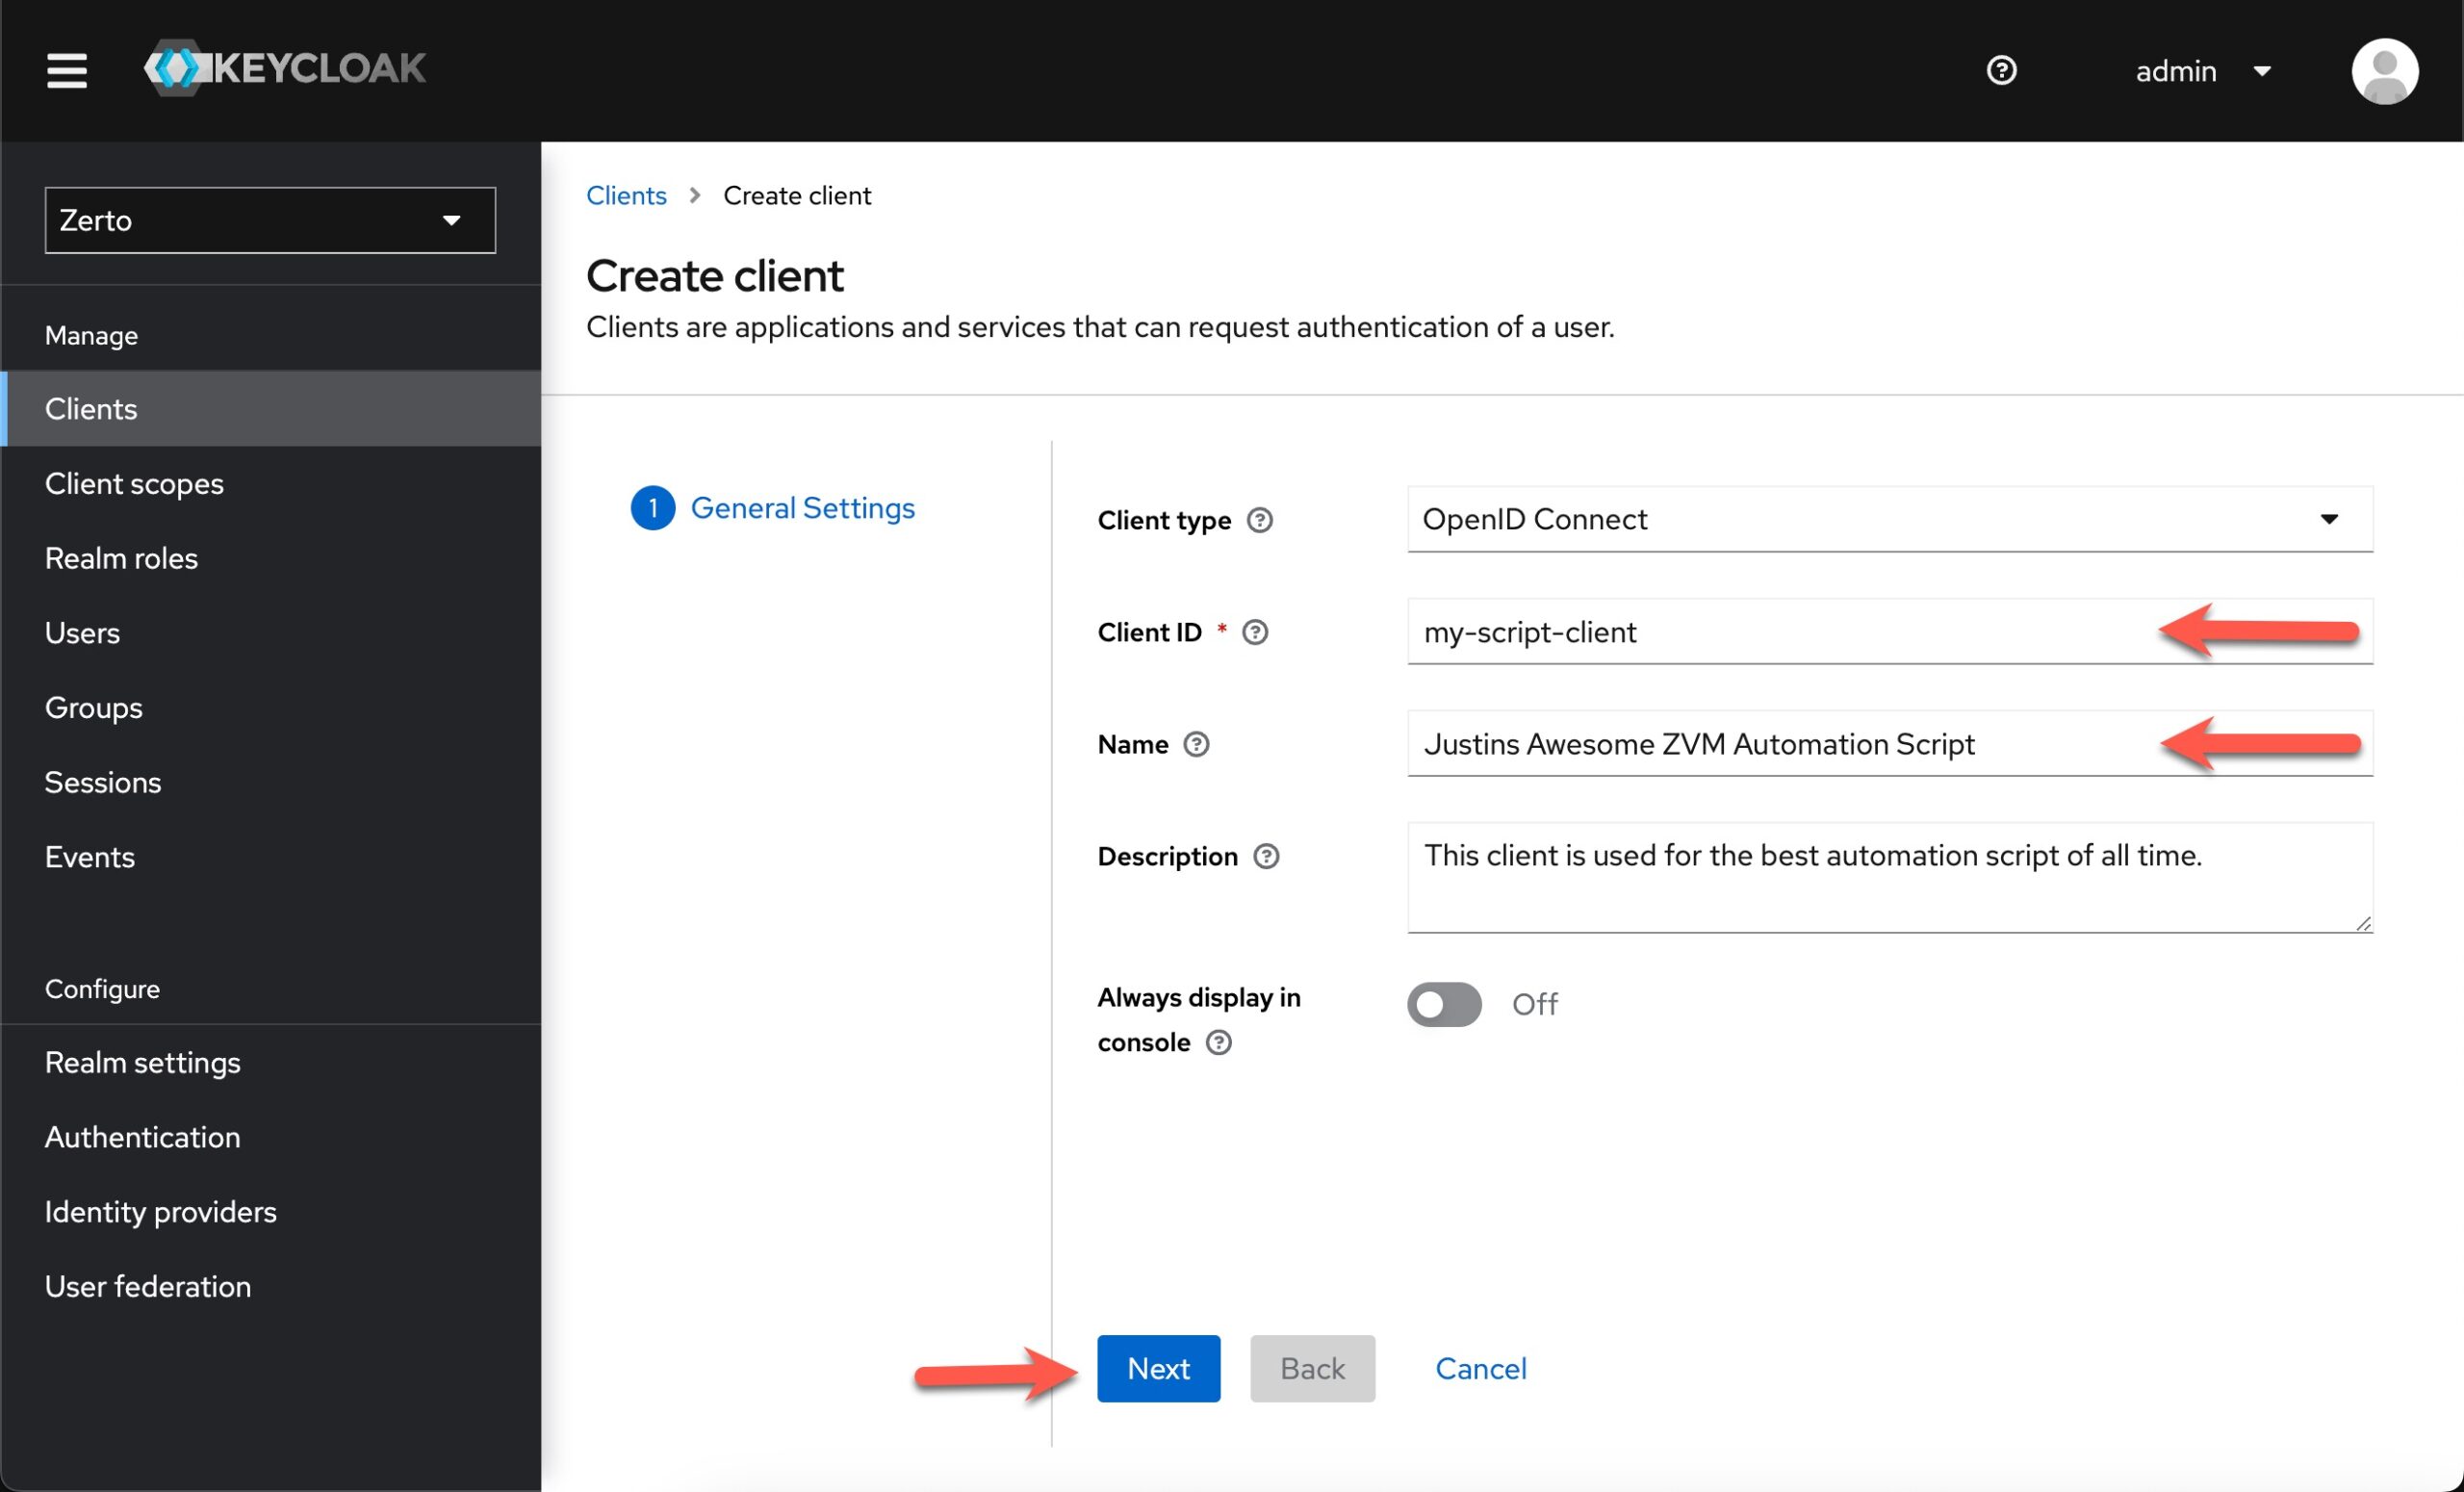
Step 2 – Create a new client
Next click on the “Clients” link in the left menu. and then click “Create Client”.
Next, provide a Client ID, the rest of the info on this page is optional. Click Next.
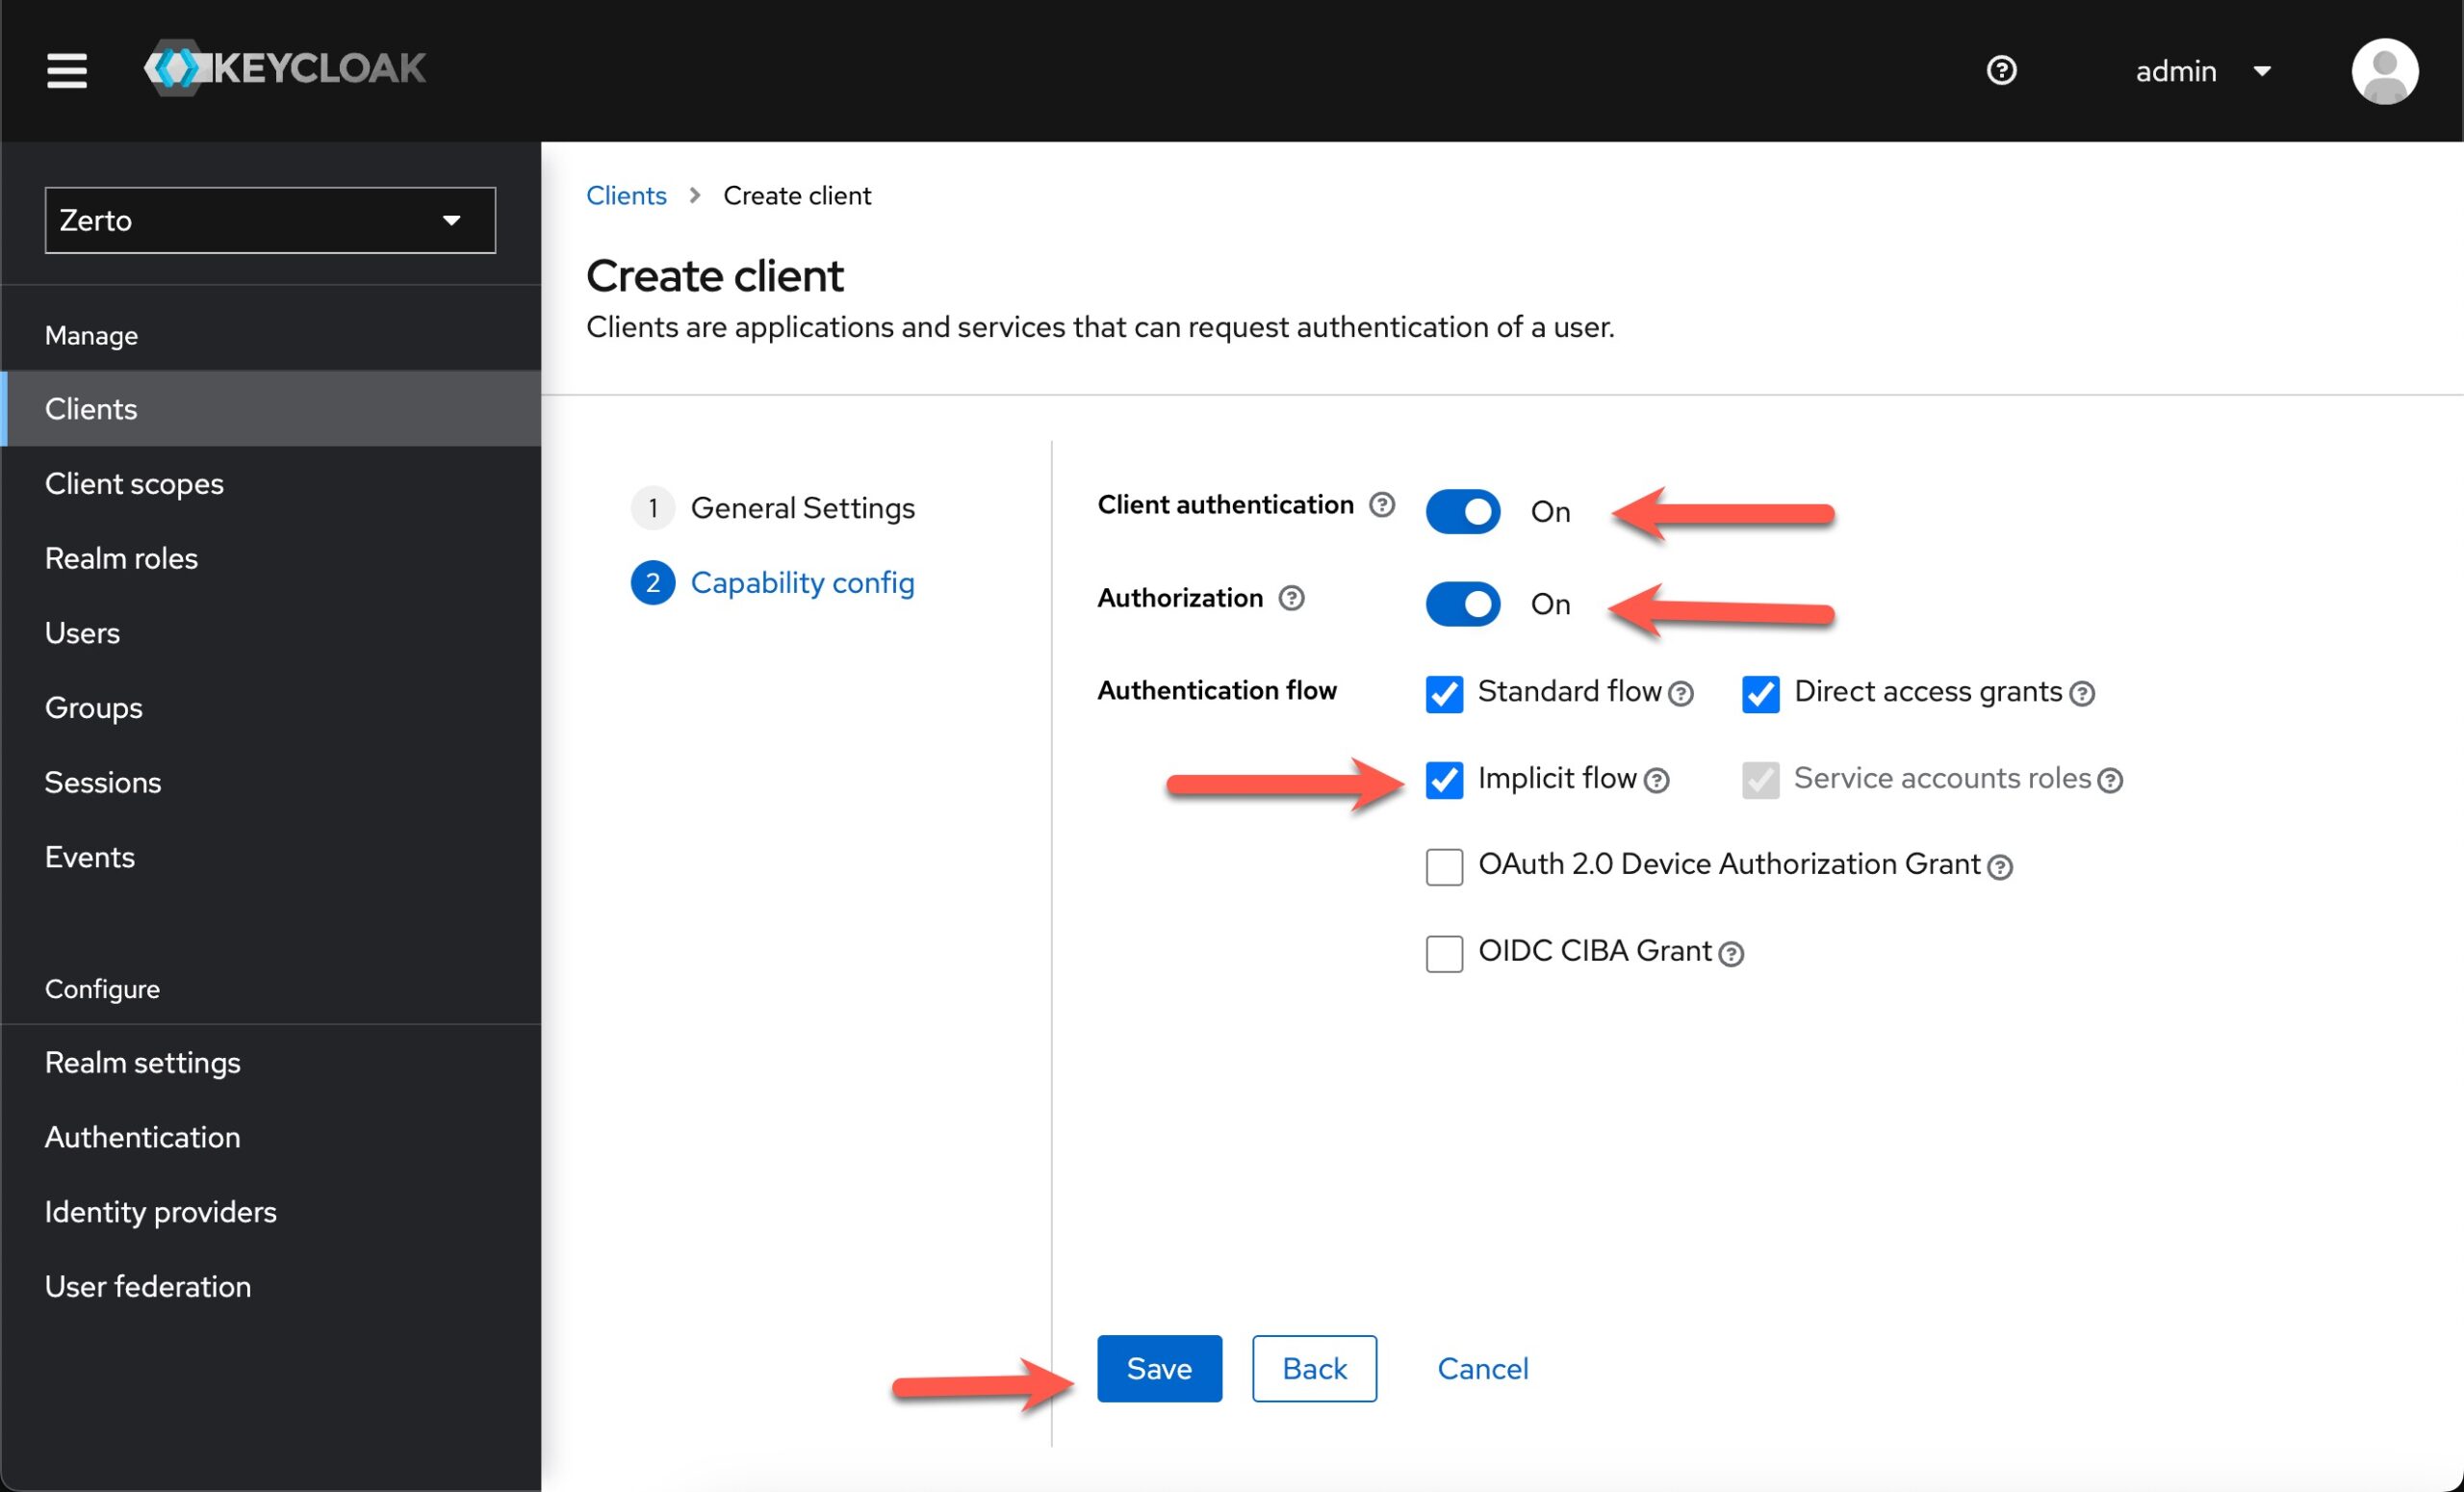
On the next screen, we need to check a few boxes. The arrows point out the things you want to have enabled. These options allow scripts to get a JWT without interactively logging in.
Step 3 – Gather your credentials
Once Keycloak has created the client, it will bring you to a screen with many tabs for this client. Click on the Credentials tab, and then copy the client secret.
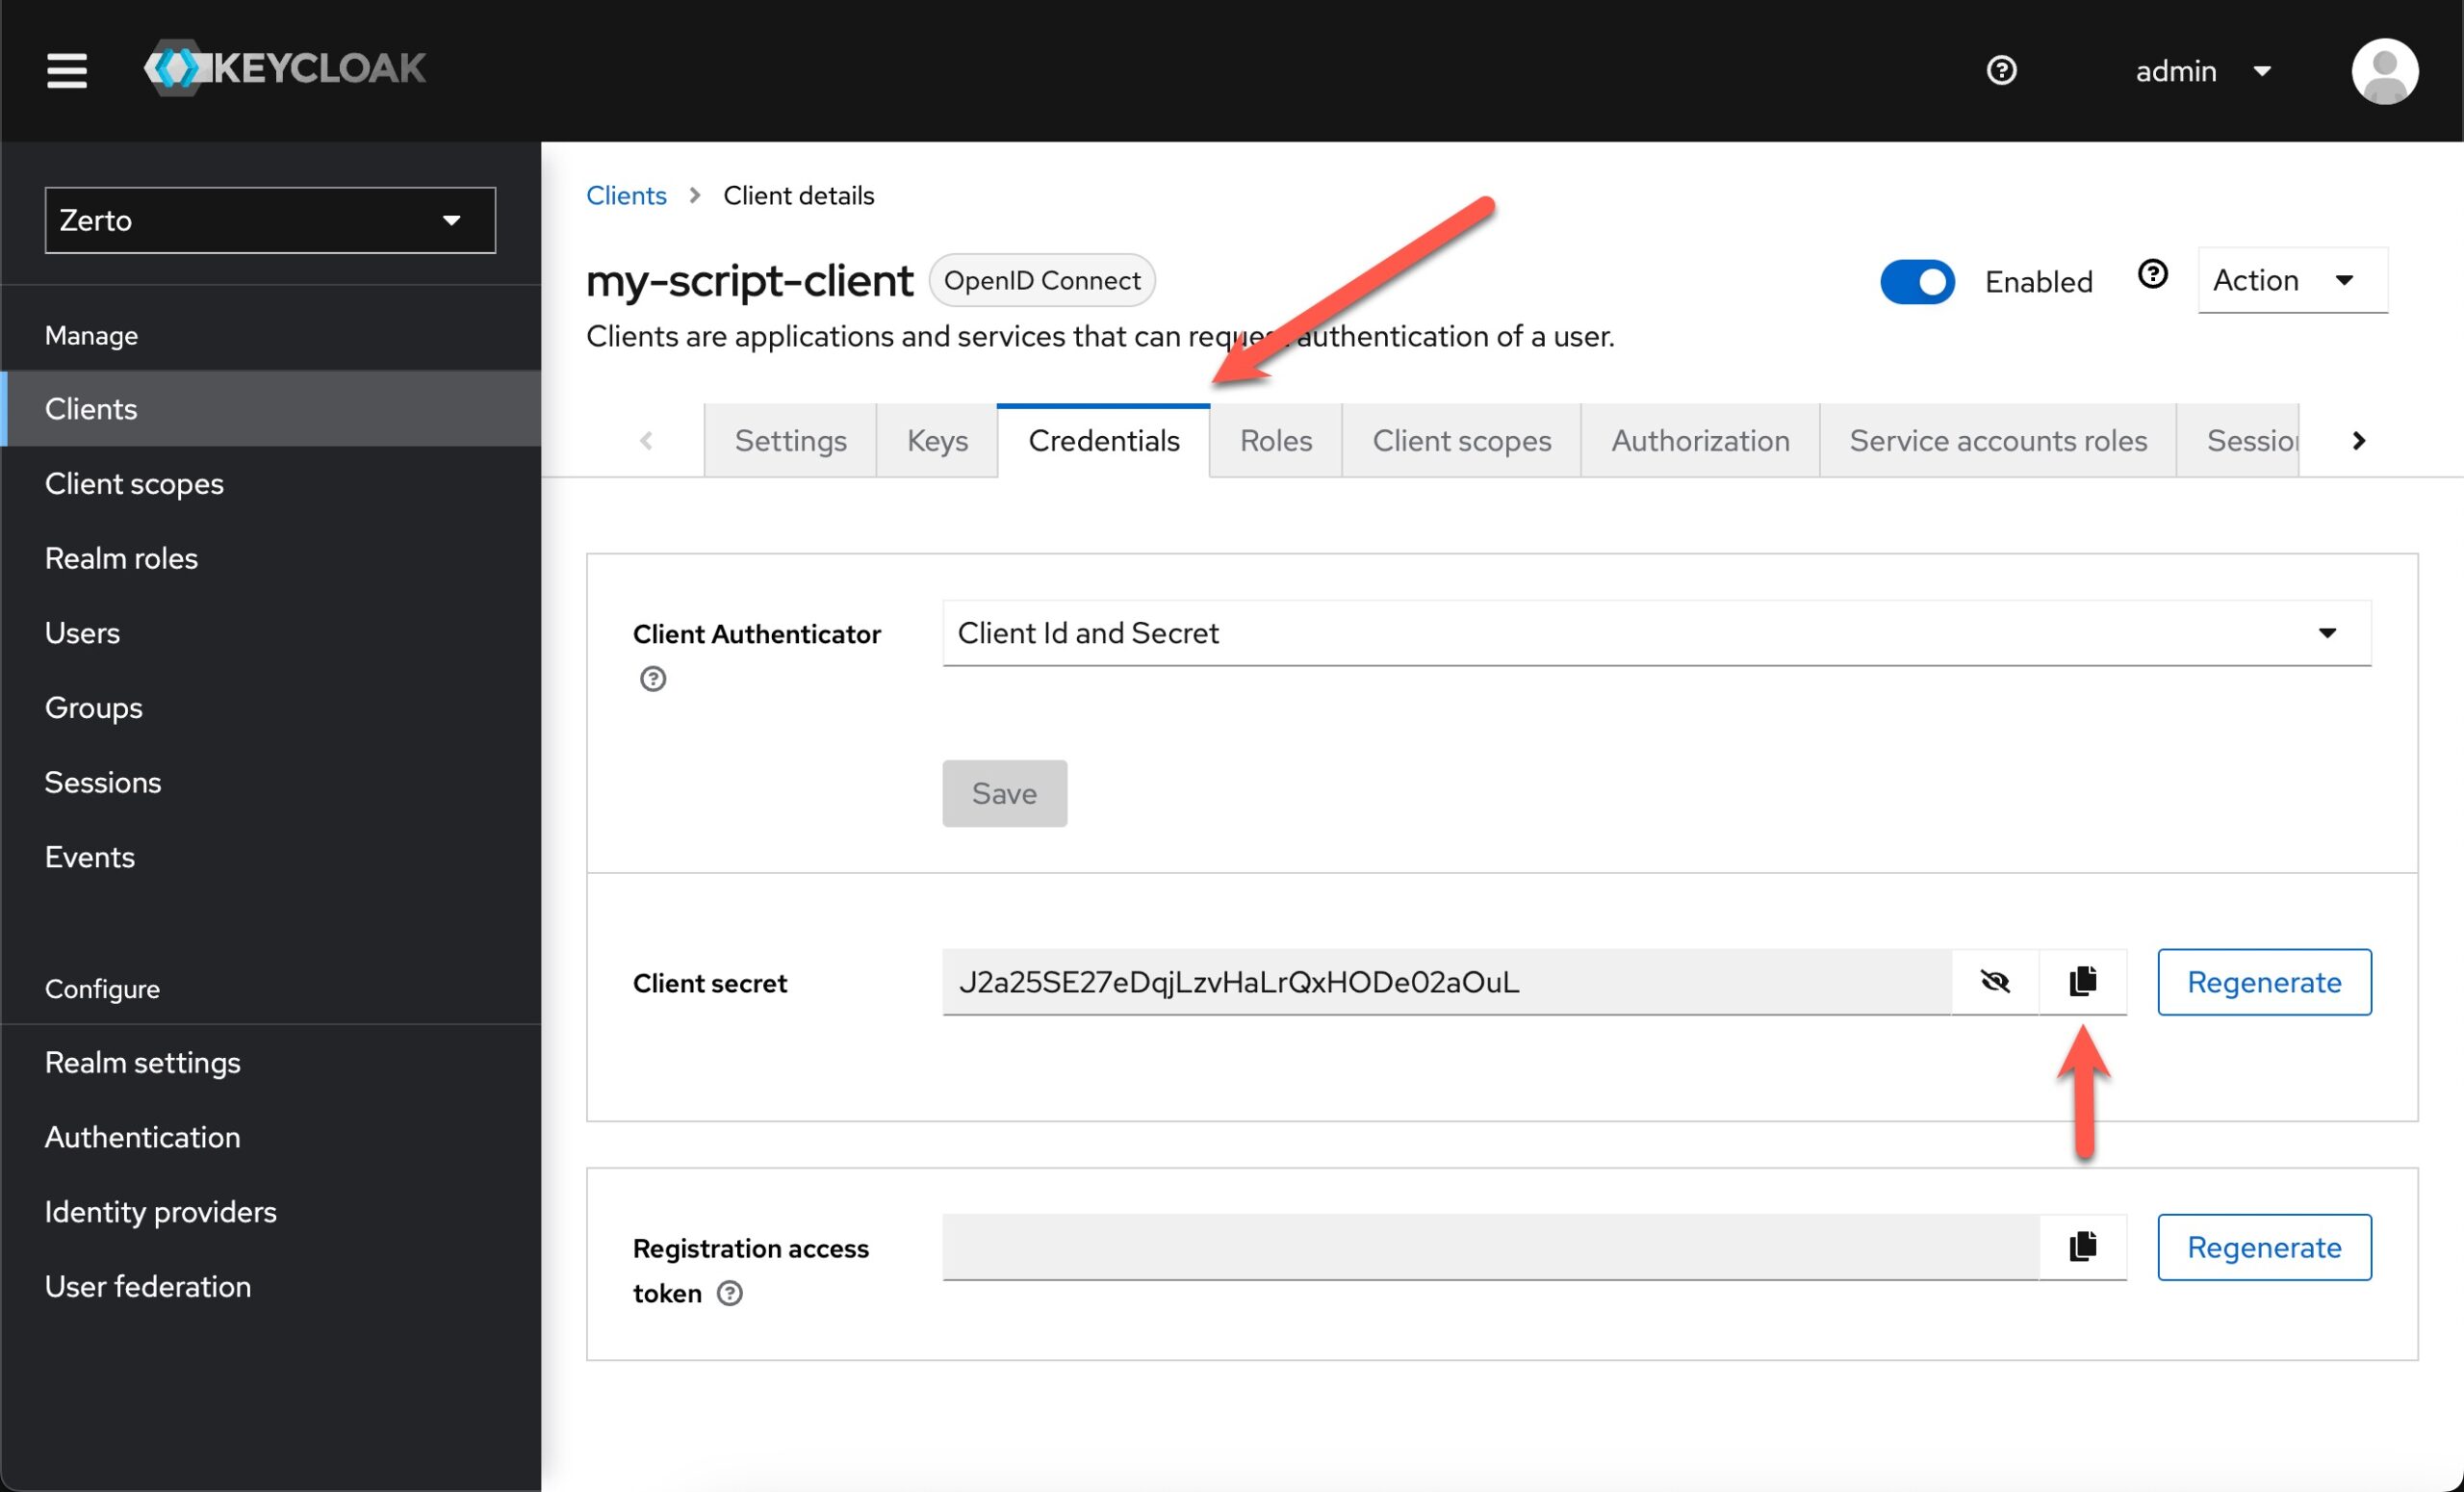
Now you have your “username” (client id) and “password” (client secret) for your script. and now we can work on converting our script from the old way to the new way.
Converting your scripts
Everyone does scripting a little differently, and that’s totally cool! However, it makes showing you how to convert your scripts a challenge. Hopefully, I can just show you a before and after and you’ll understand what needs to happen.
P.S. – My examples are all in Python. Other scripting languages should be pretty much the same process.
Your script probably looks something like this if you followed the Windows ZVM API documentation and are using Python.
Before – Windows ZVM Style
There is a function that takes your username and password and then returns an x-zerto-session token.
def getxZertoSession(userName, password):
    baseURL = f"https://{strZVMIP}:{strZVMPort}"
    xZertoSessionURL = f"{baseURL}/v1/session/add"
    authInfo = f"{userName}:{password}".encode('utf-8')
    authInfo = base64.b64encode(authInfo).decode('utf-8')
    headers = CaseInsensitiveDict()
    headers["Authorization"] = f"Basic {authInfo}"
    contentType = "application/json"
    response = requests.post(xZertoSessionURL, headers=headers, json={}, verify=False)
    return response.headers.get("x-zerto-session")
You would call this function and then use the returned data to setup an http header.
#Extract x-zerto-session from the response, and add it to the actual API:
xZertoSession = getxZertoSession(strZVMUser, strZVMPwd)
zertoSessionHeader = {"x-zerto-session": xZertoSession}
The header would then be used when you make API calls going forward.
# Get list of VPGs
baseURL = f"https://{strZVMIP}:{strZVMPort}"
ZertoURL = f"{baseURL}/v1/vpgs"
vpg_response = session.get(ZertoURL, headers=zertoSessionHeader, verify=False)
After – ZVM Appliance Style
We can still define a function to get our JWT using our clientid and client secret.
def ZvmAuth(clientId, clientSecret):
    baseURL = f"https://{strZVMIP}:{strZVMPort}"
    authURL = baseURL + "/auth/realms/zerto/protocol/openid-connect/token"

    h = CaseInsensitiveDict()
    h["Content-Type"] = "application/x-www-form-urlencoded"

    d = CaseInsensitiveDict()
    d["client_id"] = clientId
    d["client_secret"] = clientSecret
    d["grant_type"] = "client_credentials"

    response = requests.post(url=uri, data=d, headers=h, verify=verifySSL)
    return str(responseJSON.get('access_token'))
We can then call this function just like before
#Extract JWT from the response, and add it to the actual API:
token = ZvmAuth(clientId, clientSecret)
Then we can use the token in other API calls, we just setup the “Authorization” header as a “Bearer” with our JWT behind it. then pass that header with the GET request.
# Get VPGs
uri = "https://" + strZVMIP + ":" + strZVMPort + "/v1/vpgs"
h = CaseInsensitiveDict()
h["Accept"] = "application/json"
h["Authorization"] = "Bearer " + token

response = requests.get(url=uri, headers=h, verify=verifySSL)
That’s it!
Once you get the hang of it, converting your scripts isn’t too hard. It just takes time to make the changes, and then test.
Let me know if you get stuck, happy to help or at least point you in the right direction.
![]()


Pingback: How to visualize Zerto metrics using Grafana - Justin's IT Blog
Hi Justin,
I have installed PowerShell version 7.3.6 in my test ZVM linux appliance machine (10_u1). How can I install and invoke Zerto zvmlinux Commandlets to use PowerShell scripts with the Linux ZVM appliance..
zerto.zvmlinux.commandlets.1.953.2.zip
powershell_7.3.6-1.deb_amd64.deb
Thanks Justin for providing how to Creating Keycloak credentials. This works great. I know authentication is working because I can run a powershell invoke-RestRethod and get a list of VpgIdentifiers and VPG names successfully. I.E.
# Get VPGs
$vpgsURL = “https://” + $ZertoServer + “:” + $ZertoPort + “/v1/vpgs”
$vpgsResponse = Invoke-RestMethod -Uri $vpgsURL -Headers $headers -ContentType “application/json”
# Output VPGs
$vpgsResponse | Format-Table -Property vpgname, VpgIdentifier
What I am having trouble with is getting a list of VMs in an existing VPG. My output I get is.
Invoke-RestMethod:
{
“Message”: “VpgSettings with identifier e7e1057a-469e-4374-adb0-06435718a49c does not exist”
}
Even though e7e1057a-469e-4374-adb0-06435718a49c is a real identifier from the output above of a VPG. Any suggestions. I.E. I am trying to do this.
# Lists VMs in each VPG
foreach ($vpg in $vpgsResponse) {
$vpgIdentifier = $vpg.VpgIdentifier
$vpgSettingsURL = “https://” + $ZertoServer + “:” + $ZertoPort + “/v1/vpgSettings/$vpgIdentifier”
try {
$vpgSettingsResponse = Invoke-RestMethod -Uri $vpgSettingsURL -Headers $headers -ContentType “application/json”
$vmsURL = “https://” + $ZertoServer + “:” + $ZertoPort + “/v1/vpgSettings/$($vpgSettingsResponse.Identifier)/vms”
$vmsResponse = Invoke-RestMethod -Uri $vmsURL -Headers $headers -ContentType “application/json”
Write-Output “VPG Name: $($vpg.vpgname)”
$vmsResponse | Format-Table -Property VmName, VmIdentifier
Write-Output “`n”
} catch {
Write-Error “Failed to retrieve VMs for VPG $($vpg.vpgname) with identifier $vpgIdentifier. Error: $_”
}
}
Not sure why it does not recognize the identifier. Here is the URL I would use: https://zertotest.westfieldgrp.corp:443/v1/vpgSettings/e7e1057a-469e-4374-adb0-06435718a49c/vms
Pingback: Converting REST API Scripts for ZVM Appliance v2 - Justin's IT Blog