If you are looking for an alternative to purchasing multiple disk to disk backup appliances you may want to pay close attention to this one. When Veeam released version 8 they stashed away a feature called Cloud Connect. Essentially Cloud Connect lets you take the backup software you already have and do more with it. Before v8 if you wanted offsite Veeam backups our best option was to get a pair of disk to disk backup appliances from EMC Data Domain, Exagrid, HP, or one of the other providers. Then do you backups to the local box, then let that appliance replicate the data offsite to its sister box. Now, before I continue, let me just say that this is still a damn fine solution and one that is tried and true; however for some customers it just doesn’t make sense.
One of the biggest reasons why it may not make sense is cost, the other big reason is location; by that I mean that some customers just don’t have a suitable second location to store the box at, and if you have to colocate the box at a service provider you are looking at hundreds of dollars a month just for that space…. let alone the box.
So where does Veeam Backup and Replication v8 fit ? Cloud Connect (on the client side) is basically just presenting a Veeam Repository for Veeam to use as a destination for a copy job… much like you could use a tape device as a destination for a copy job.
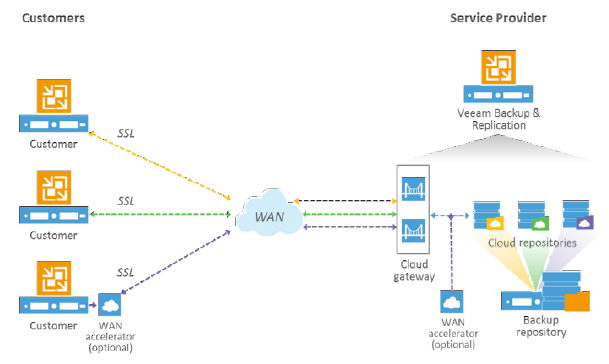
Some of the other highlights of this architecture (and Veeam Backup and Replication V8 in general) are end-to-end encryption and WAN acceleration. And to be perfectly honest … if you want to use a service provider to remote your offsite backups… I would HIGHLY encourage you to use the WAN accelerator… even if it means upgrading your license to enterprise plus. In my personal testing on my home WAN to colo setup I seen a minimum of 4x decrease in job time due to using the WAN accelerator.
As for encryption… You can now set an encryption password for each Veeam job. It is as simple as that, your local Veeam password manager will store the password so that you can continue to operate Veeam just like you did before, but if someone outside of your Veeam instance tried to open your backup files they would have to provide the password in order to un-encrypt the data… just don’t lose your password… your service provider has no way to get it back for you.
So how do you setup Veeam to back up to the cloud?
The first step is to create a new service provider object in the Backup Infrastructure area of Veeam. If you are just wanting to test cloud connect to see if you can do the setup you are welcome to use the values in these screenshots as my Cloud Connect server is publicly accessible and I will be providing a generic username and password with a 1GB quota in this article. If you want to actually test this on one of your jobs though you will need to email me so that I can create an account with a larger quota.

So for the DNS name or IP, I am using cc1.jpaul.me, while the port is configurable my guess is that almost all providers will leave this as the standard port.
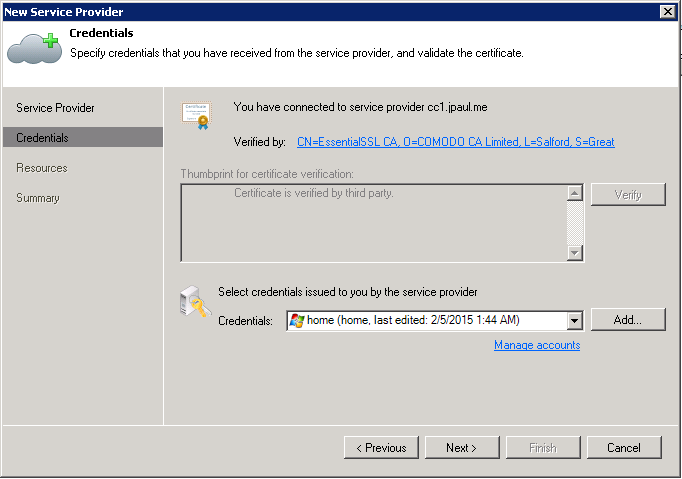
After you click next Veeam will check to see if the service provider is alive and download its SSL cert…. look at me I actually managed to get a REAL cert on this box 🙂
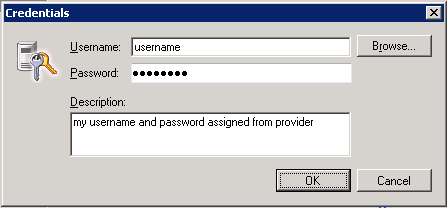
As for a temporary account that you can use if you just want to see how it works use the username bloguser and the password is tryitout
Again this account will only work for my server, and it has a 1 GB quota… If you want to actually test the service and see how long it might take for a job to complete email me at [email protected] and we can set up a separate account for you to test with.
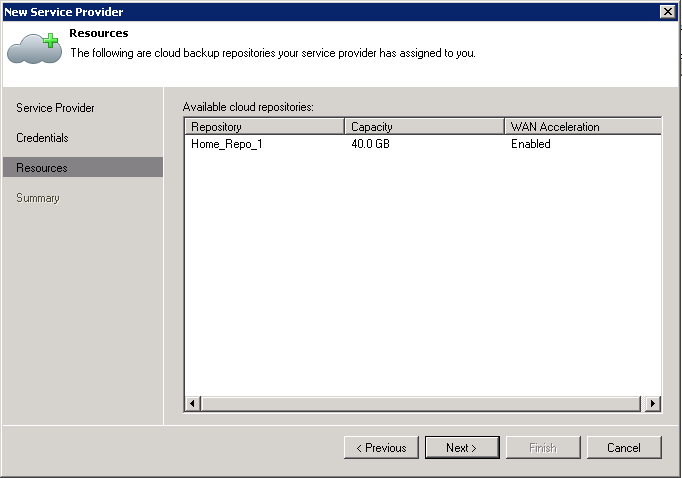
Here you will see what your provider has called your repository, as well as its quota size and whether WAN acceleration is enabled on the cloud provider side. Just a note here… a provider that is not offering WAN acceleration is crazy and probably should be avoided in my opinion … it will save both parties a CRAP LOAD (yes its a technical term) of bandwidth, and costs them nothing to enable.
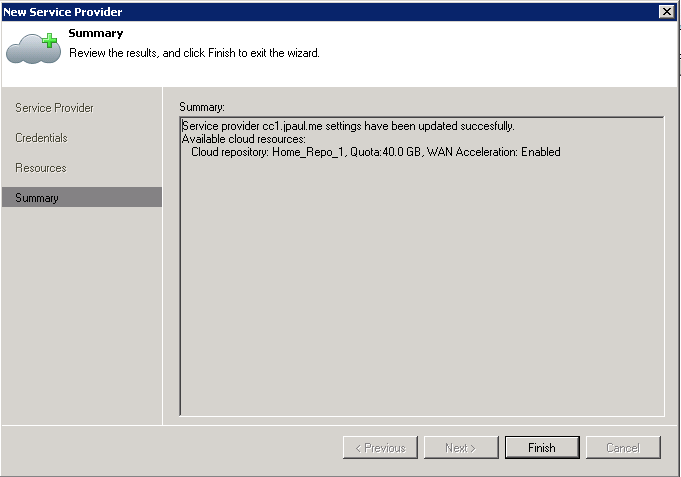
As per the Veeam norm, you will have a chance to click Finish on the last step after reviewing what is actually going to happen. After clicking Finish you are ready to create a copy job, and your Veeam Backup and Replication should be fully connected to the cloud connect service provider.
Please note that you may want to skip down to the “Creating a WAN accelerator” section if you have that feature. I listed it last as it isn’t required, but if you have the license you will certainly want to use it.
Creating a copy job
So in order to actually use the service provider we have to get data uploading, to do that Veeam leverages its Copy Job function that has existed for some time now.
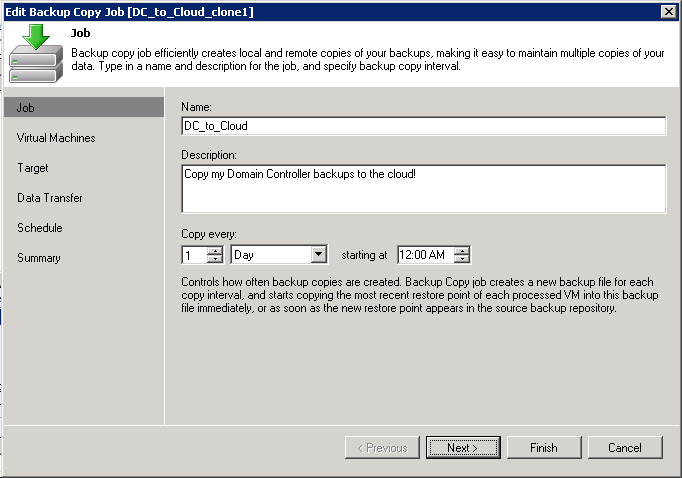
I just give my job a name, and then matched the copy settings to the backup job settings. Meaning, because my backup job only runs one time per day, I leave the copy job setting to 1 time per day. Adjust as needed.
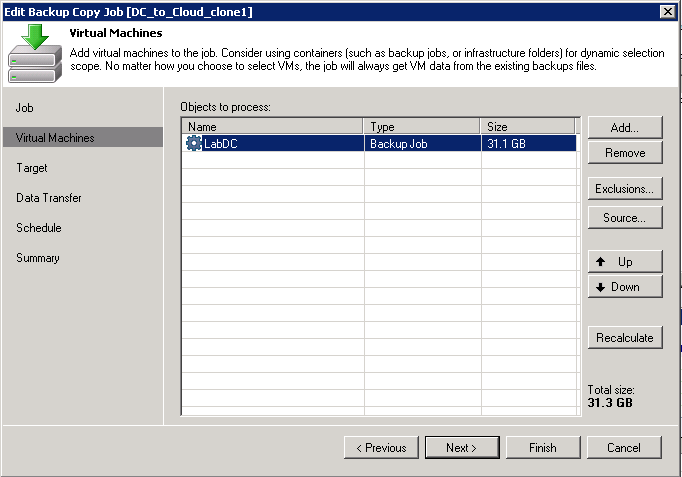
Select what VM’s will need to be backed up to the cloud.

Here you need to select the Cloud Backup repository as the job’s target.
As for what you want to keep on this target… you need to remember that the provider is going to charge you based on the amount of data you are keeping there… not the size of the VM’s you are backing up.
For example: Let’s say you have a job that is backing up some VM’s.. the VBK size of a full backup is 100GB, the size of the VBI files are 10GB for each day. From this information we can do some math.
If you want to keep 7 restore points on disk you will have to keep at least 1 full backup (100GB) plus 6 daily backups (10GB each). So you will need to have at least a 160GB quota to store it. However in my opinion because backups are linked to a full, you will probably balloon up to as many as 14 restore points so if it were me I would plan to have a 400GB quota.
Now here is where things can get more complicated. If you want to also keep some Grandfather/Father/Son backups you will need to multiple the number of those by the full backup size. For example, if I also wanted to keep a weekly full backup for 4 weeks, and monthly full backups for 3 months that means I will need to keep a total of 7 additional full backups at my provider… which would translate to an additional 700GB of storage.
(Im developing a calculator to help calculate this and as soon as I have it finished I will post it here)
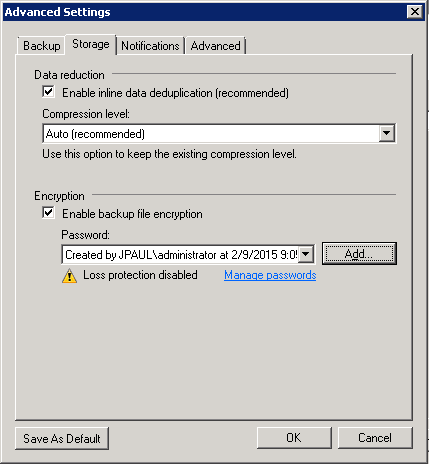
This is where you set a password for the job’s encryption. Remember the service provider will not be able to retrieve your password, so if you don’t remember what it is all of this work is for nothing when it comes time to do a restore.
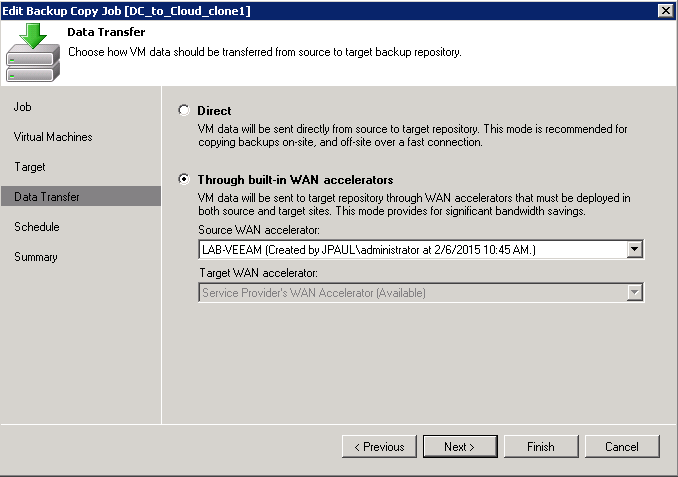
So here is where we can select to use a WAN accelerator… if you dont have a WAN accelerator already setup and you are licensed to use the feature then proceed down to the next section and do that first before setting up your job…. or you can complete the job and then edit it after you setup the accelerator.

You are able to black out certain times if you want to avoid production hours… or in the case of my home WAN… the wife’s Facebook hours
(LOL its a good thing she doesn’t read my blog… but lets face if even if she did … she would have stopped reading WAY before this point)
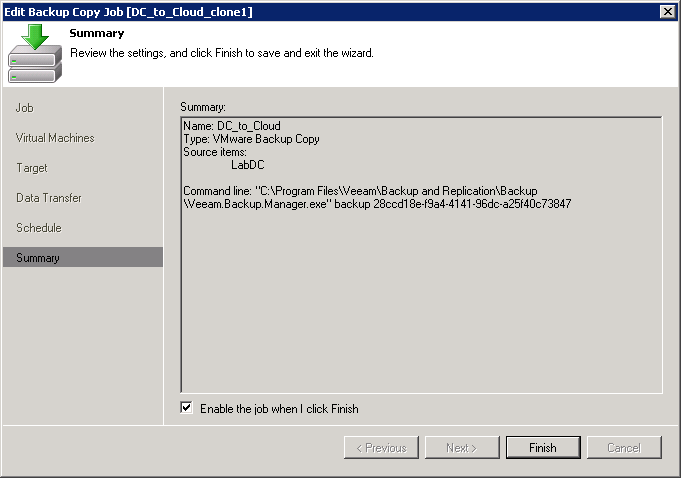
Step 7: Review step, click finish here 🙂
That is it. You are ready to backup to the your cloud provider. And you just saved yourself a capex… but you added an opex. It’s hard to say which will be better for you… but this is definitely an option worth looking into if you are a smaller shop or just don’t want to have your own offsite storage box.
Bonus: How to enable WAN acceleration
Enabling WAN acceleration takes all of about 2 minutes, and its saves you a massive amount of bandwidth. So let’s look at how to get one going. (BTW, I already had one setup so the screenshots are going to say “Edit” instead of “Create” but the steps are the exact same)
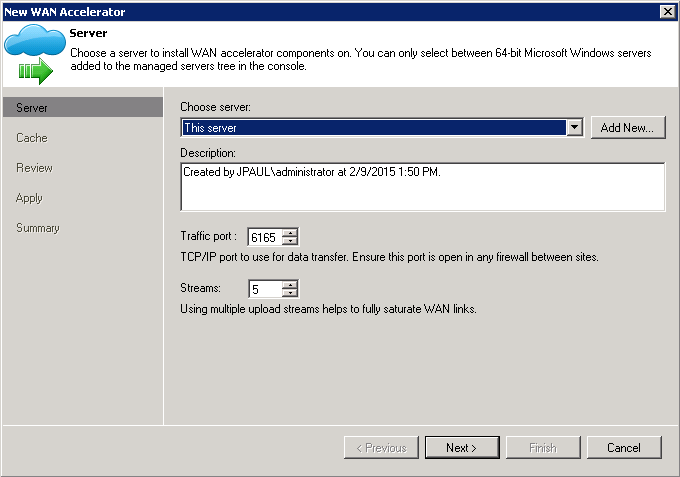
All you really need to do here is select a box that you want the service to run on. For a small environment this could easily be the Veeam server that you use to do your backups too.
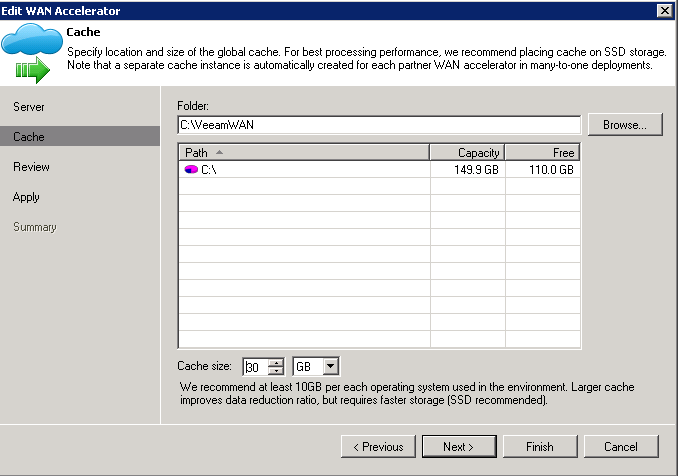
Veeam will create an on disk cache for storing common information… please note that whatever size you set this to will get used instantly upon completion of the wizard.
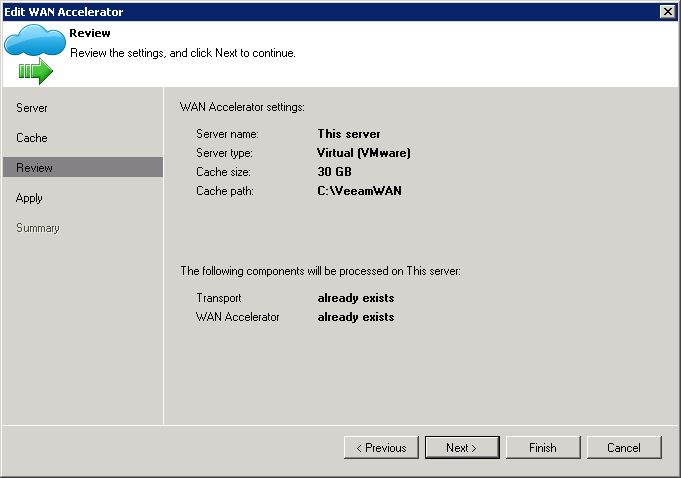
This is pretty much the last step… the rest of the process is simply applying the changes to the selected server and clicking Finish.
Note: Just because you installed a WAN accelerator doesn’t mean you are using it. If you created your copy job before you had a WAN accelerator setup make sure to go back and add it to the job so that it actually gets used.
![]()


This is an excellent howto post Justin, thank you!
Our cloud provider is charging us $0,20 per GB per month and they use NetApp storage, do you think its reasonable? Do you know what are the typical prices per GB for Veeam backups hosted storage?
This is an excellent howto post Justin, thank you!
Our cloud provider is charging us $0,20 per GB per month and they use NetApp storage, do you think its reasonable? Do you know what are the typical prices per GB for Veeam backups hosted storage? Thank you!
are they charging you actual space used or .20 / GB of quota space ?
Thanks for the article. We were doing hosted Veeam backups for customers before and the old ways (VPN, dedicated VM’s per customer) was expensive/painful to manage and I’ve been eyeing this as a replacement.
To George’s point, some of the vendors are charging higher prices because they use name brand storage. Others charge more for providing recovery services (You can restore to their VPS enviroment) USB drive seeding and recovery, and 2-3 site replication bundled.
At work we do this stuff as a service, but have never been in commodity pricing.
If your looking for commodity pricing, I know the StoneBridge/Kor Computing guys (they do hosting at ~10 cents per GB or less depending on commit) are testing/evaluating doing this as a service. Alternatively if your willing to manage it yourself, nothing stopping you from spinning it up on Amazon S3 or another solution yourself.
hi
have you made that calculator for counting the mount of data needed?
im not sure i understand what you mean ?
Found you Veeam Cloud Connect Price Estimator 🙂 that was what I looked for.
I found that Wan Acceleration and Cloud Connect were probably 2 of the biggest talking point at this year’s VeeamOn in Vegas. I’m really glad you went into detail about the Wan Acceleration in this tutorial. Cloud Connect has really empowered Veeam partners with a rich and competitive marketplace of choices, when it comes to off-site storage options.
I found that Wan Acceleration and Cloud Connect were probably 2 of the biggest talking point at this year’s VeeamOn in Vegas. I’m really glad you went into detail about the Wan Acceleration in this tutorial.
How can i be a service provider? how do you make it? is it possible?
im sure you could… give them a call and they will put you in touch with the local team im sure