Azure DevOps is a suite of offerings from Microsoft that aims to help companies deliver better software faster. They have a great article on “what is DevOps” here.
But why am I using DevOps?
You may be asking yourself, why is this infrastructure guy using development tools? The short version is because my new role at Zerto is a mix of all sorts of things, from partner manager SE to developer. (I haven’t blogged about it officially before, but I moved to the Zerto Technology Alliances team in August 2017.) The longer version involves the zPlanner project (article1 article2) that I’ve blogged about before.
So where does DevOps come in?
zPlanner involves a lot of code for a guy who doesn’t really think of himself as a coder. It also involves docker, VMware OVA files, git repos, and a bunch of other stuff.
What I quickly learned is that I make a LOT of code revisions, and therefore my “deliverables” like a Docker container get our of date pretty quickly. Rebuilding that container each time I push a code update to by git repo was getting old fast! Azure DevOps fixed that!
The deliverables
Let’s do this Tarantino style and start at the end, then we will circle back to the
Right now I deploy the zPlanner docker container from a docker web UI called Portainer. Whenever I need to review a customer’s stats database, I simply spin up a zPlanner container, load the SQL file, and go. It works great!
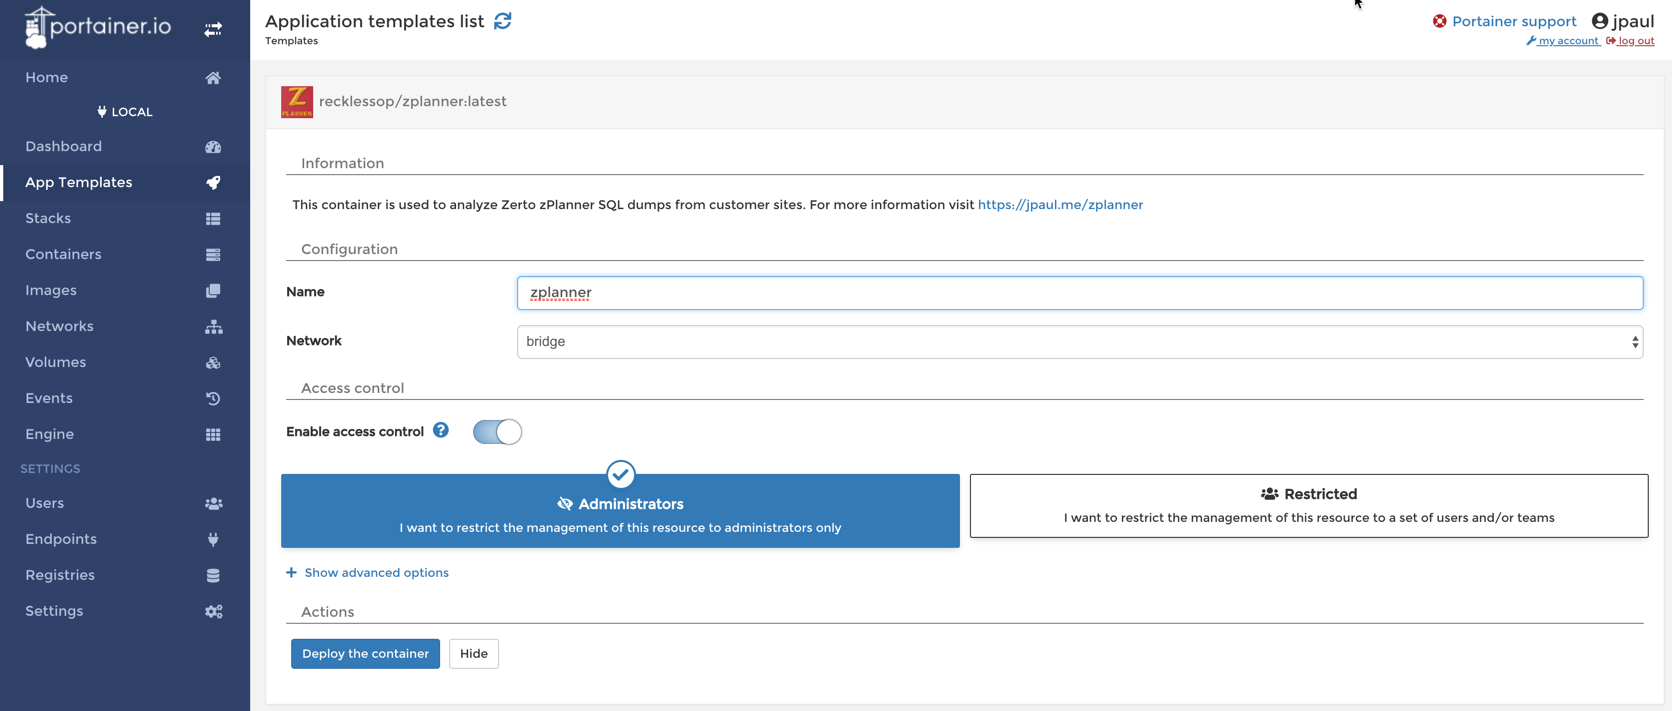
If you notice at the top, the image that the app templates is using is called “recklessop/zplanner:latest”. A quick look at the Docker Hub registry shows the revisions of my container.
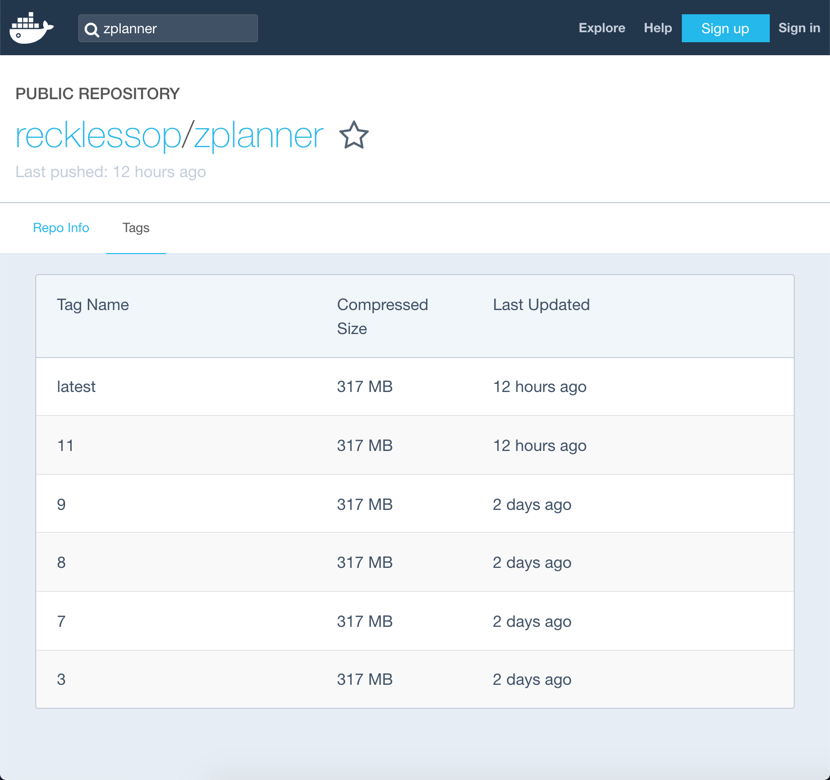
So let’s recap. I build the docker image using a Dockerfile, then push it to the Docker Hub registry. Then I use Portainer to graphically deploy and control my fleet of containers when I need them.
I could just save the Dockerfile in a folder on my machine, and run “docker build .” then Docker commands to tag and push the new image into the registry. But doing that a few times per day is a PITA.
Azure DevOps automates all!
Now that I’ve talked about the end goal, and how I consume my container, let’s talk about how we get docker images buil.
To start, our Dockerfile along with all the other components of the container, are stored in an Azure Repo.

Unless you are going to keep your docker image in the Azure docker registry you will need to establish a Service Connection to Docker Hub. It’s really easy to do, and is located inside of “Project Settings”
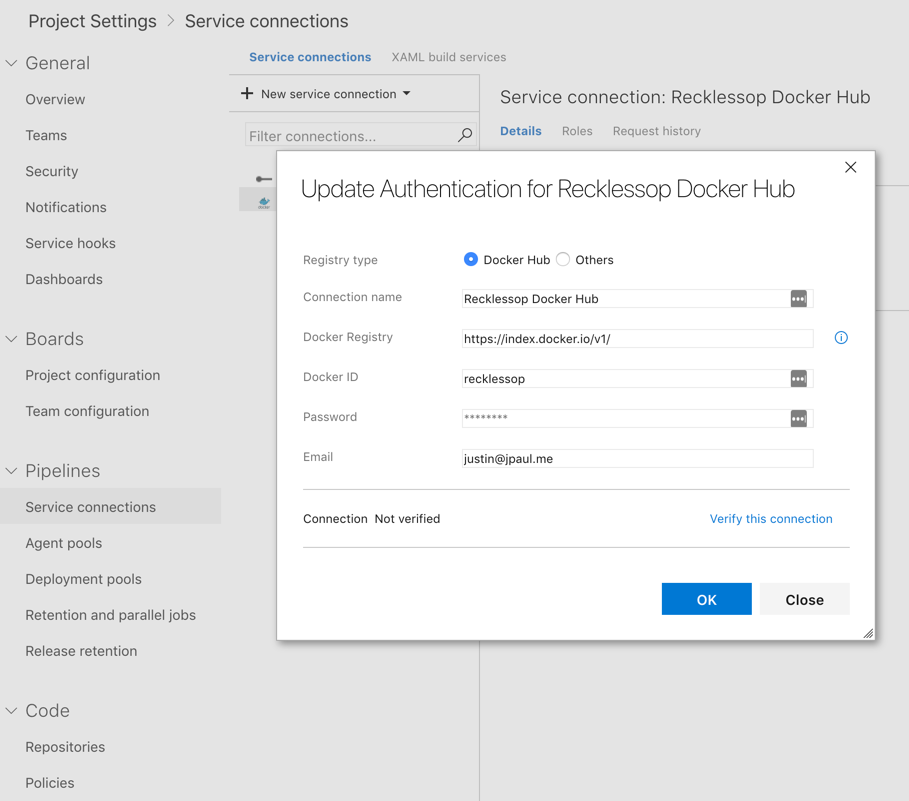
After we have our service connection created we can create a new pipeline. There are a BUNCH of pre-defined pipeline templates to choose from. One of them is a Docker “Build and Push” template. I picked that one and then customized it.
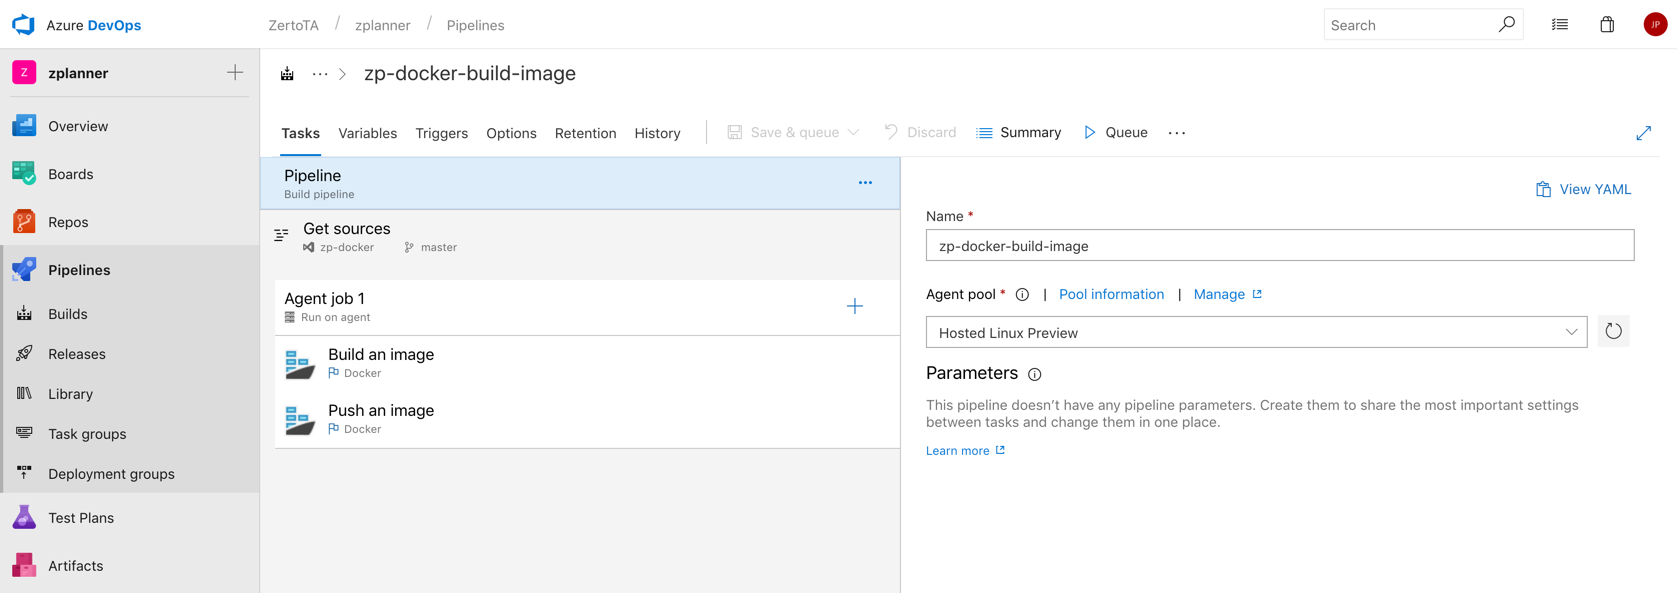
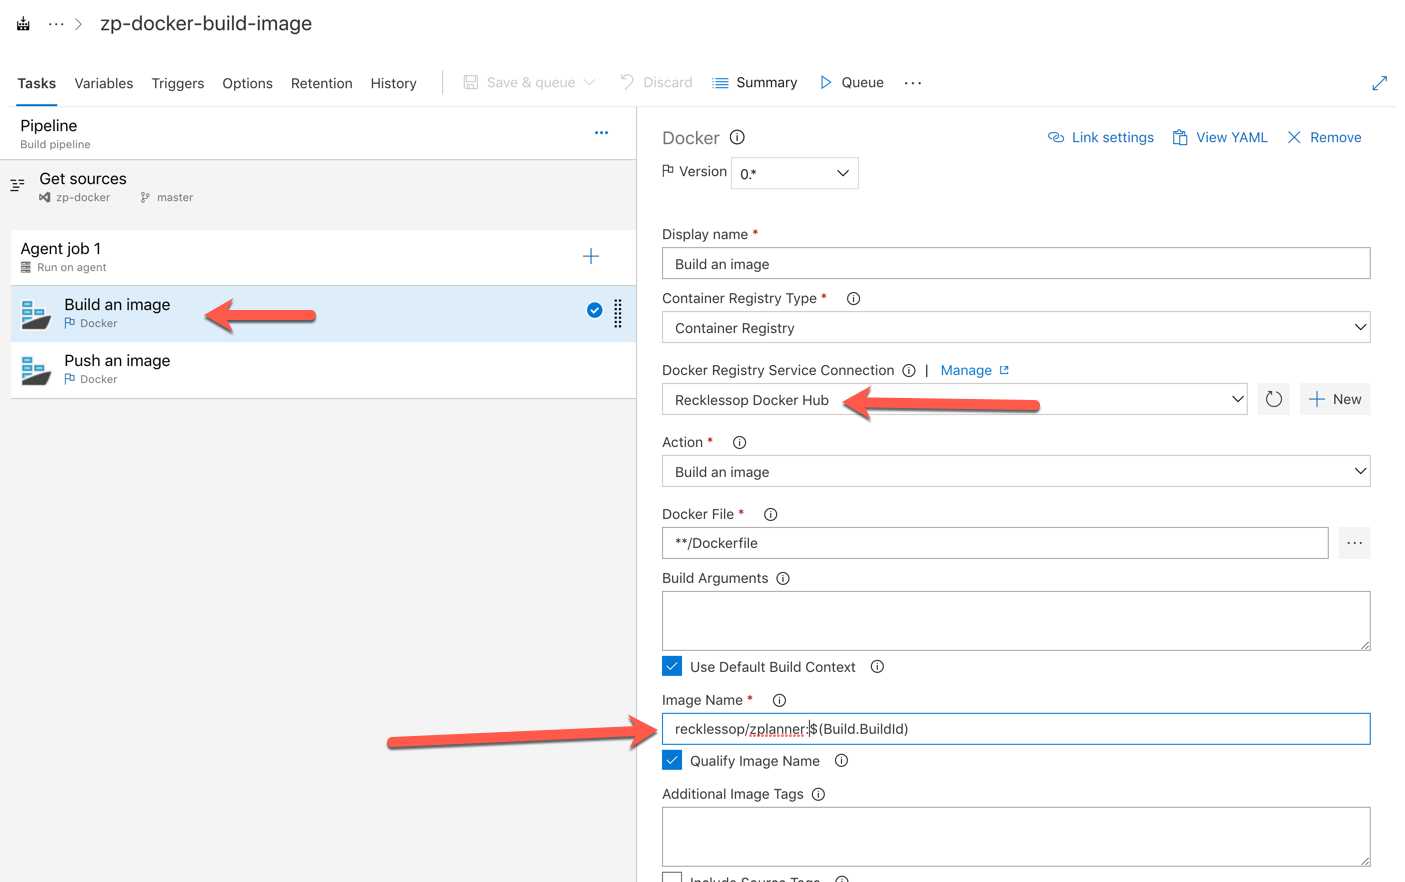
Next you will want to click on the “Build an image” job. On this job we need to configure the Container Registry Type (which I forgot to put an arrow by, but it’s above the first arrow on the right side). Select “Container Registry” from the drop down. Then select the Service Connection we created earlier for your Docker Hub account. Lastly change the image name to whatever it needs to be pushed into the registry as. In my project it needs to be “recklessop/zplanner:<some build number>”
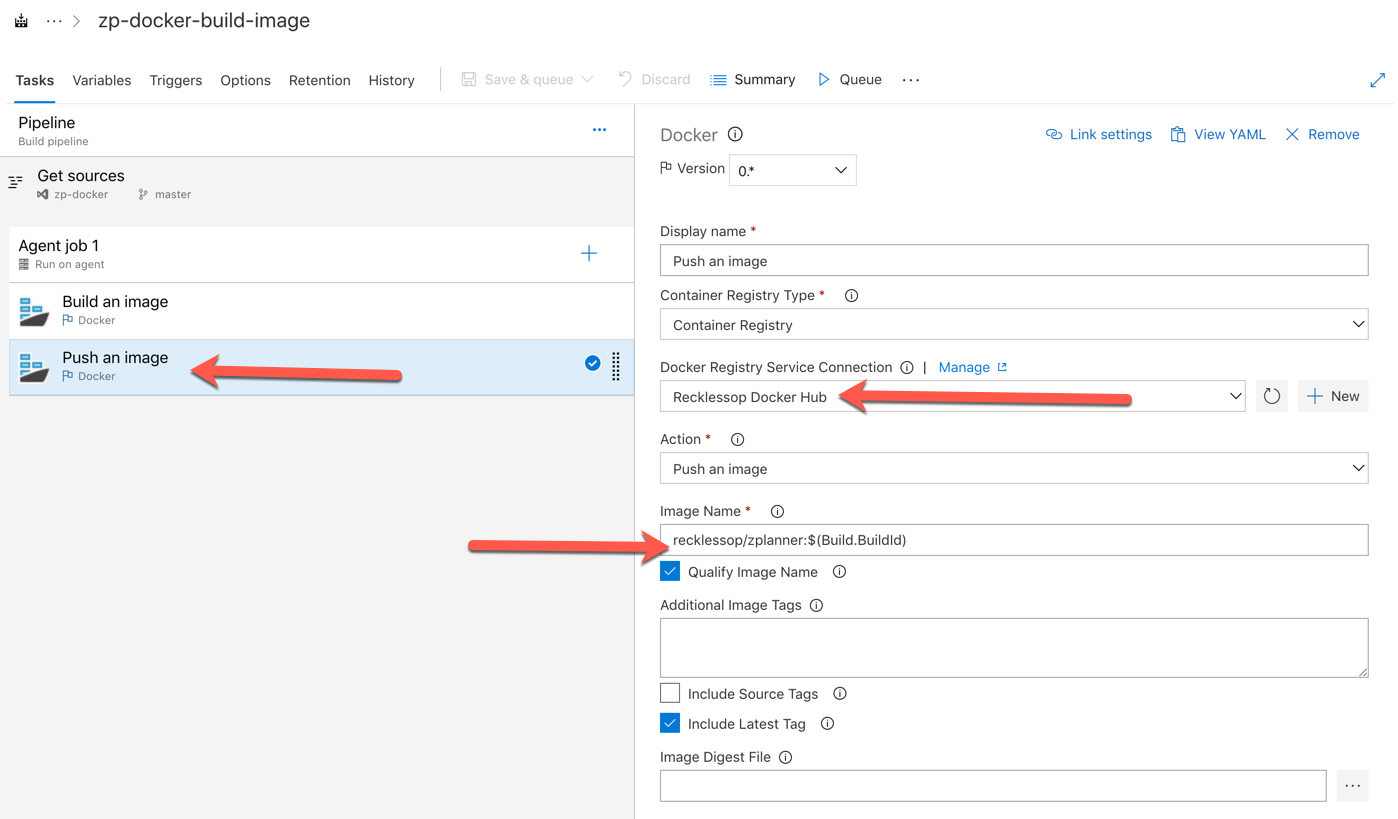
On the “Push an image” job we need to configure a couple things too. Again, change the Container Registry type and the Service Connection like we did in the last step. Lastly, modify the Image Name to be the *exact* same thing as you set on the “Build an image” job.
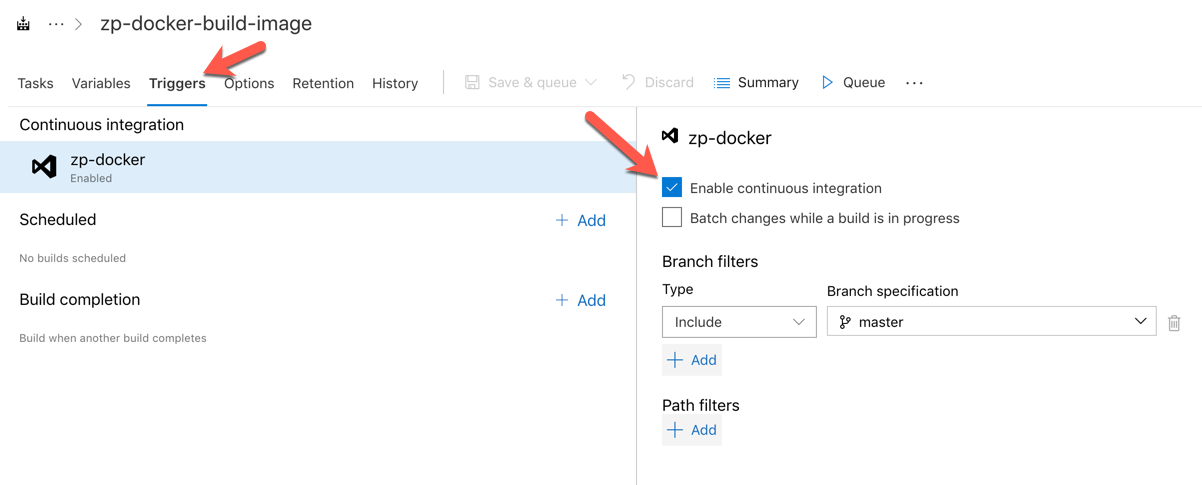
So now we have a pipeline configured that will build some Dockerfile. But we haven’t told it “what or when.” To configure those settings, navigate over to the “Triggers” tab at the top.
On the triggers tab, add a “Continuous integration” item, and select the repo that this build pipeline should work with. Then click the “enable continuous integration” checkbox. It should already be set to filter to only the master branch of your repo. If that isn’t right then make sure to change that. (Maybe you only want to build on the “Dev” branch, and manually build the master branch or something.
What we just did was basically enable a machine to take an input and give us an output. That’s how I think of a pipeline. Here is what the job summary looks like after a successful run of my pipeline
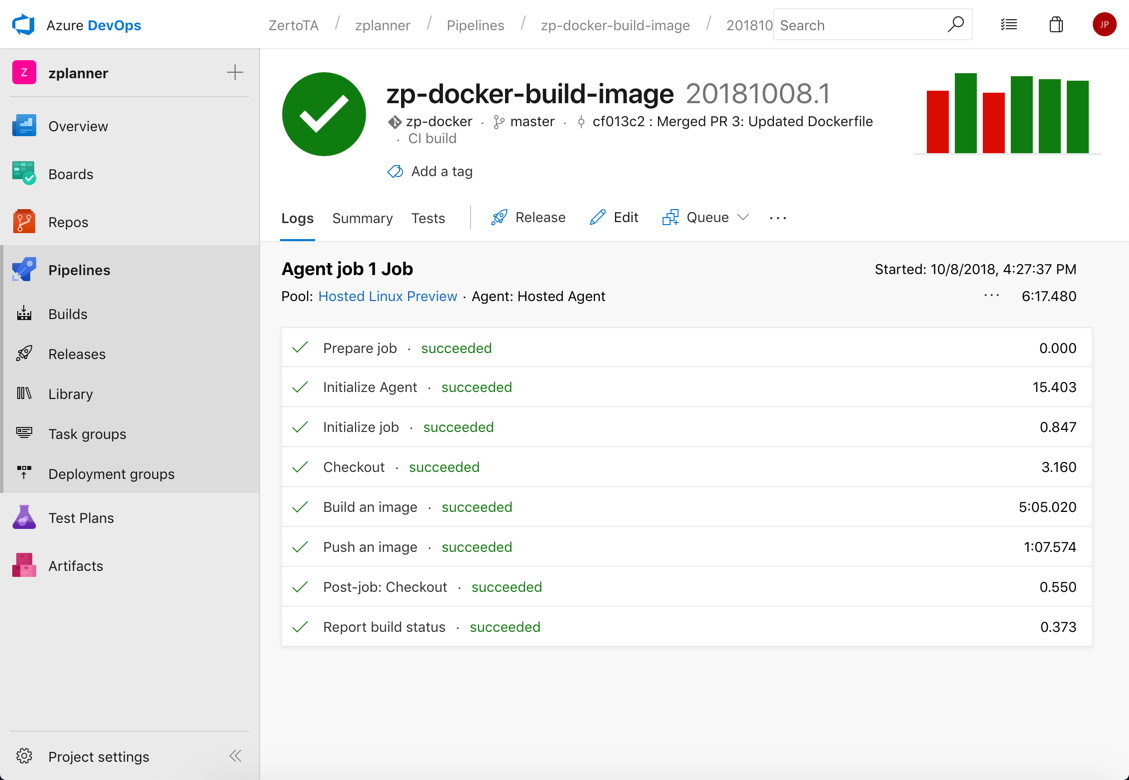
In this example, we ingest an Azure Repo
The best part… IT’S ALL AUTOMATED!
Summary
So to bring this all together, essentially Azure DevOps saves me a LOT of time! I can push and merge changes to my code and as soon as that happens, a pipeline process kicks off to build that code and deliver me a docker images to my registry so that I can start consuming it immediately.
Hence the term continuous integration / continuous delivery.
Next up I plan to see what I can do to automate the build of an Ubuntu OVA file, stay tuned!
![]()


