With an entirely new web interface I thought it might be time to do an update on how to use Zerto 4.5 Preseeding to get your larger data sets to the DR site..
On the back-end everything operates the same as 3.x, however in the GUI you get to the preseed area a little differently.
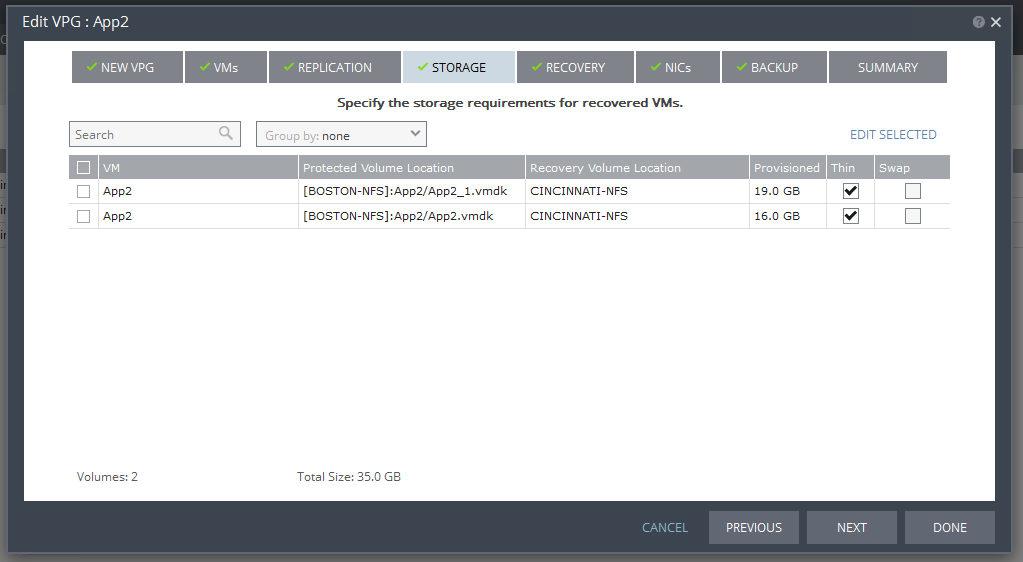
In order to preseed you need to select it while creating your VPG, and the Storage tab in the Create VPG wizard is where you make that selection. Unfortunately I didn’t have my Sufrace Pro 3 that has all the cool screenshot tools on it, but In the screenshot below if you hover over the “Recovery Volume Location” column for the VMDK that you want to preseed there will be a green pencil on the right side. Click that pencil.
When you do you will see the following box. This is what it will look like when it is not in preseed mode.
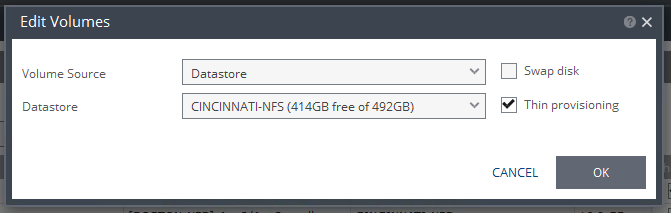
The next step is to click the Volume Source drop down and select “Preseeded volume”. Once you do that you will see the options in the below screenshot.

From here we select the datastore where we placed the VDMK (or VHDX) to use as the seed. Then click the browse button to specify the exact path to the proper virtual hard drive file.
Once that is complete hit OK to save the settings and finish the Create VPG wizard. Zerto will then start replicating your data.
As always let me know if you have any questions.
-Justin
![]()


Pingback: How to Seed VMDK's for Zerto Replication - Justin's IT Blog | Justin's IT Blog
I’m glad I frequent your website, because Zerto’s preseeding mechanics have always been a pet peeve of mine. Explain to me how I would know which VMDK to choose for preseeding if multiple disks attached to a single virtual machine are the same size? The simple answer i syou cant. Selecting the disk is strictly based on size and not a checksum or hash. In the case of a multi-disk setup you cannot assume that .vmdk, _1.vmdk, _2.vmdk are sequential to the OS.
you are correct… it can be hard to tell. Generally though we do keep them in the correct order so whatever they are in prod they will be in dr