If you are looking to push your small business or even just your personal laptop backups to the cloud, Cloudberry‘s Online Backup product might just be what you are looking for!
Cloudberry offers several backup products for almost any situation, from a single laptop to a Microsoft Small Business Server to your standard Windows server… they do it all. From what I have seen they have built in VSS support if you want to use it, but for my use case I left it off as I just wanted to push my documents and pictures to the cloud.
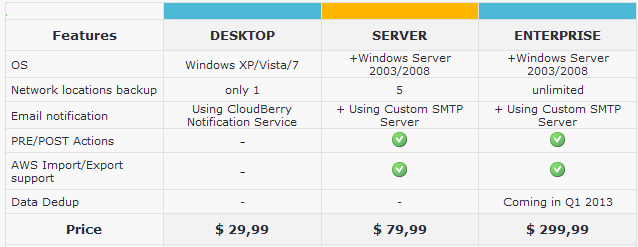
The three editions include Desktop, Server, and Enterprise. Below is the feature comparison and price comparison table, so far I have only tested the desktop edition but plan to test out the server edition soon.
For my testing I used two types of storage… one of which Cloudberry doesn’t do a huge job of promoting… just a simple CIFS share. The other type of storage I used was an Openstack Swift cluster running here in my home lab. Both worked great, and I am really looking forward to digging in to OpenStack and Swift in the future for this and other uses.
So easy to setup your mom could do it
Seriously, it is really easy and the download is under 10 MB in size. After downloading you run the installer and click next through a typical windows program installation. After installation has completed you must activate the software, a license key is emailed to the address you provide when you purchase.

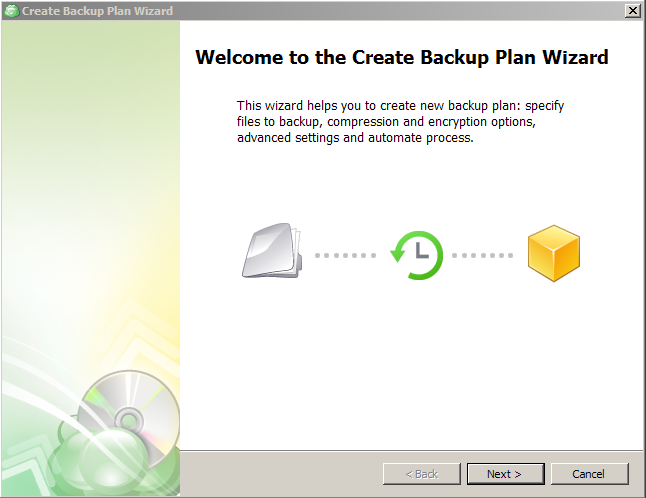
After activation we can use the Backup Plan Wizard to create a backup job.
Step 1. Select Storage Type
The first thing you need to do is select which type of storage service you want to use. In this screenshot I was using a simple CIFS share, in subsequent tests I selected OpenStack instead of CIFS.
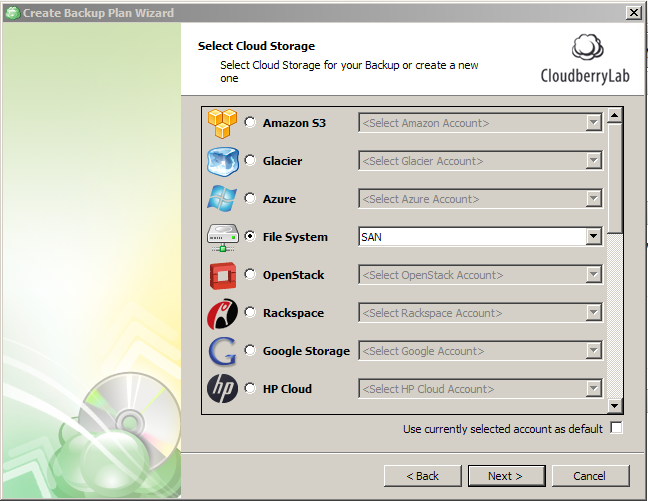
The only part of the CIFS process that was not clear was the authentication portion. In this wizard there is no place to put a username or password. But after the wizard is finished I will show you where to put those settings.
Step 2 – Storage Account Setup
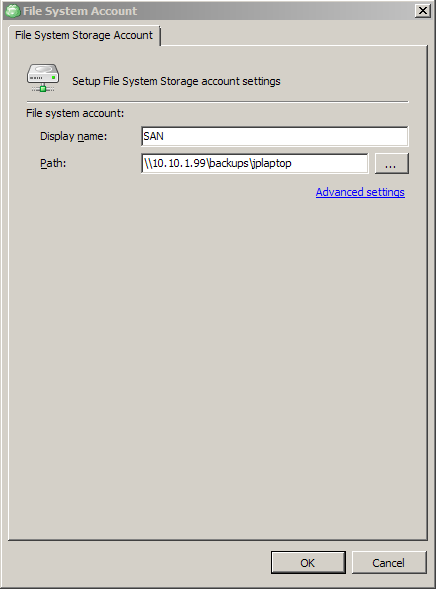
No matter what type of storage you plan to use, you will need to setup the account information the first time. For CIFS you have to enter the display name and the path. As you can see there is no place for credentials (which my CIFS share requires), but fill in the path and we will circle back to the credentials in a bit.
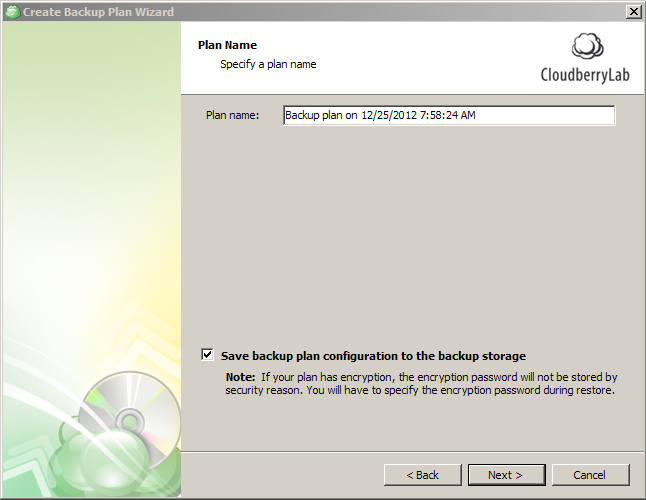
Step 3 – Name your Backup Job
Pretty Simple step… just pick a name
Step 4 – Pick Simple or Advanced Mode
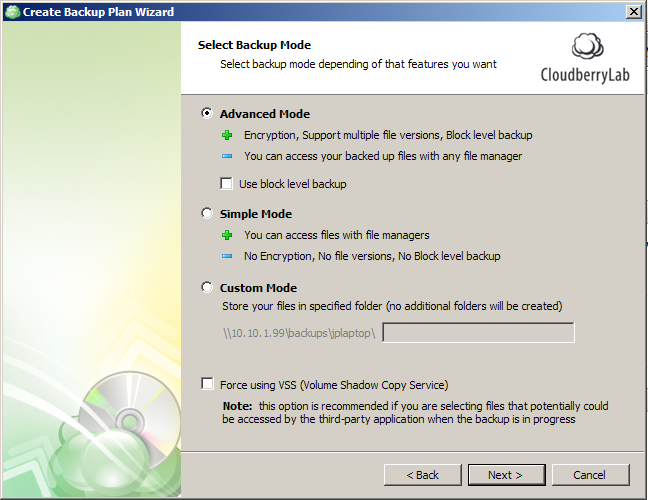
Note this is also where you force VSS to be used.
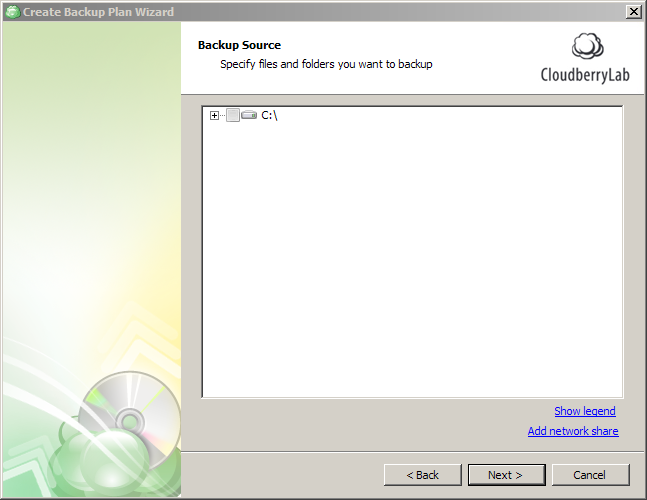
Step 5 – Select what you want to backup
Pretty easy step, just pick what on your desktop or server needs protected.
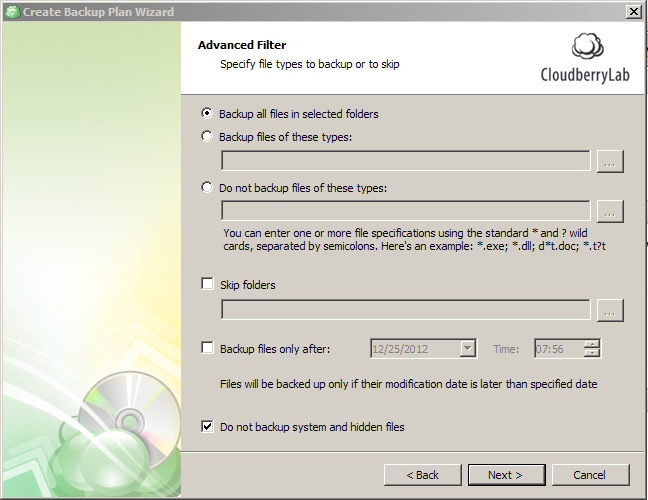
Step 6 – File Filtering
This isn’t required, but you can filter what files you do and do not want to backup. This might be a great option if you want to make sure not to backup music or something.
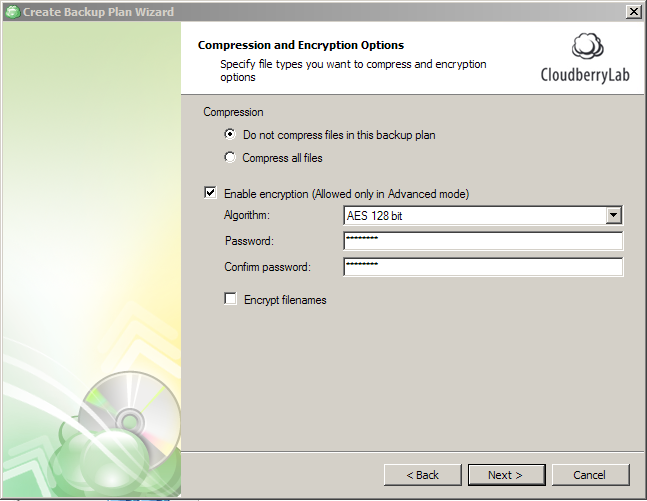
Step 6 – Compression and Encryption
Here we can select options to compress and encrypt our backups, since I’m going to local storage on a CIFS share i only chose to encrypt my backups and not to compress.
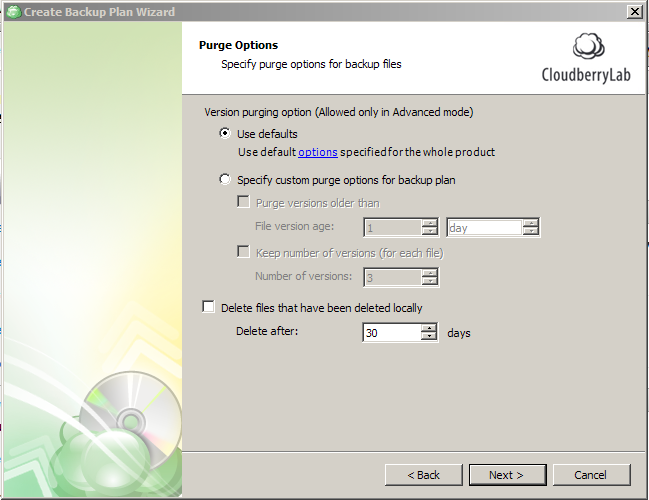
Step 7 – When to get rid of old stuff
As with everything we have to put a limit on the amount of history we want to keep… well i guess we wouldn’t have to, but chances are we will want to. That is done in this step.
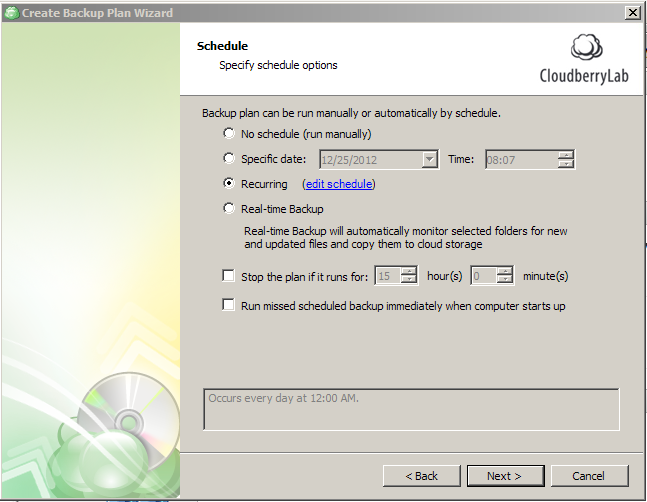
Step 8 – Schedule your backup
A common step for any backup software.
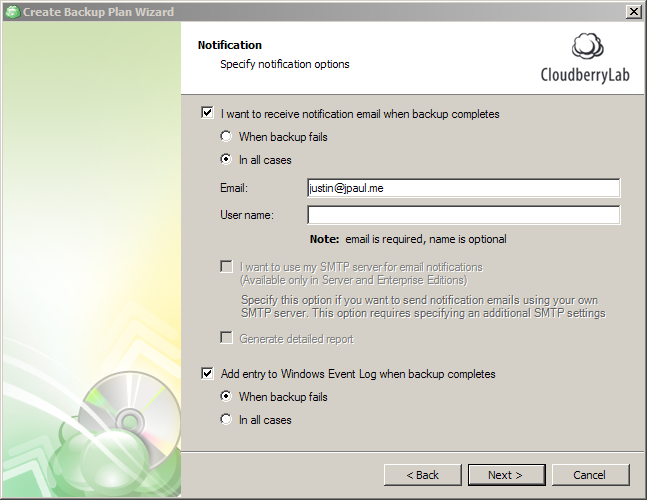
Step 9 – Notifications
This is one thing that I really like about the Desktop product… it doesn’t make me use my own mail server… in fact it wont let me use my own mail server. For a corporate user this would be annoying probably, but for me or a home user it makes setup quick and simple.
Step 10 – FInish
After Clicking next on the notifications page you get a summary page that will allow you to review your settings before clicking finish. (Very Veeam like 😉 )
CIFS Credential Setup
Remember I said the storage account wizard did not have a place to put CIFS credentials… well after some digging I finally found where to put them.
- Click Tools from the main Cloudberry Backup window (at the fop)
- Select Network Credentials
- Click Add
- Put in the path (i just put in the CIFS server in \server ip format
- Enter username and password and click test
That should take care of it. I’m not sure why they didn’t put that step in the wizard, but im sure a future release will make it more streamlined.
Monitoring a Job
So after you create a job we obviously want to know how to monitor the jobs
From the main window of CloudBerry Backup Click the “Backup Plans” tab and you will see all of your jobs listed. You can expand the jobs to see which ones are running and what their status is.
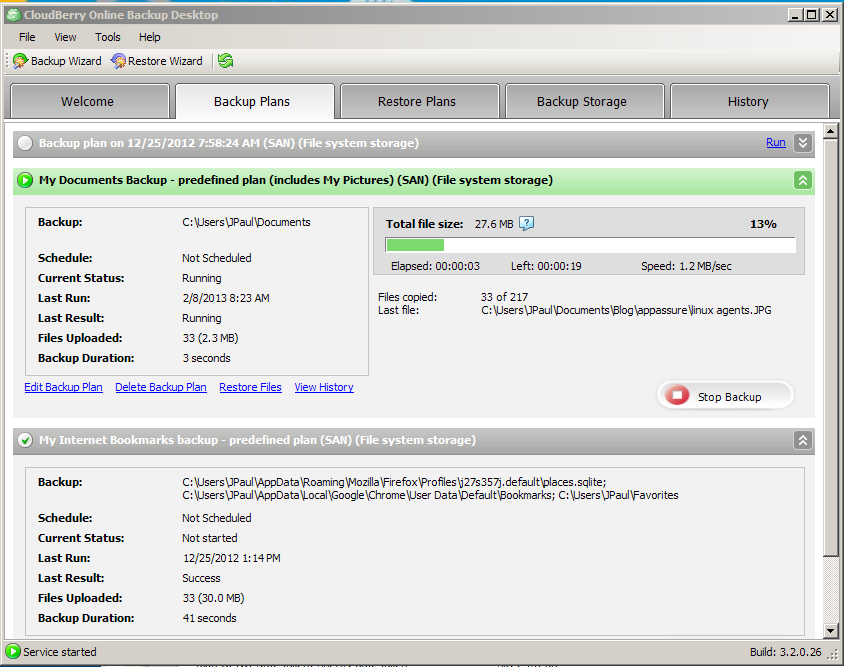
If a job fails there is a link that appears in the “Last Result” area that lets you know what files were not able to be backed up and why.
Restoring a File
Probably the most important part of a backup product is to be able to successfully restore files that were backed up. So lets take a look at the procedure to restore some files.
First Click on the “Restore Plans” tab and you will probably just see a white screen since you have not restored anything yet. Click the Restore Wizard at the top.
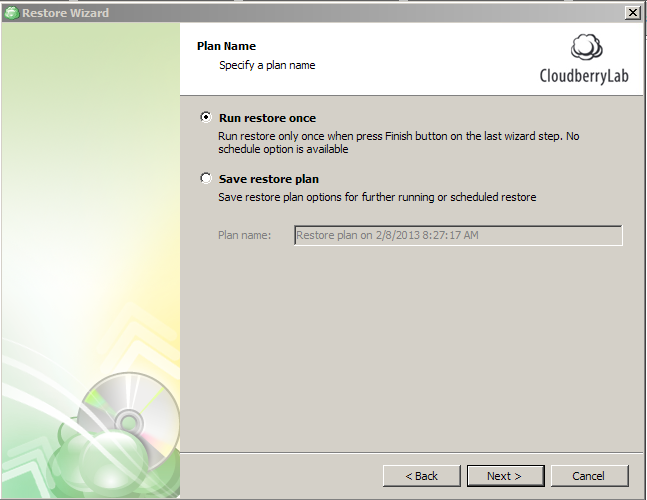
Step 1 – Select whether or not to save the restore plan.
I guess if you are dumb enough to delete the same file over and over… you might want to save the plan.
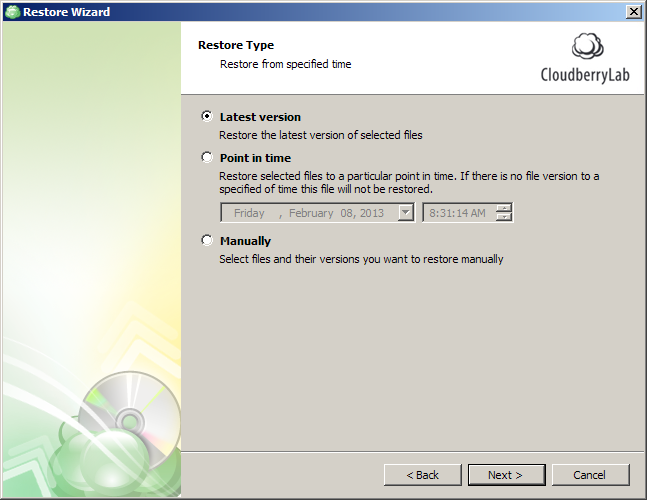
Step 2 – What version should we restore
Sometimes you don’t want the latest version, so here you can choose which one to restore.
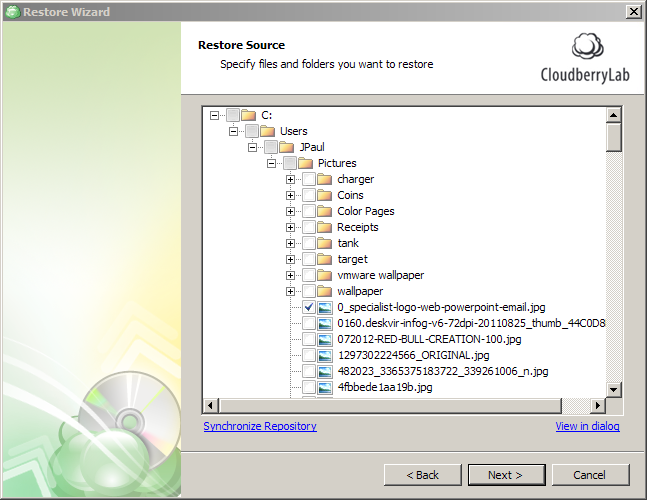
Step 3 – Select the files you want to restore
Just like when you were selecting what to backup, here we select what we want to restore. If its not in the list… it wasn’t backed up…
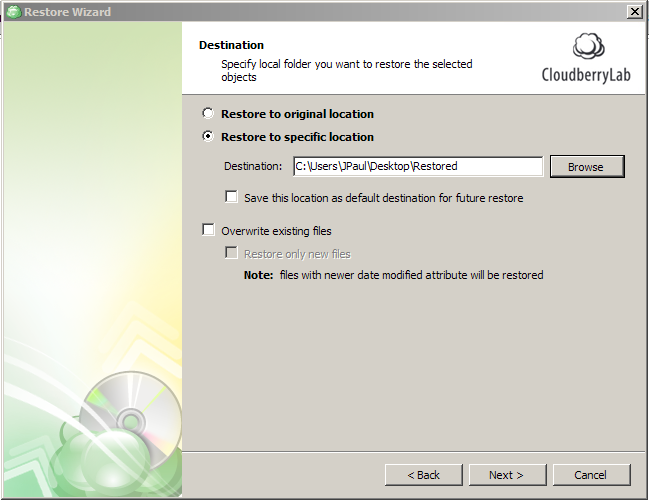
Step 4 – Where to restore to
Next we need to specify if we want to restore to the original location or somewhere else. I picked a new folder on my desktop so I could easily file my file.
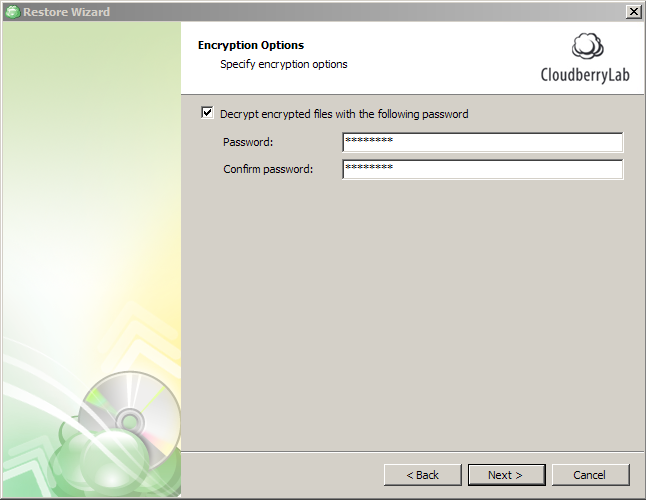
Step 5 – Uh Oh! did you remember your encryption password ?
Enter your password if you encrypted the backup job
Step Finished – After that we just need to view the summary step and then click finished. And the job will run and dump off your files where you told it to.
Cloud Storage
I did test Cloudberry out with a local OpenStack Swift Cluster that im running as well, and I’m happy to report that it worked just like advertised. The only hang up’s that I had were finding out the right URL and credentials to use so that I could authenticate. But after figuring that out I was all set…. I’m sure if I were more experienced with Swift, as well as if i had setup swift from scratch and wasnt using a canned developer setup it owuld have been much easier too.
Overall I like Cloud Berry a lot, and it has been running on my personal laptop for over a month, and at this point I am just trying to decide if I want to put together an OpenStack Swift Cluster at the colo and start using it for family and firends backup as well, or if I should just use Amazon Glacier or one of the many other commercial storage platforms out there.
Oh and one last note, If you are using Amazon S3 Cloudberry also has the option to archive backups to Glacier for long term cheaper storage as well… very cool.
![]()


Interestingly, that GUI looks identical to the new Veeam Cloud solution. Wonder which came first or they both have rebranded another product!
The cloud berry software has been out for a while, and if you do some investigation Cloudberry is partially owned by the owner or Veeam, and sits in the same building in columbus, ohio as Veeam HQ. 😉
Aha! Nice! Love the review, always enjoy reading your blog! Keep it up! 🙂
I purchased Drive Server Edition. While the product works pretty good there are a few issues. My biggest complaint is about the lack off support. Tickets and Forum messages are not responded to for a very long time, if at all.