Intro to vCloud Director Hands on Lab
Lab Duration: Approximately 15 minutes
Lab Skill level: Basic
Overview
In this lab you will explore the vCloud Director web interface and get familiar with its capabilities and features. This lab is meant as a starting point for those who have never used vCloud Director before. When you are finished with this lab you should know enough about vCloud director to be successful in the rest of the hands on labs, which do not explain much about vCloud Director.
Prerequisites
The only requirement for this lab is that you have received the welcome email with your access credentials.
Tasks Include:
- Components of vCloud Director
- Logging in to vCloud Director
- Adding a vApp from a Catalog
- Creating a vApp from Scratch
- Renewing a vCloud Lease
- Restoring vApps that have expired
- Starting and stopping vApps
- Deleting vApps
For the best lab experience…
For the best experience use a device with two monitors. Ideally you would use one screen for displaying this lab manual, and the other for the VMware View Desktop/vCloud Lab environment. If two monitors are not available, other suggestions include using an iPad or other tablet for the lab manual or working with another person and using their device for one thing and yours for the other. Printed lab manuals may be available if none of the above are possible.
Components of vCloud Director
What is vCloud Director?
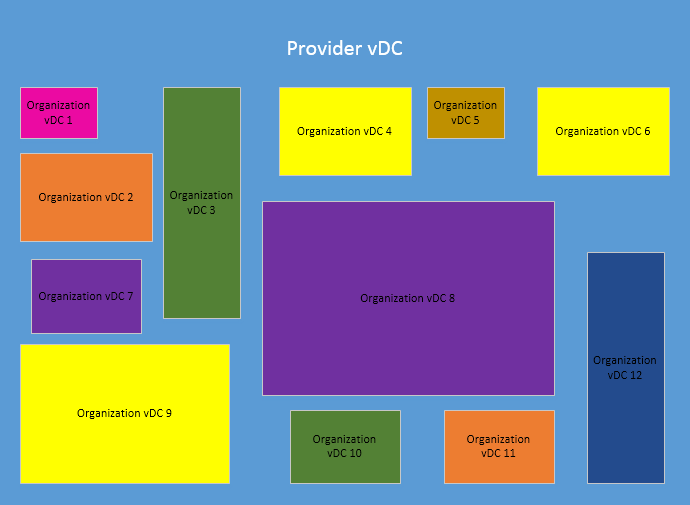
vCloud Director is a web based interface that allows users to consume resources from a cloud without having intimate knowledge of how that cloud is built. vCloud Director takes VMware vSphere clusters and creates a “Provider Virtual Datacenter” or Provider vDC. From that provider vdc a vCloud administrator can then give many users or organizations chunks of the resources, while keeping each organization isolated from the others. These chunks that are assigned to organizations or users are called Organization Virtual Datacenters, or Org vDC’s.
If you’re lost already don’t worry…think of a provider vdc as an apartment building and an Org vDC as a single apartment in that building. Taking the analogy a little further, think of the infrastructure in an apartment building… there is electrical, plumbing, HVAC, etc … all of which the tenants use. But they use them without any knowledge of how they work, or where the resources come from. This is exactly how vCloud Director serves up cloud resources.
To organize virtual machines inside of vCloud Director, we use what are called vApps. A vApp is nothing more than a folder for virtual machines that are related, all of the labs are organized into individual vApps. This organization is what allows users to deploy the lab environments with no additional configuration.
vCloud Director also uses several types of networking… vApp networks are virtual networks that only allow traffic to flow between VM’s in a vApp. Another network type is an Org Network, this type of network allows interconnecting of many vApps together and it also allows virtual servers inside of an Org vDC to connect to the out side world (IE the internet, or a DMZ, or a VPN, etc).
More information on the components of vCloud Director, and more advanced features will be discussed later on, but can be skipped unless you are interested in vCloud Director itself.
Logging in to vCloud Director
All lab users will have received a welcome email, in this email is your username and password as well as a URL used to access vCloud Director. You will need to make sure when you type in that URL that it is EXACTLY as it appears in the email as it is case sensitive.
All vCloud Director URLs are in the format of http://www.vcloudlab.net/cloud/org/<Org Name>/
For security reasons vCloud Director will not tell you if the org name you entered does not exist, it will just continually tell you that your username or password is invalid, so make sure the URL is right.
VMware View VMware View is also part of the hands on labs and can be used to simplify the process of getting started with the labs as well as provide a much smoother experience. Information on how to connect to the HOL Vmware View server was also in your welcome email.
If you choose not to use a VMware View desktop there are several things you will need in order to use vCloud Director.
- Adobe Flash
- vCloud Client Plugin
- Popups disabled
Therefore if you use a View Desktop, all of the requirements have already been taken care of, and all you will need to do is install the VMware View Client.
Logging in
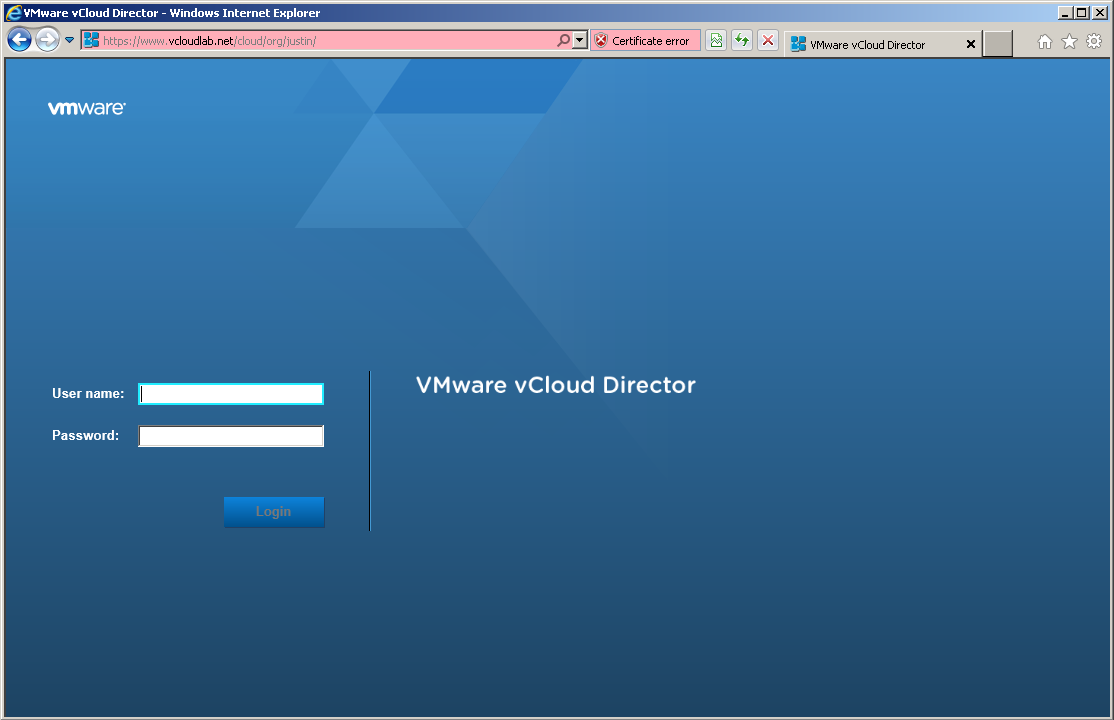
Ok so now that you should be logged into a View Desktop, or have all of the requirements installed on your desktop or laptop we can proceed to login. Open up a browser and go to your unique vCloud URL, you should see a blue login page.
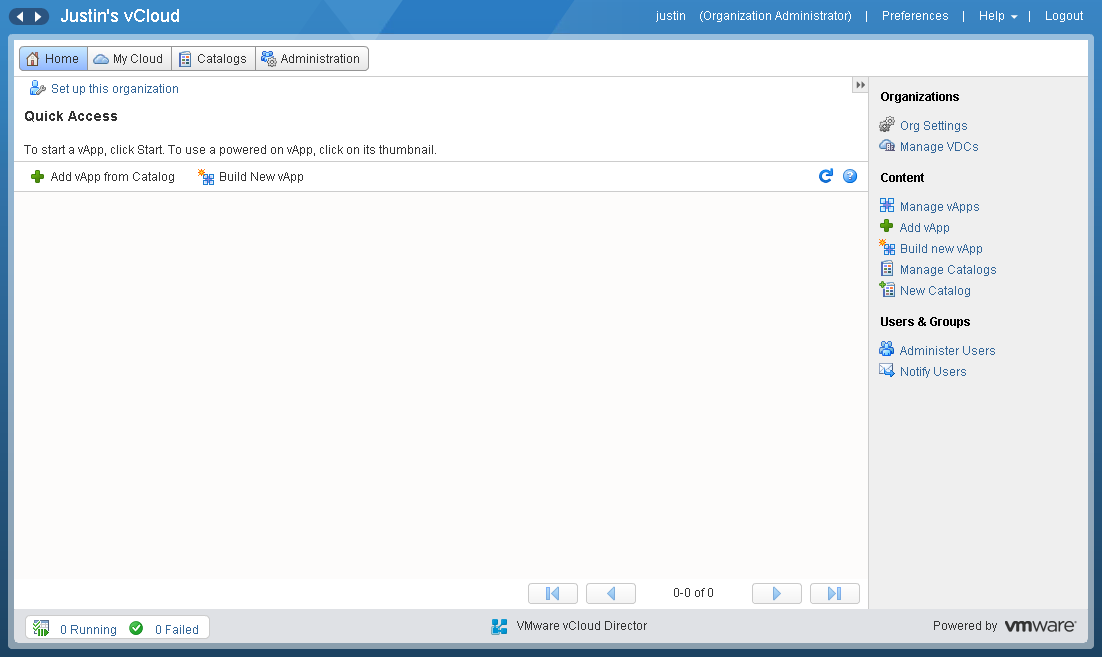
Enter the username and password that was in your welcome email. After logging in you should see your Organization home page.
You have successfully logged into vCloud Director!
Looking around
While we are logged in let’s browse around and get familure with the vCloud interface. At the top we have 4 buttons that will take us to various places. The first button is the home page where you currently are, the second button is the “My Cloud” button.
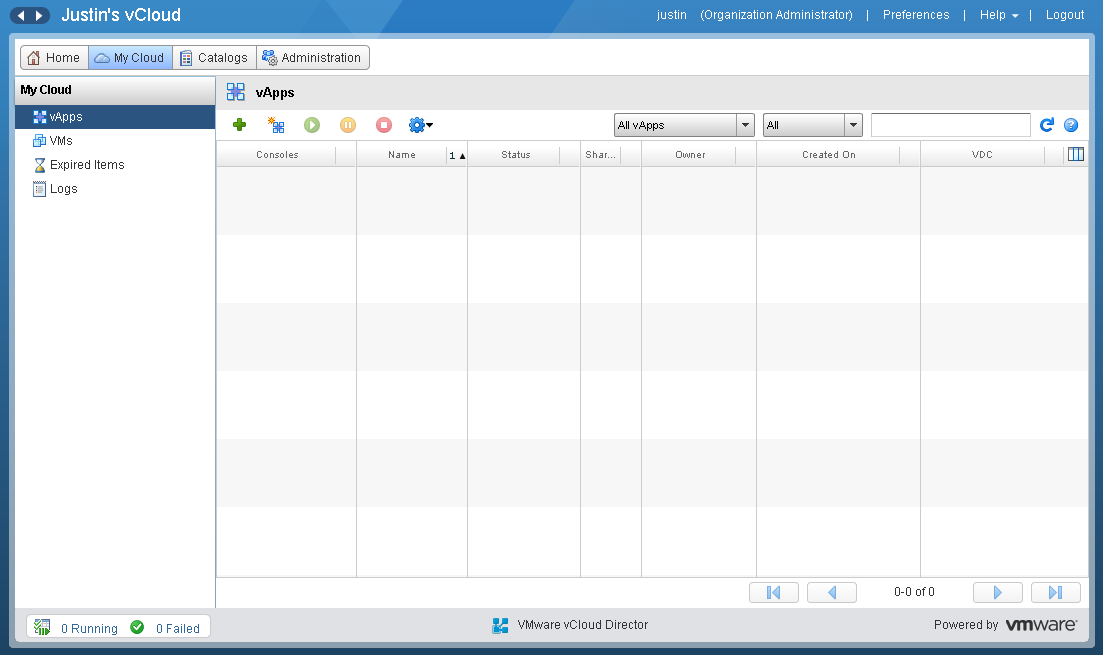
The My Cloud page will show you a list of vApps as well as individual VM’s and Expired Items. Most user accounts on the HOL vCloud will have time limits on items. This means that if you do not request more time your vApps will be put into a suspended state and moved into the Expired Items folder. This is essential in order to keep resources free for future users. However if you come back later and want to continue work on a lab you can power it back on by going to the expired items section and restoring them.
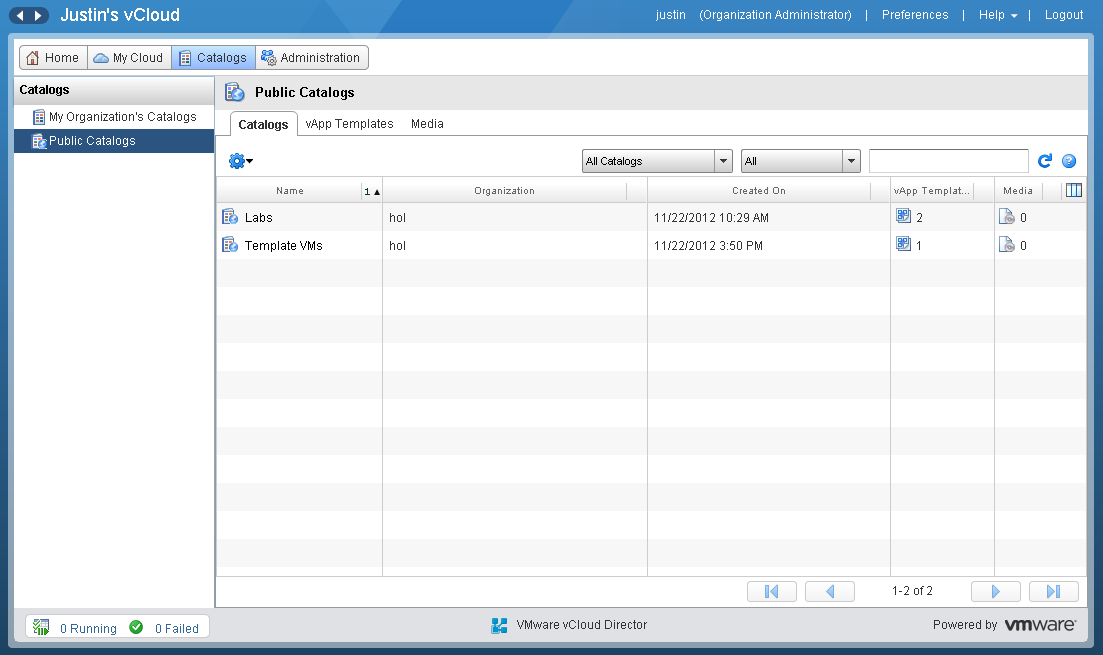
The next tab is the Catalog tab.
The Catalog tab is where you can find vApp templates. These templates have been created by the lab administrators and contain the lab virtual machines as well as bare bone VM’s that can be used to build your own custom labs.
When you go to deploy any of the labs you will be using templates from a catalog.
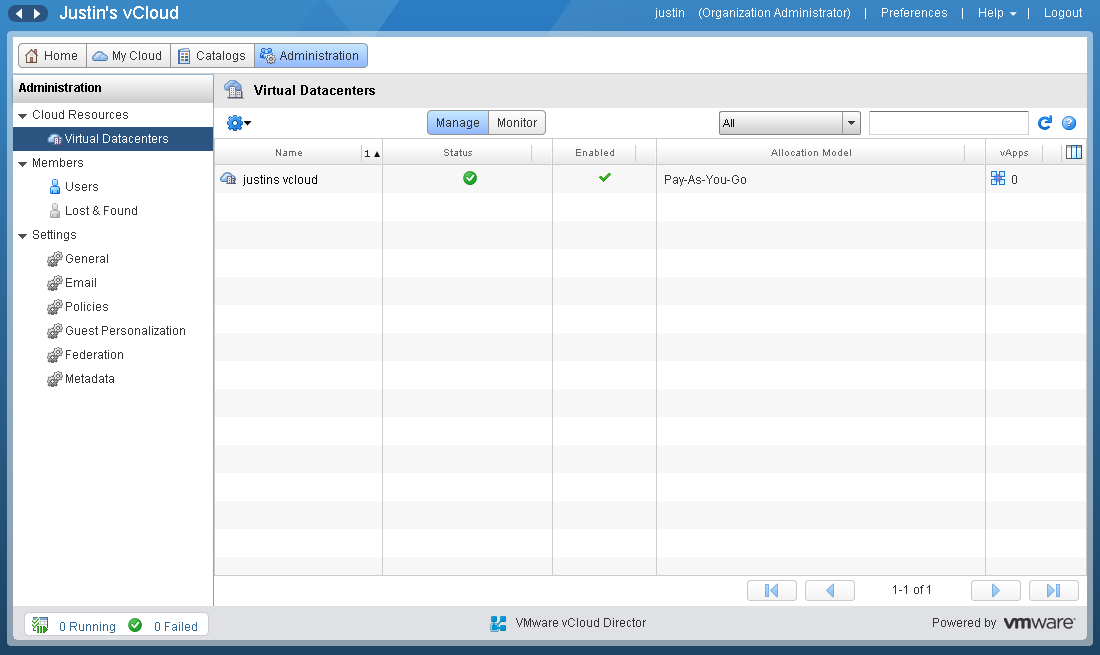
Lastly we have the Administration tab
There isnt much you will need to do from the administration tab in the labs, however if you were using a vCloud service provider to augment your private cloud, you may use this tab to create new users for your organization as well as setup email preferences and other administrative actions.
Adding a vApp from a Catalog
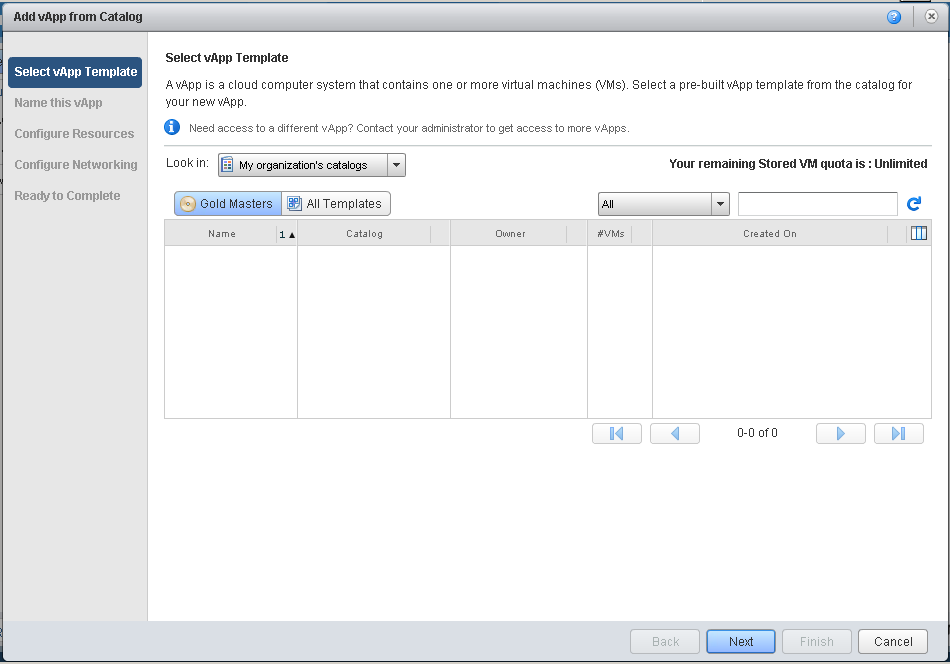
As stated before all of the labs are packaged as vApps, so the first thing that each lab will ask you to do is to deploy the lab vApp. To do this go back to the Home tab at the top, then click “Add vApp from Catalog”.
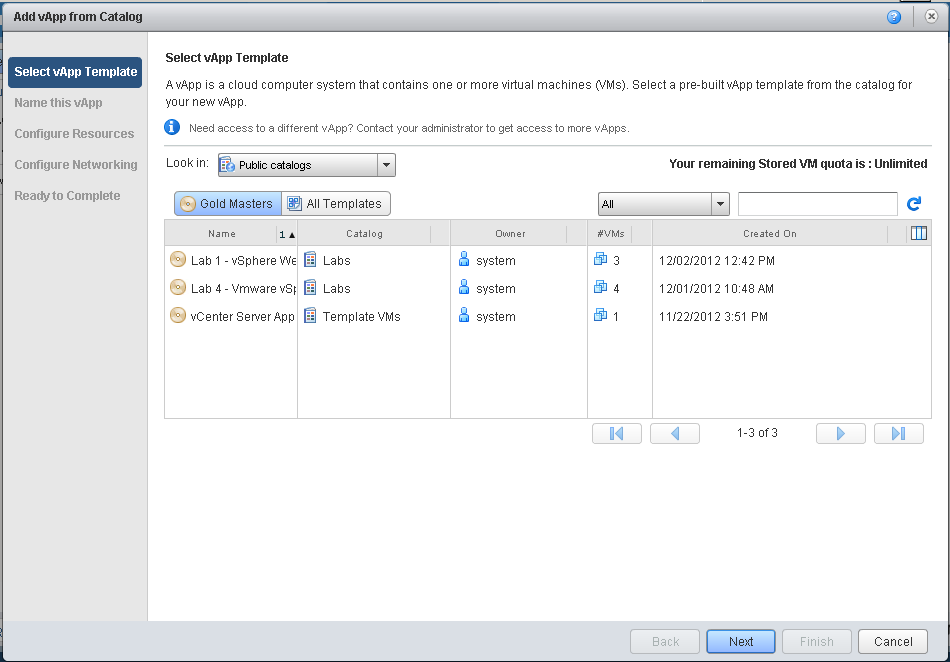
On the first page of the wizard you are only shown vApps from your organizations catalogs. However the Labs are in a public catalog called “Labs”, so to see them you need to click the drop down menu called “Look in” and select “Public Catalogs”
Now you can see the Lab vApps. This is where you would select whichever vApp corresponds with the lab you want to take. In a production vCloud environment the provider may have public vApps for things like Zimbra, or Windows Servers, or any other frequently used configuration.
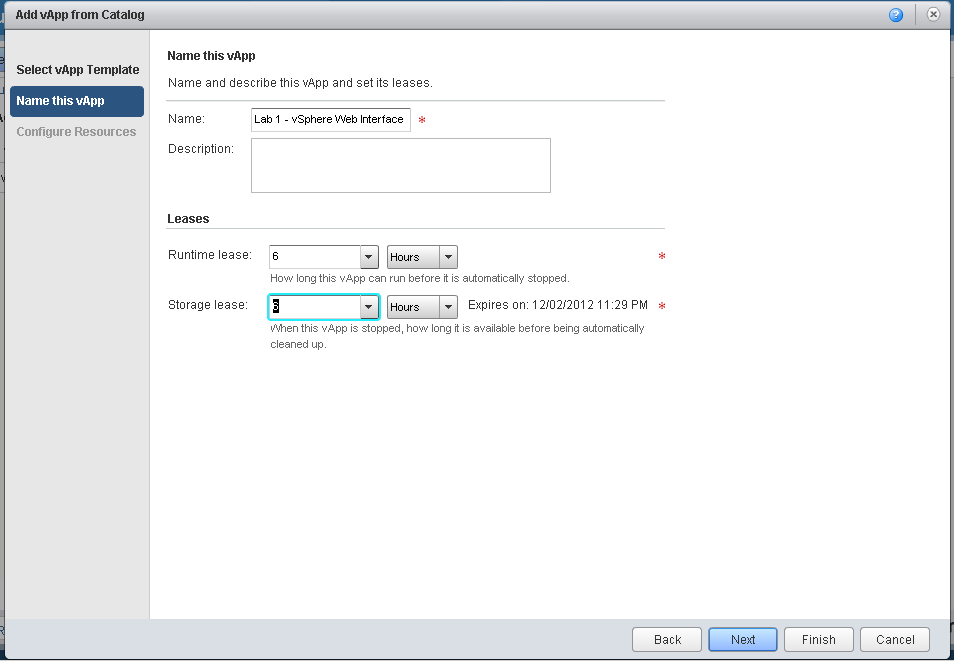
After selecting a vApp and clicking Next you will be asked to name the vApp, this can be anything you like as long as its not the same as another vApp in your organization.
This page also contains the Lease times for both running time and storage time. In a production environment you will probably not be restricted and could select “Never Expire” for both values, but all test/dev environments should have lease times so that if a developer turns on a vApp and forgets about it, or finishes using it but doesn’t turn it off… it will be turned off automatically and release those resources back into the pool.
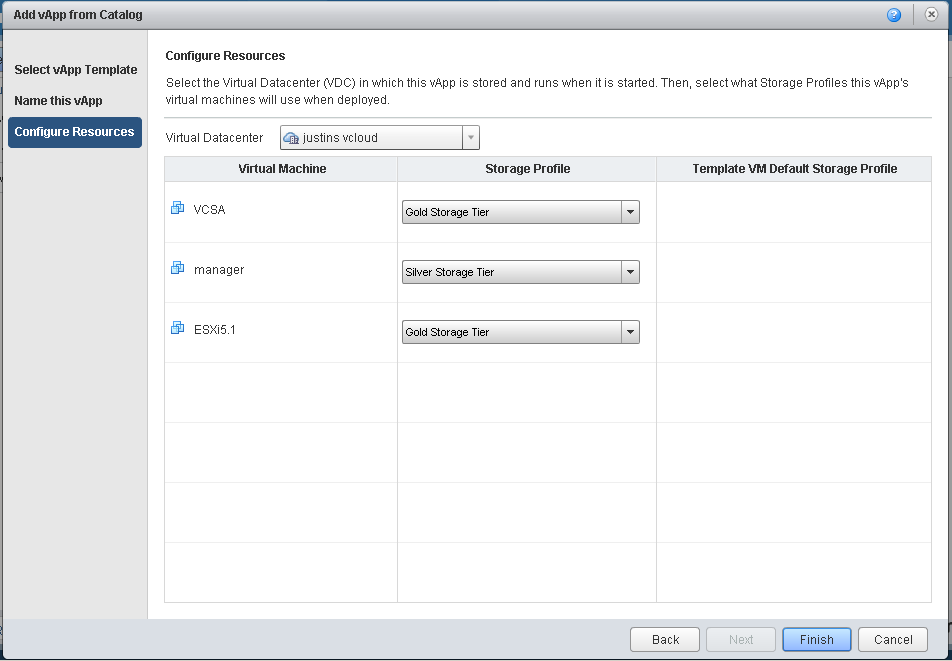
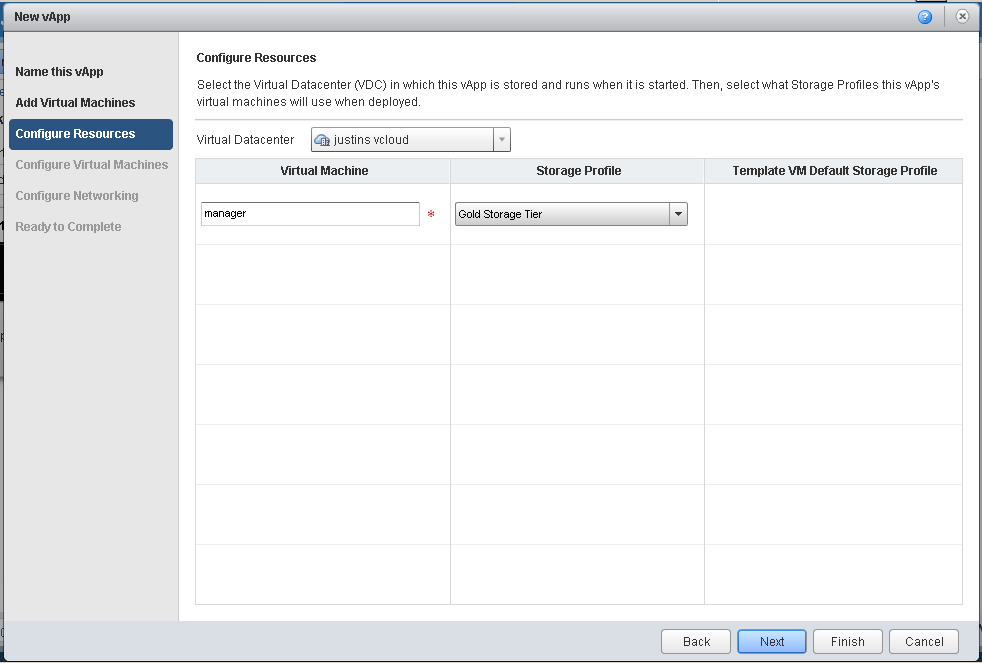
On the final page of the wizard you have the option to choose which Storage Profile you want each VM to live on. For lab purposes you can leave whatever the default is, but if you were deploying vApps to a production cloud these settings may be very important because typically better/faster storage tiers cost more than slower tiers.
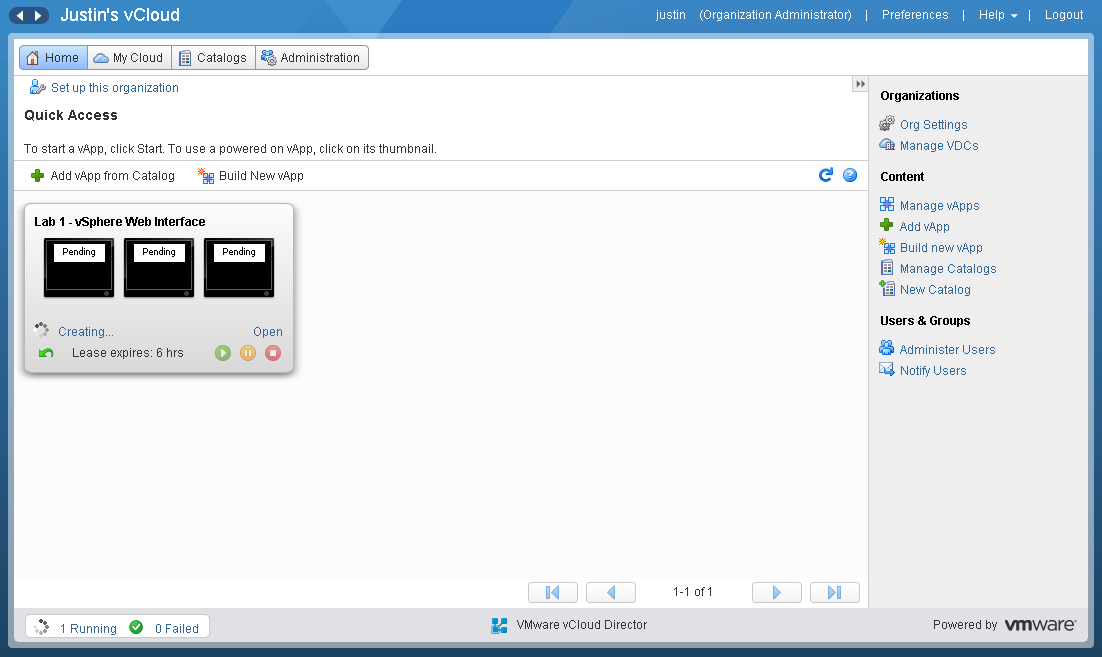
After clicking Finish your vApp will begin to deploy. This can take from just a few seconds to several minutes depending on the size of the vApp and what type of storage vCloud Director is deploying it to. Once it is finished you will have a new vApp box on your Home page.
Creating a vApp from Scratch
This is probably the most popular way to get up and running on vCloud Director if you are using a vCloud Service provider or just starting out. However in the labs creating a vApp from scratch is really only needed if you are trying something out, or if you are building your own lab.
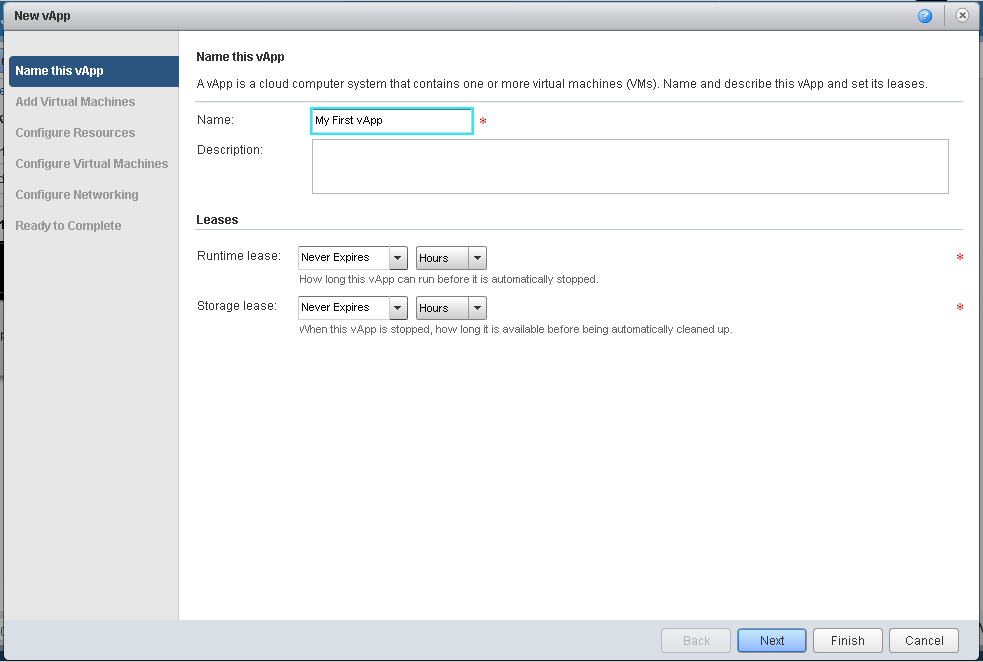
To create a new vApp make go to the Home page of your vCloud Org and click “Build New vApp”. This will start the new vApp wizard, on page 1 of this wizard you will be asked to give your vApp a name and pick a lease expiration time.
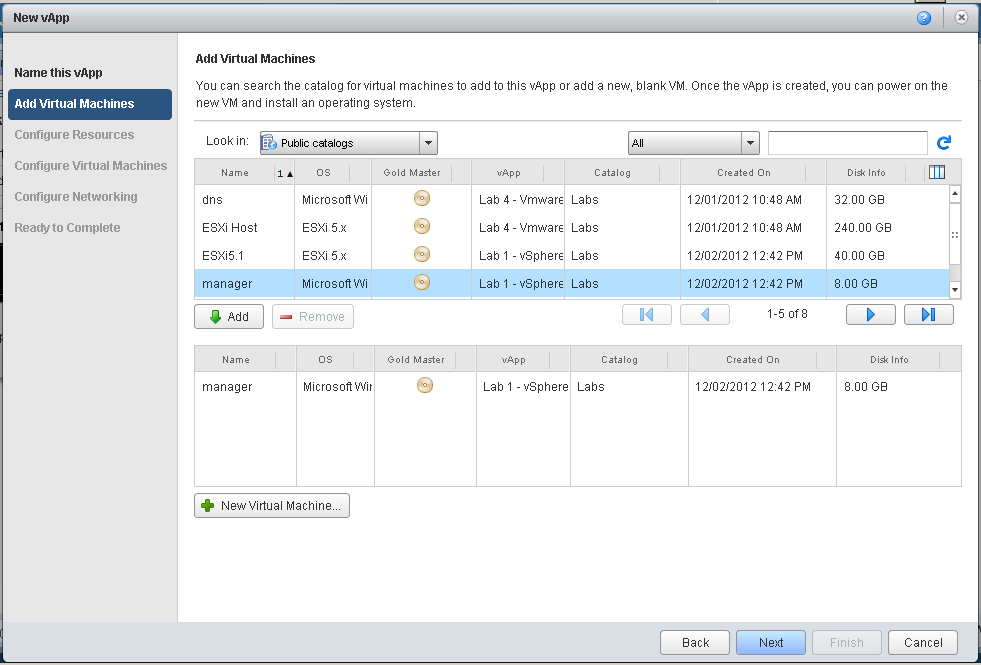
Click next, and on page two we are asked to add Virtual Machines to our vApp. We have a bunch of options here; we can add virtual machines that are used in other vApps be selectin the “Public Catalogs” from the “Look in” drop down or we can select VM’s that are currently only available in our organization, and lastly we can click the “New Virtual Machine” button at the bottom to create a brand new VM. You do not need to add all VM’s now, you can add more to your vApp later as well.
After adding all of the VMs you want, click next. On page 3 we are asked to assign each of the VM’s we added to a storage profile.
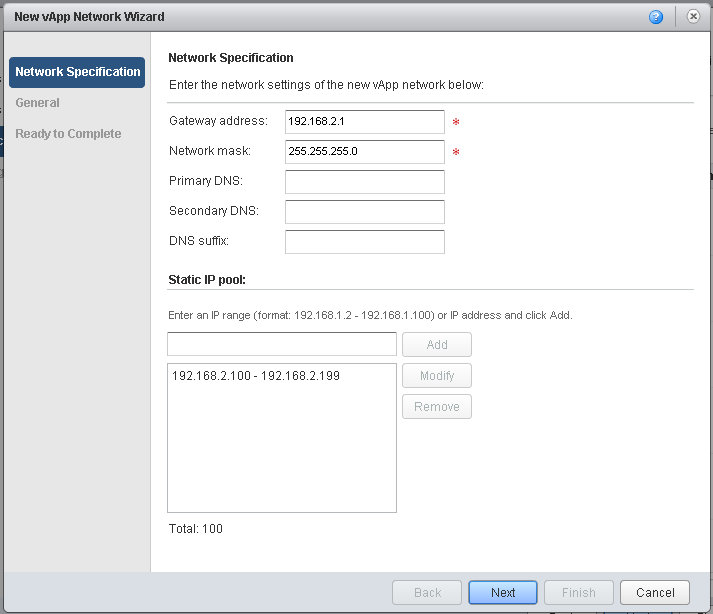
On page 4 we then assign each VM to a virtual network, here we can select an existing Org Network, or click add new to add a new vApp network. In the lab almost all vApps will not have internet access and a vApp Network is all you will need. However in some special cases the lab administrators may create a external network for your organization and you could select that too. An external network is a network that connects to the outside world. It might be the internet or it might be a stack of physical lab equipment like a POE switch with IP phones, or even a deduplication appliance.
If you select “Add new” you will see the following box which will allow you to pick the IP scheme for your network.
After clicking next a couple of times past more network options you can click finish and your new vApp will be created.
Renewing a vCloud Lease
Leases ensure that no one Organization or user can forget about a vApp and let it continue to consume resources even after the user is finished with it. While production vApps normally will not have leases, test/dev environments and the hands on lab do.
However even if your lease is expiring it does not mean that you have to stop using your lab. All that is needed if for you to reset the lease.
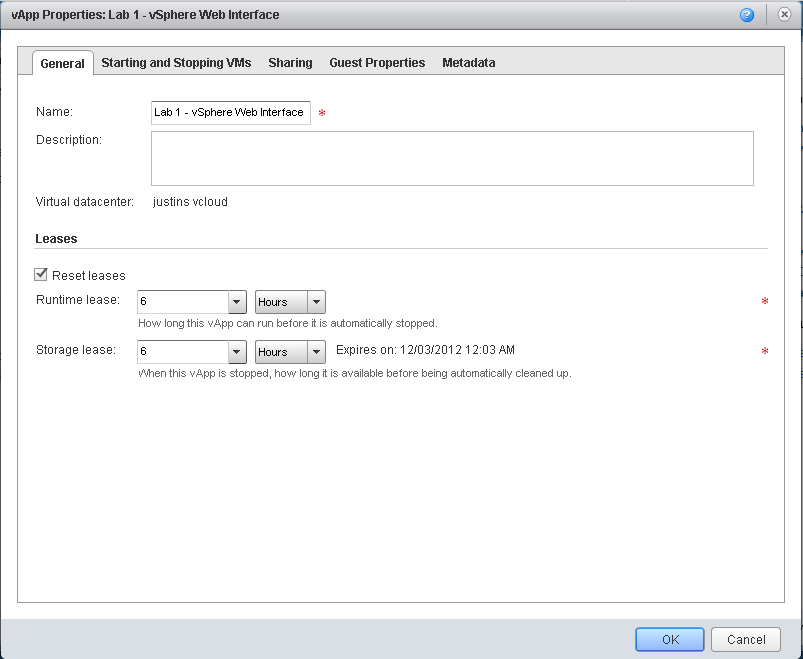
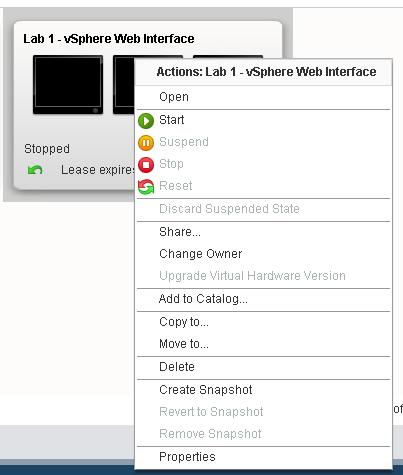
To reset the lease go to your Home page and right click on the vApp you need to renew, then select “Properties”. On the General tab of the properties dialog box you will see the Leases section.
Click the checkbox next to “Reset leases” and then select a time from the appropriate drop down boxes. Then click ok, your lease has now been extended.
Restoring vApps that have Expired
asdasdasd
Starting and Stopping vApps
Starting and stopping a vApp can be preformed by right clicking on a vApp, and then selecting whichever action you want to preform. Please not however that if you Power off a vApp it will by default power off all VM’s in that vApp without properly shutting them down. So if you want to stop a vApp and do it gracefully you need to do a guest shutdown on each of the VM’s just like you would do in vCenter, and then power off the vApp.
Deleting vApps
After you are finished with a vApp or have completed a hands on lab, you should power off the vApp and then delete it. The vApp must be powered off for a delete to take place.
After powering off the vApp right click on it and select Delete. This will permenantly delete all VM’s and networking associated with the vApp.
![]()

