What a container registry does
Even a single docker host machine has to get its images from somewhere. That somewhere is a container registry. A container registry is typically a public server that allows multiple people to share these images.
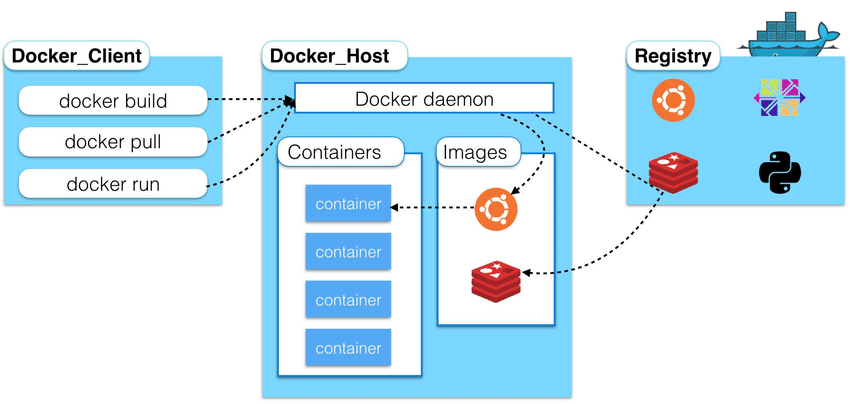
Container images are sort of like a zip file with everything a particular application (or microservice) needs to run on a docker host. A developer will typically start with a Linux image, then start layering on software. This process is called “docker build”.
Once the developer has built a docker image they will push it to a container registry so that it can be used by docker hosts.
Docker hosts then “pull” images from the container registry when a user runs the “docker run” command. Developers also pull images from a registry when they want to build another image.
Why you might want a private container registry
Sharing is a good thing, but sometimes software needs to be private. Trade secrets and intellectual property are two reasons why someone might want a private repository. But sometimes speed, customization, and security might be drivers too.
Why Harbor?
Harbor is an Open-Source project which was purchased by VMware. It still offers Harbor as open-source, and has made it really easy to get going.
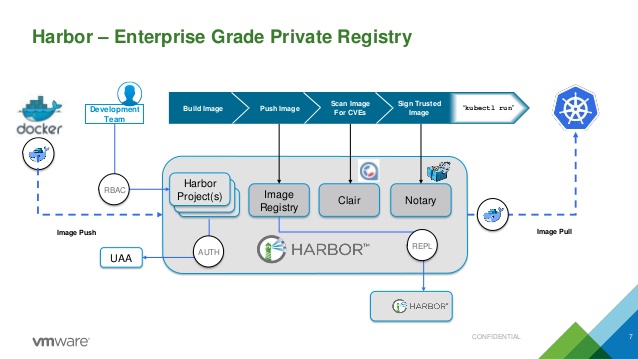
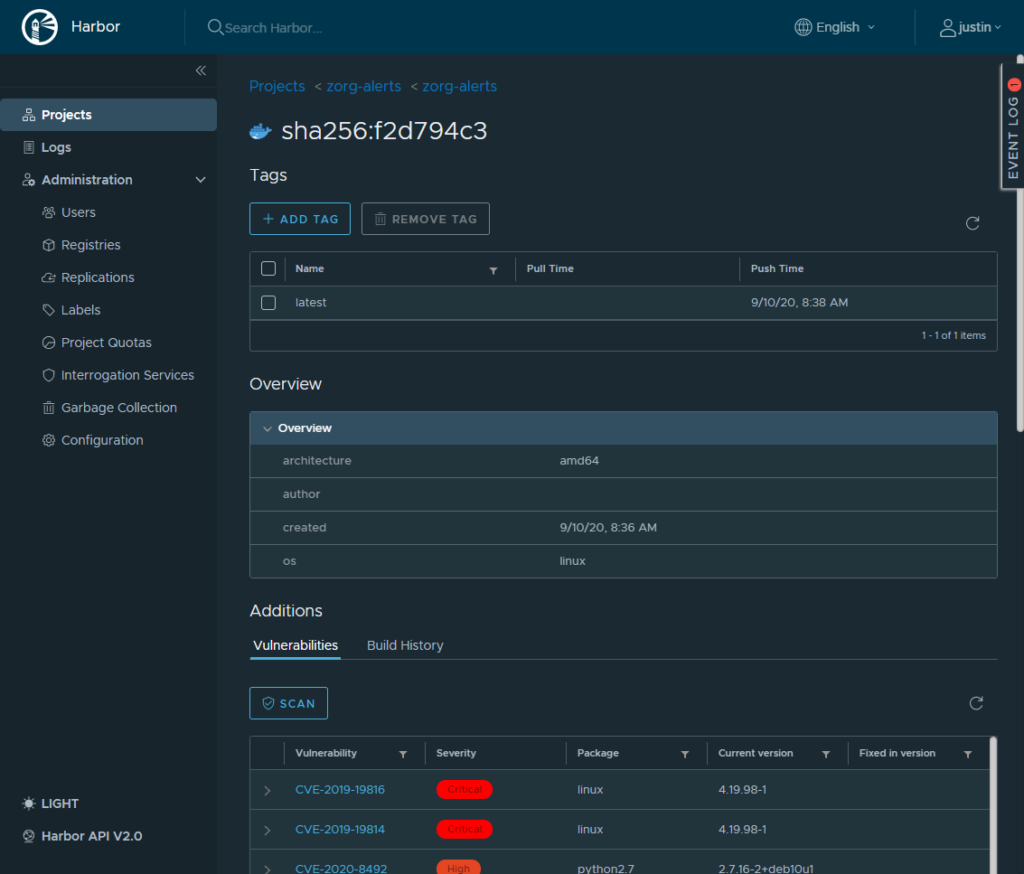
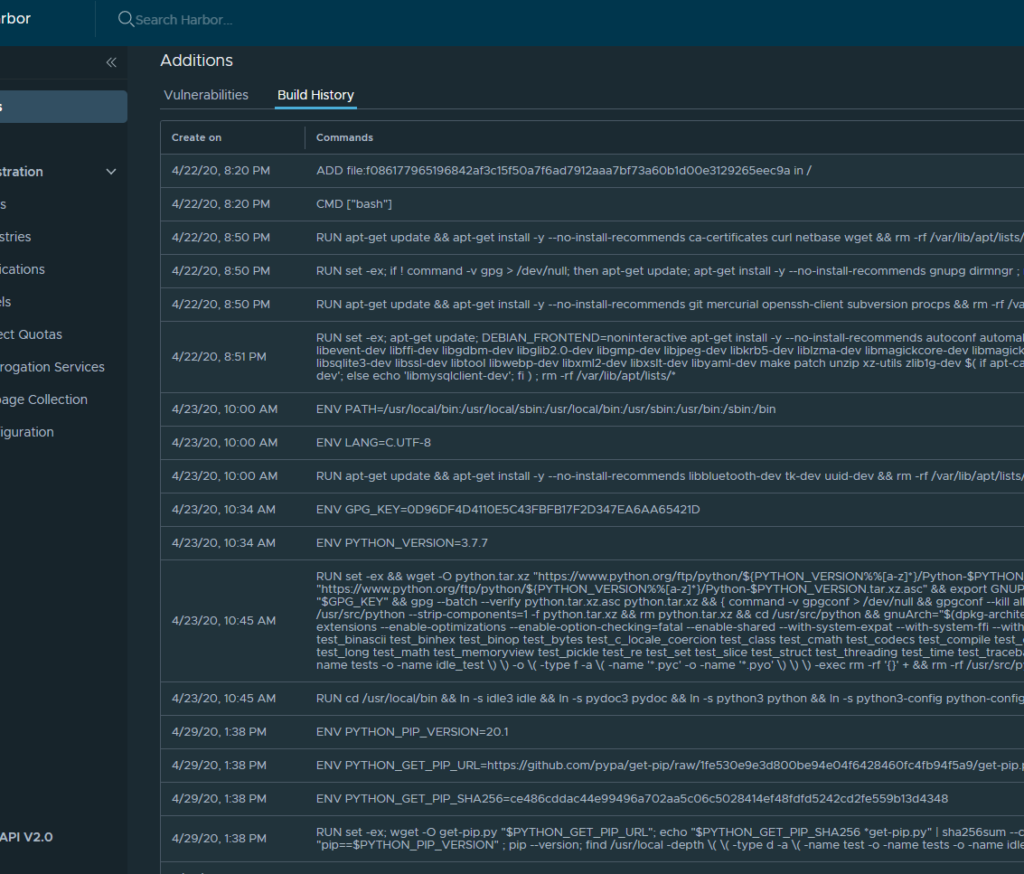
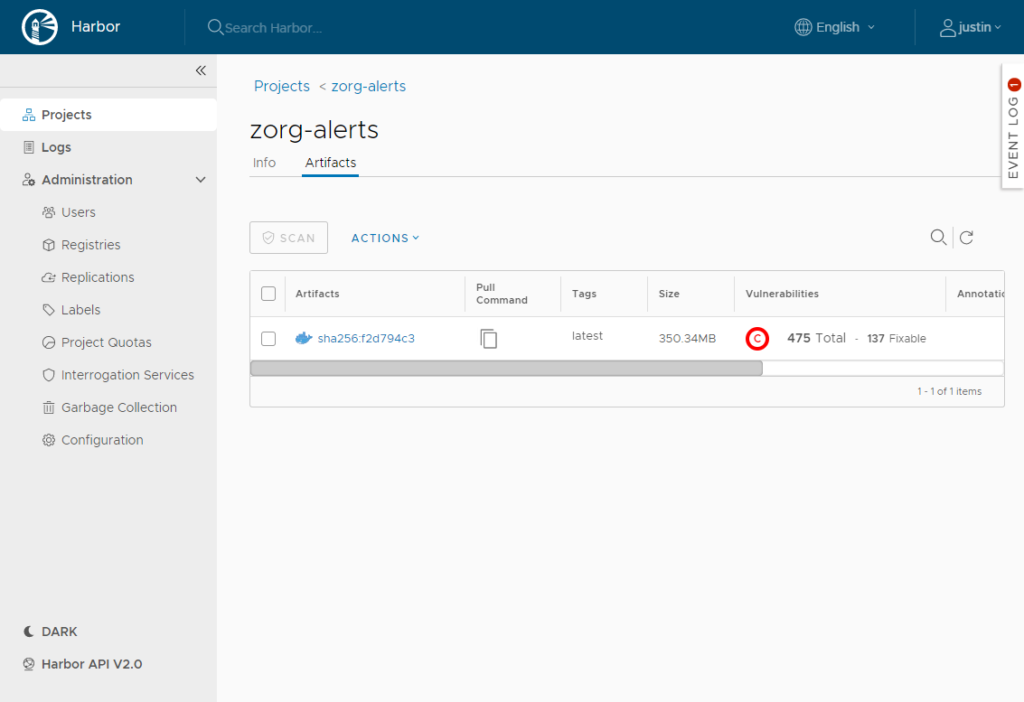
As you can see Harbor encompasses not only a container registry but also can do vulnerability scanning and trust signing of your docker images. It also has a really smooth web interface that allows you to do things like RBAC, project creation, user management and more.
Prerequisites
I will be deploying my Harbor Container Registry to an Ubuntu 20.04 server. Aside from the basic install of the operating system we will also need Docker, docker-compose, and openssl installed on the machine.
First, check to see if openssl is already installed:
openssl version
If it returns a version, then you should be good to go. If it does not you can install it with:
sudo apt install openssl
Next, we should install docker and docker-compose:
sudo apt install docker-compose docker.io -y
(If you prefer having the latest and greatest docker-compose, you can follow the DigitalOcean how to guide here.)
Before going too much further we also need to configure DNS. If you plan to use Harbor internally, simply configure a DNS A record to point to the static IP address you have configured on the Ubuntu server. If you plan to use this repository globally, you should also create an A record on your public DNS servers too.
Signed SSL
A signed SSL certificate is also needed in order to get HTTPS working. If you are using Harbor externally, this is a must have.
LetsEncrypt is a great option if you do not want to purchase a certificate, but it can be pretty involved to get it going, so I stuck that in a seperate article.
If you choose to purchase a certificate, or if you have a wildcard certificate for your domain, the Harbor documentation has a great explanation on how to get going.
Download Harbor
At the time of this post the latest release of Harbor is 2.0.2, but you should check to see what the latest version is when you install, then update the link as needed.
Download Harbor to the machine:
wget https://github.com/goharbor/harbor/releases/download/v2.0.2/harbor-offline-installer-v2.0.2.tgz
Next extract the package:
tar xvf harbor-offline-installer-*.tgz
cd into the harbor directory:
cd harbor
Configure Settings
Before installing Harbor we need to configure the settings YAML file that will be used during installation.
cp harbor.yml.tmpl harbor.yml
nano harbor.yml.tmpl
Inside the YAML file set your FQDN to the record that you created earlier. In my lab it will be hcr.jpaul.io
Install Harbor
Once you have your SSL certificate in place and your other settings in place you can start the installer.
sudo ./install.sh --with-clair --with-chartmuseum --with-notary
This will install Clair (the vulnerability scanner) as well as the Chart Museum plugins as well as Harbor.
The installation wizard will check for docker and docker-compose. It will then create the customized files it needs and then finally deploy Harbor to docker.
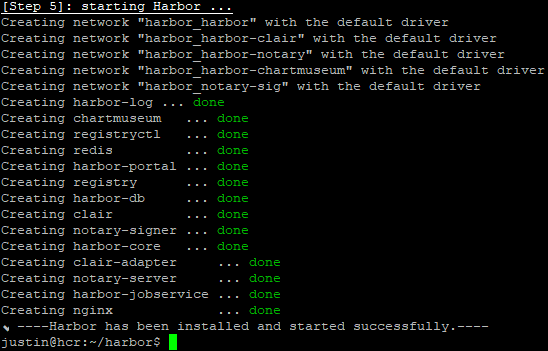
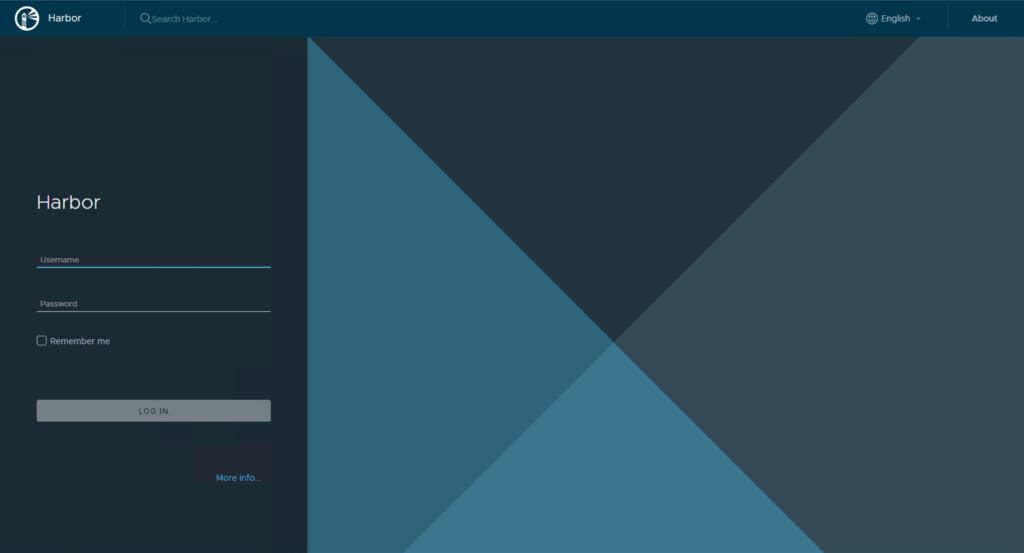
Once it is complete you can login to your new container registry.
In the next post I’ll show you how to use your new Harbor install to push images, scan them for vulnerabilities, and then use them for deployments.
More Screen Shots
![]()


I think, what we need to edit is harbor.yml, and not harbor.yml.tmpl. Just a typo I guess.
Is it not the case?
Also, the updated command to actually install the harbor as per current version might be something like
sudo ./install.sh –with-trivy
With the command mentioned in the blog post, following output is received.
Note: Please set hostname and other necessary attributes in harbor.yml first. DO NOT use localhost or 127.0.0.1 for hostname, because Harbor needs to be accessed by external clients.
Please set –with-trivy if needs enable Trivy in Harbor.
Please do NOT set –with-chartmuseum, as chartmusuem has been deprecated and removed.
Please do NOT set –with-notary, as notary has been deprecated and removed
It is self-explanatory, that notary and chartmuseum are deprecated in current version v2.10.0
But thanks for the blog post, it was nicely written. Appreciate it.