If minimizing WAN bandwidth is important to you then you will certainly want to know how to use Zerto’s Swap Disk feature. There are a few modifications that you will need to make to your virtual machine in order to utilize the feature, but in some cases they are well worth the small amount of effort that it takes to implement them.
What does It Do?
Both Windows and Linux systems (be them physical or virtual) use a virtual memory area called swap. Swap is a place on a storage device that the operating system places pages of memory if “real” memory (RAM) isn’t available. Normally this happens when the system has an under allocated amount of RAM for the workload it has been assigned.
While swap is not a bad thing it can have negative effects on storage devices, mainly because every time a page of swapped memory is needed I/O operations happen to the underlying disks. So the problem with replication and swap is that every time a page of memory is swapped to a disk that is being replication (via Zerto or any other replication technology) it must then be sent to the replication target. Therefore swap operations consume WAN bandwidth.
Swap space is treated just like RAM to an operating system, meaning that it is needed while the power is on … but once the power goes out anything still in swap is no longer needed. So if we were to fail-over a virtual machine, the data in the swap disk is no longer needed… therefore there is really no reason to replicate it… or waste WAN bandwidth in the process.
Hence Zerto’s Swap Disk feature, the rest of this article will explain how to utilize the feature with Windows virtual machines.
Looking for the How to for Linux?
More details on the different levels of swap space in my other post here.
Windows VM’s + Zerto Swap Disk
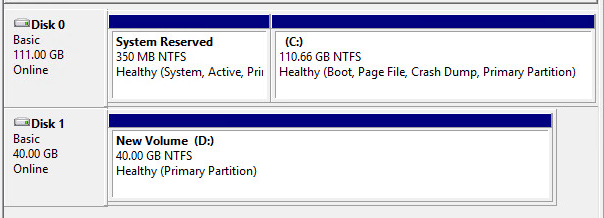
Before we start, lets first look at what a normal windows virtual machine might look like.
Before Implementation
For a standard VM with just a C: drive we will have just one virtual hard drive
In order to use the Zerto Swap Disk feature we need to separate out our virtual memory location so that instead of c:pagefile.sys, it goes to its own VMDK file. Once it does we can mark that VMDK as a swap disk in Zerto.
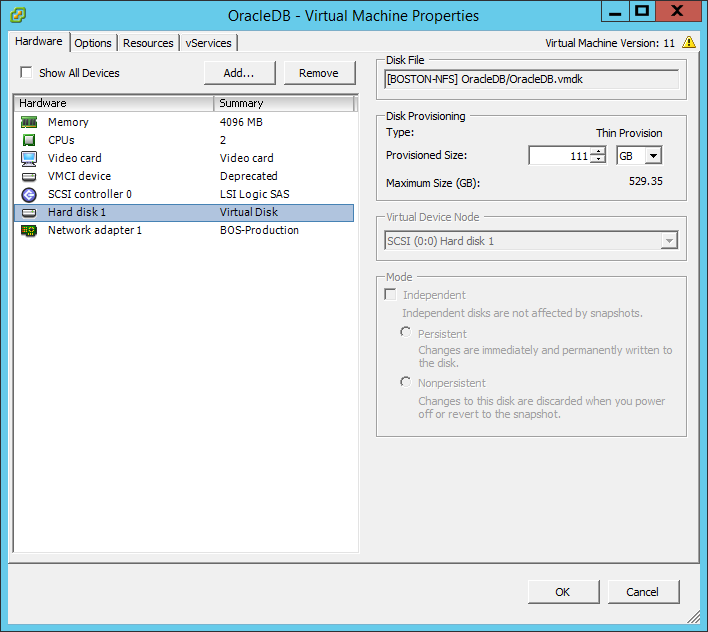
And here is what the Virtual Machines configuration looks like before we add a virtual disk dedicated to swap space.
Modifying the VM
Virtual Hardware Modifications
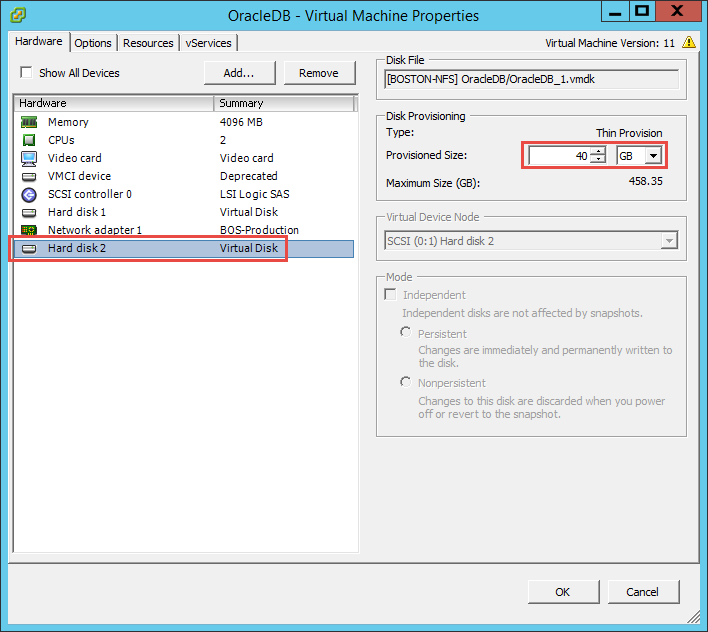
The next step in implementing this feature is to add a new virtual hard drive to the VM. For the proper size of a page file, you will need to refer to Microsoft’s documentation, but for me I like to make my VMDK file a little more than 1.25x-1.5x the size of what my RAM is set to in the VM. In this example I just left the VMDK set to the default of 40GB, but there is really no need for it to be that big for a VM with only 4GB of RAM.
Now our virtual machine configuration looks like this:
Modifying Windows to use the new VMDK
The part is to switch windows over from the page file located on the C: drive to the new dedicated paging disk. Windows does require a reboot to complete this so you will need to do this during a planned downtime window. Before we can make it happen though we need to prep the new virtual disk inside of windows. I won’t go into detail because I’m sure you know how to bring a disk online in windows as well as format it and assign a drive letter… but here is a high level.
Prepping the Disk
Before we can put the new disk to use we have to do a few things:
- Bring the disk Online in Disk Management
- Initialize the disk
- Create a partition
- Format the partition and assign a drive letter
Before and after of disk prep
Before
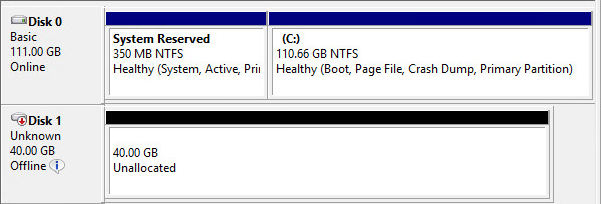
After
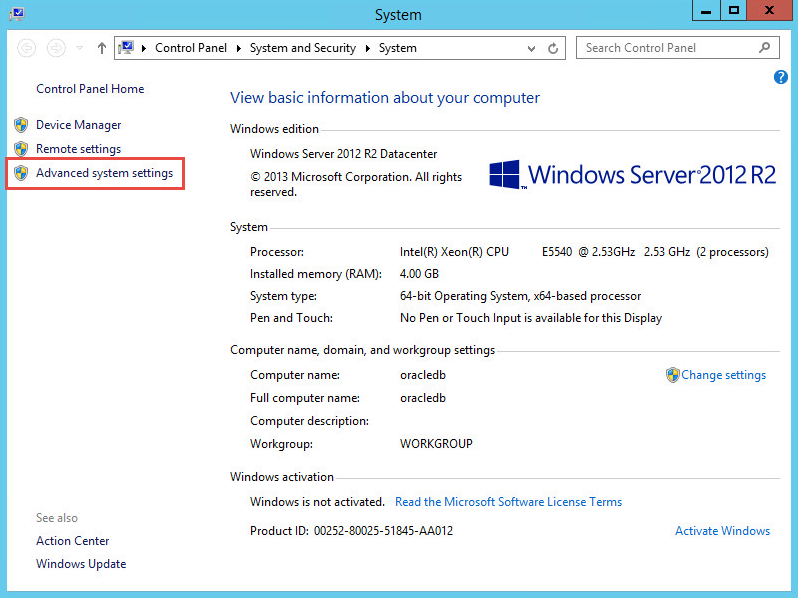
Relocating the Page File
To relocate the page file we need to get into the System control panel. I normally do this by right clicking on the start button and then selecting “System”. Then select “Advanced system settings”.
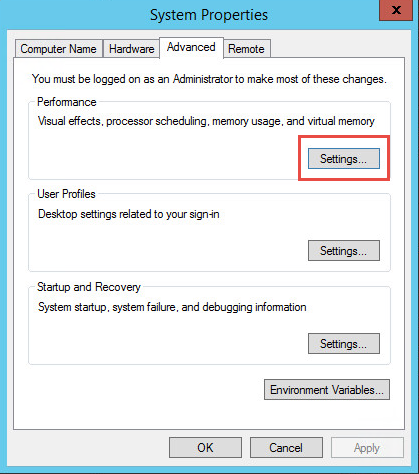
Inside of the Advanced system properties select the “Advanced” tab then click “Settings” on the Performance section.
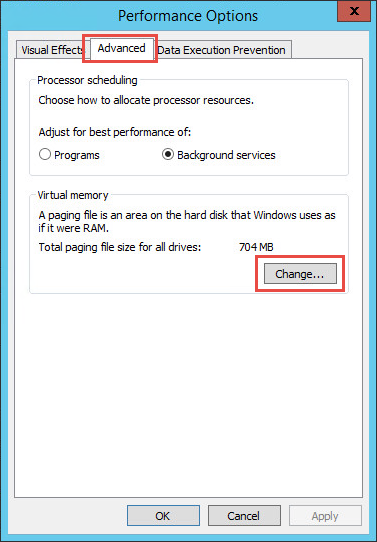
In the Performance Options select the “Advanced” tab, followed by the “Change” button on the Virtual Memory section.
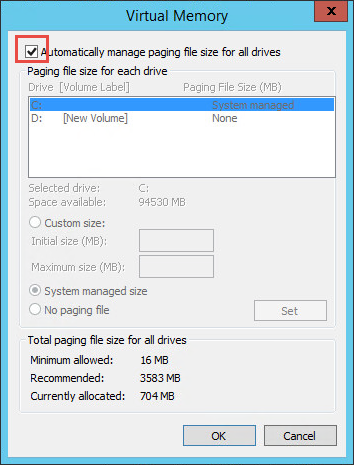
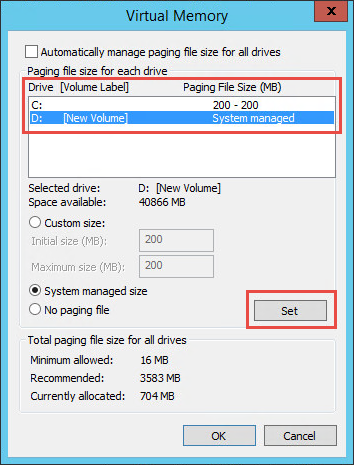
On the Virtual Memory dialog box you will notice that we need to uncheck the “Automatically manage” check box. This will then allow us to customize how much page file goes to each disk.
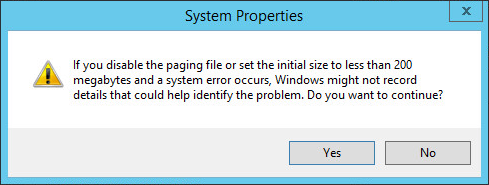
If you don’t leave 200MB of page file space on the C: drive you will get this warning. You will have to check MS documentation to determine if this is OK or not… for me I left 200MB on the C: drive and then allowed Windows to control the usage on the new disk.
After assigning the appropriate amount to each dis make sure to also click the “Set” button to make it stick. After doing so you can then click “OK.”
You are required to reboot the machine after modifying the page file settings. The reboot must happen before the new settings will be used.
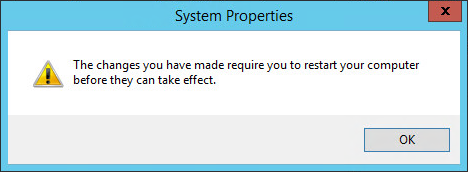
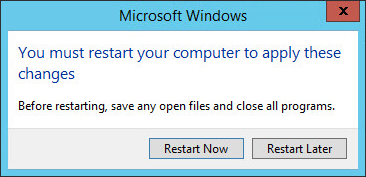
REBOOT!!!!
Zerto VPG Modifications
Now is a good time to go ahead and modify our VPG and mark the new disk as a swap disk. Why? Well because at the moment the vmdk is almost empty, and if we mark it as swap now very little WAN bandwidth will ever be used by this disk. If you were watching Zerto’s web GUI while you added the new virtual disk you will have noticed that Zerto already created the virtual disk at the recovery site and is doing its initial volume sync… which will take all of about 30 seconds since there is no data on the disk.
Here are some screenshots of the process in case you didn’t have the GUI open yet.
What the VPG looks like before adding the dedicated swap VMDK
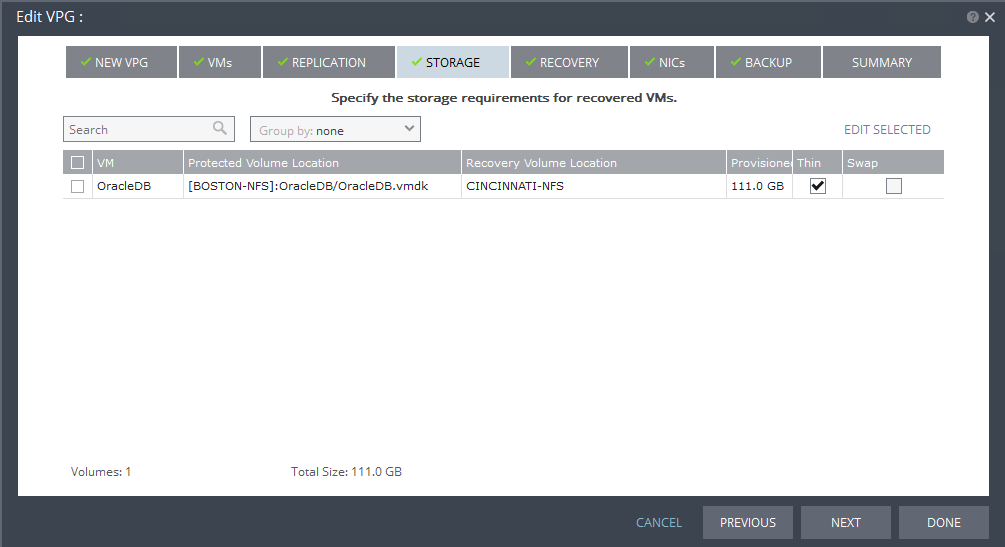
After adding the new dedicated VMDK for swap
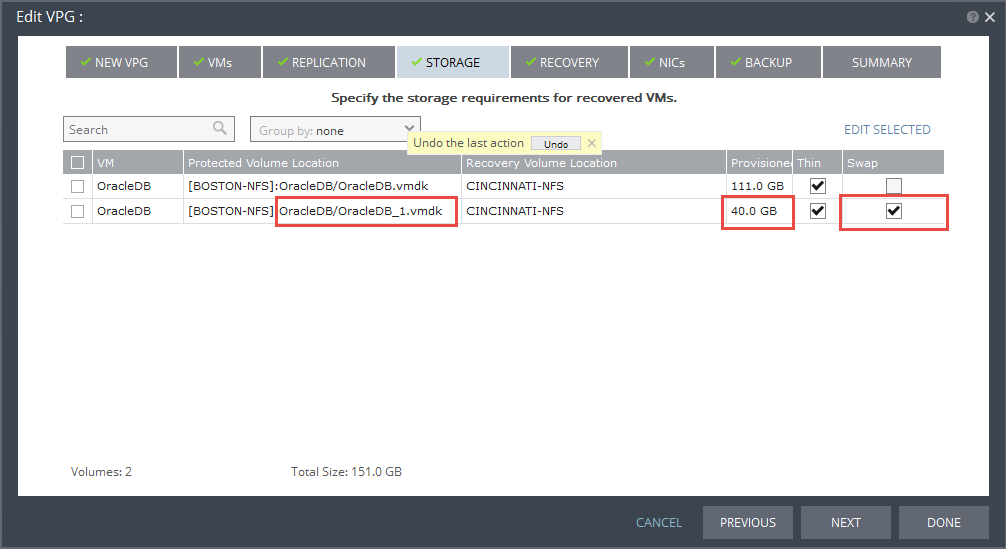
After checking the Swap box you can then click “Done” to update the VPG settings.
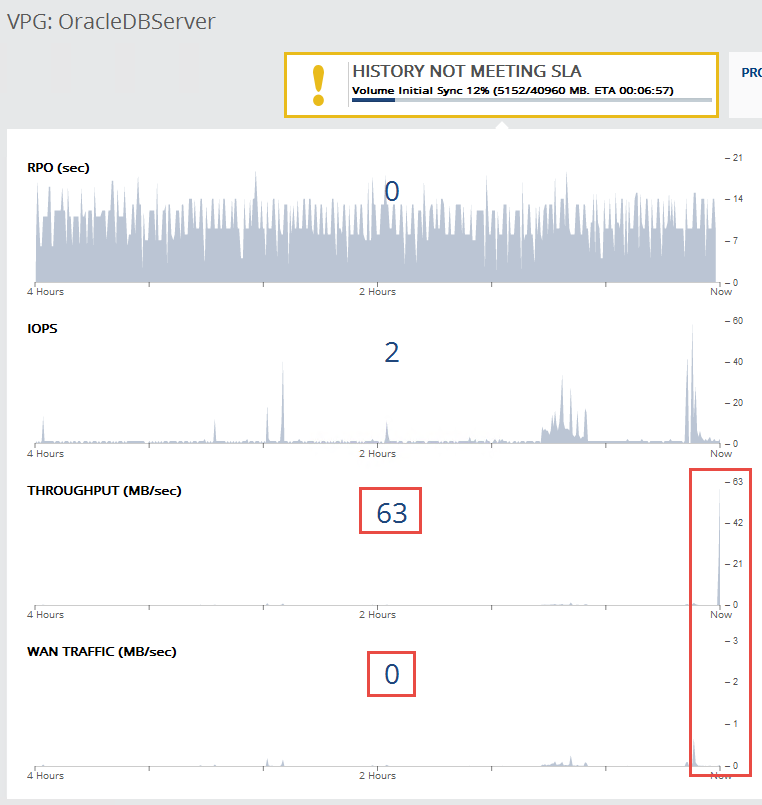
History Not Meeting SLA after adding the new VMDK

WAN usage for Initial Sync of new VMDK
You will notice some extra throughput as the new VMDK is scanned for data, but because it is completely blank you will see no additional WAN usage during this sync. And as long as we mark it as swap before doing anything with it inside of the virtual machine, no WAN bandwidth will ever be used by this disk.
Conclusion
At this point Windows is using the new swap disk for any memory paging that goes above the amount of physical RAM. It will generate storage I/O locally at the production site, however now Zerto will ignore those write I/O’s and save you bandwidth!
Disclaimer: I work for Zerto, however any views or opinions expressed here are strictly my own. I am solely responsible for all content published here. This is a personal blog, not my employers blog. Content published here is not read, reviewed, or approved in advance by my employer and does not necessarily represent or reflect the views or opinions of my employer or any of its divisions, subsidiaries, or business partners.
![]()


Pingback: How To Use Zerto's Swap Disk Feature with Linux - Justin's IT Blog | Justin's IT Blog