In July VMware released a new fling on the VMware Labs site that is designed to help you apply all VMware best practices for virtual desktops in one easy swoop. There are two ways to run the tool, locally and remotely, this post will focus on running it locally on the VDI image to be optimized.
Starting on page number 17 of the VMware Horizon View Optimization Guide for Windows 7 and 8 is a list of parameters that VMware suggests tuning for best performances in your VDI desktops. Here is the problem that I have found… after you go through and look up all of those settings and how to change them, you end up with about a whole day of work. This is where this new tool from VMware comes in, with the push of two buttons you can apply all of these settings in about 2 minutes (including installation of the tool to do it).
To get the tool head over to http://labs.vmware.com/flings/vmware-os-optimization-tool
After grabbing the MSI fire up your golden image that you intend to optimize and install the MSI on to it. The installation is pretty simple, there is about 5 steps but you can just click next through everything. Once installed you will have two desktop shortcuts, one is for using the tool remotely which I will talk about in a future post, and the other is to run the tool locally. Double click the icon to run the tool locally.
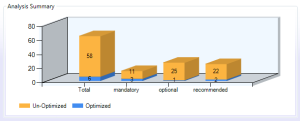
After the interface loads you should see something similar to what is above. There are 4 main sections of the analyze tab, two at the top show the system information and bar graphs about how many settings have been applied, while the bottom two sections show the list of parameters that you can change as well as a box for more detailed information about each parameter.
The first step is to click the “Analyze” button in the lower left corner, once you do that the tool will compare the current system parameters with the VMware best practices and then show you some bar graphs in the upper right corner to give you an idea of where your system is overall in its current state.
Next in the bottom half of the interface you will see each of the parameters that the tool intends to change. This is the time to review what it is going to do, and un-check some of the boxes if you don’t want those settings applied.
For me I like to uncheck the “Screen Save Secure” option as it forces me to re-login when I leave the terminal for too long, but some organizations may want that. In total there are 71 parameters that will be modified by this tool. For a complete list check the Optimization guide at the beginning of this article.
Once you have the parameters the way you want them click the “Optimize” button to apply those settings.
You will see a progress bar just like when you clicked “Analyze”, once it completes you are all finished. Personally I uninstall this utility from my image before publishing it.
Next article will be about how to run the tool remotely.
![]()


