Keycloak became the cornerstone of the Zerto appliance back in 10.0 (wow, it’s been almost 5 years!) and over that time we have tried to simplify getting started, as well as integrating Keycloak with other identity providers like LDAP OIDC and SAML. But sometimes the IT gods just aren’t smiling when folks are trying to configure their ZVMs.
This post is just a list of things that I would check if I were troubleshooting. This certainly won’t take the place of a support ticket, but I would highly recommend checking these items before opening a ticket just to save yourself time and rule out any of the simple issues.
Check DNS servers
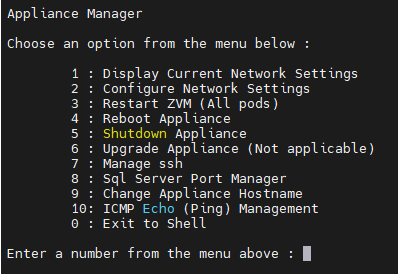
The first thing you should check (especially on a new ZVM appliance) is the DNS servers configured on the appliance. The Zerto appliance has a CLI based menu system which will print on the currently configured DNS servers. It is also capable of doing all of the backend configuration needed for the various containerized services on the appliance. I do NOT recommend trying to manually edit dns server settings manually.
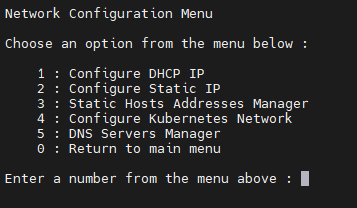
To verify existing DNS servers login to the CLI using the username zadmin with the password configured during initial configuration. Next selection option “2 : Configure Network Settings”.
Now select “5 : DNS Servers Manager”
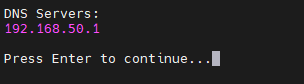
Finally select “1 : Print All Configured DNS Servers”
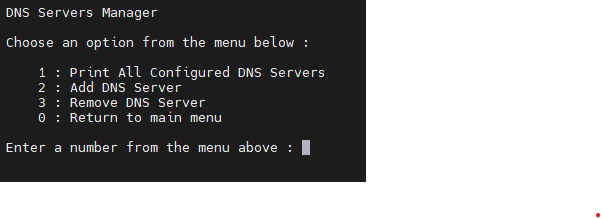
The system will list the DNS servers, check this list to see if there are any that do not belong here. If there are incorrect DNS servers, press Enter and then navigate back into the DNS manager and select option “3 : Remove DNS Server” to remove them. You can also use “2 : Add DNS Server” to add what you need.
Before proceeding make sure you have the DNS servers you need to resolve your identity provider’s name/URL. (NOTE: Need to be able to resolve the name even if you are using an IP for LDAP(s) server!)
Check the Certificates installed in Keycloak
After we have validated that we can resolve DNS to our upstream IDP (identity provider) we can move on to certificate verification. Certificates are required to be uploaded into Keycloaks trust store for pretty much all upstream IDPs with the exception of LDAP (LDAPS does need a certificate too).
Since 10.0 Update 4 (aka 10.4) Zerto has provided two APIs to help check and upload certificates. If you are following the documentation to SCP certificates to the appliance and then run a bunch of commands, STOP… read on to learn about how to use the API.
Checking existing certificates via API
Navigate to the Management Console of your ZVM, mine is https://192.168.50.30/management once logged in click the top right corner menu, and select APIs. Once you are on the Swagger page, the first thing to do is click Authorize.
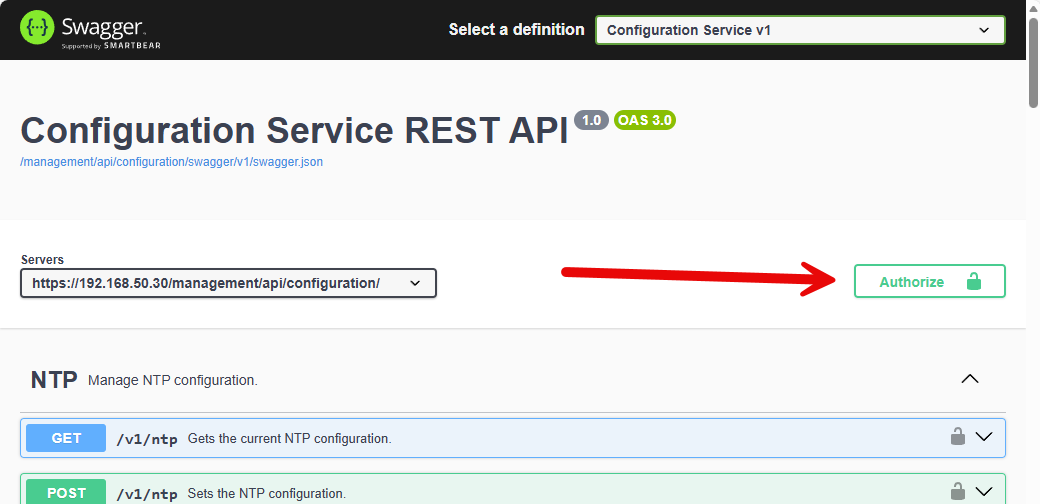
A box will pop up where you need to click Authorize again, the button will change to “Logout”. Once it does click Close.
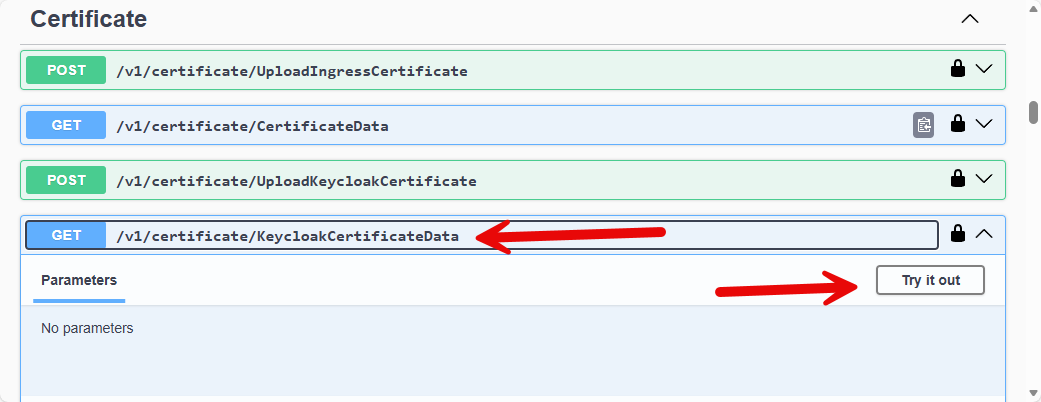
Next scroll down to the Certificate section of the page. You will see four APIs total, two are for the ZVMs Ingress Certificate (ie the “NOT SECURE” warning you get in your browser because of the ZVMs self signed certificate) and the second two are for Keycloak.
We want to first check the second one, it will be the “GET” API, this api lists out certificate names and expiration dates of what Keycloak already has in its database. Click on the blue GET line, then click “Try it out” in the top left.
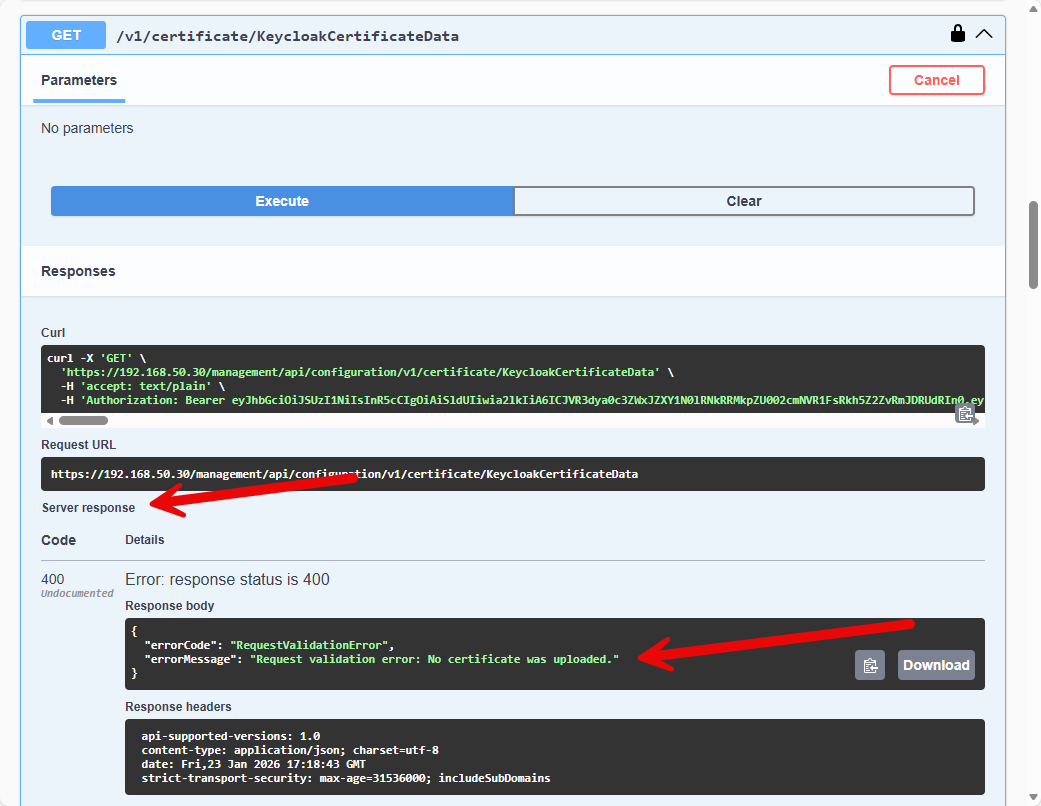
Scroll down a little and then click “Execute”. The API will either return a list of all the certificates already in the database or like in my case with a new ZVM, it will return a 400 error and say it doesn’t have any certificates.
Uploading a new certificate
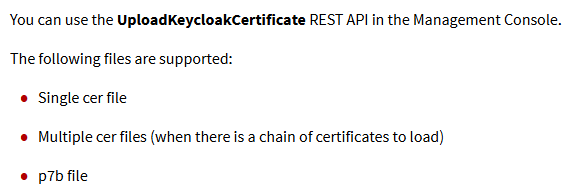
So, if you don’t have the certificate, you need you can use the other API to upload one. Here is an excerpt from the official docs explaining what type of certificate you need to upload:
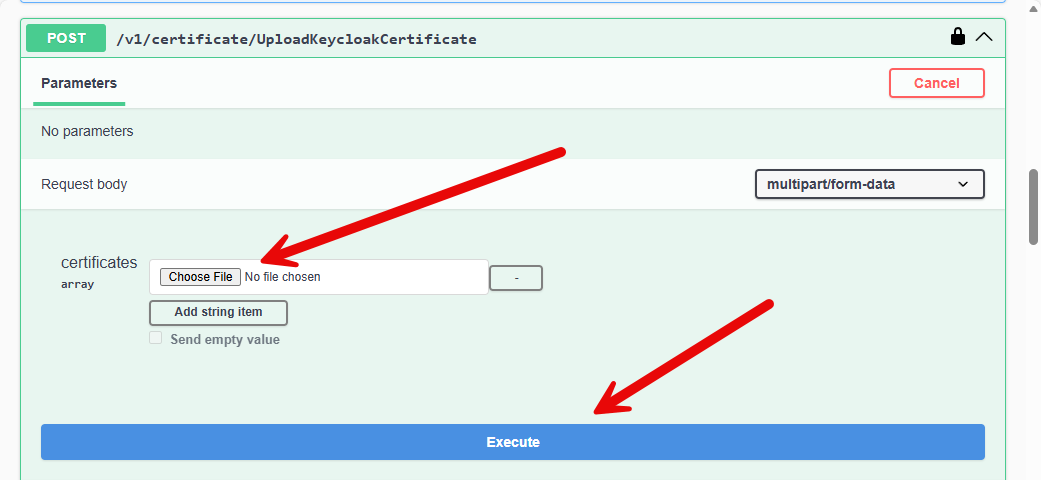
Once you have the certificate, click “Try it out” button in the top right corner on the POST api call. Here you will see a choose file box in addition to the Execute button. Click “Choose File” and select the certificate you want to upload and then click Execute.
Once you run the command, you will see a task identifier. Honestly, this process runs so fast that I don’t really think there is a reason to check the task process, but as long as you get one…. the process is at least trying.
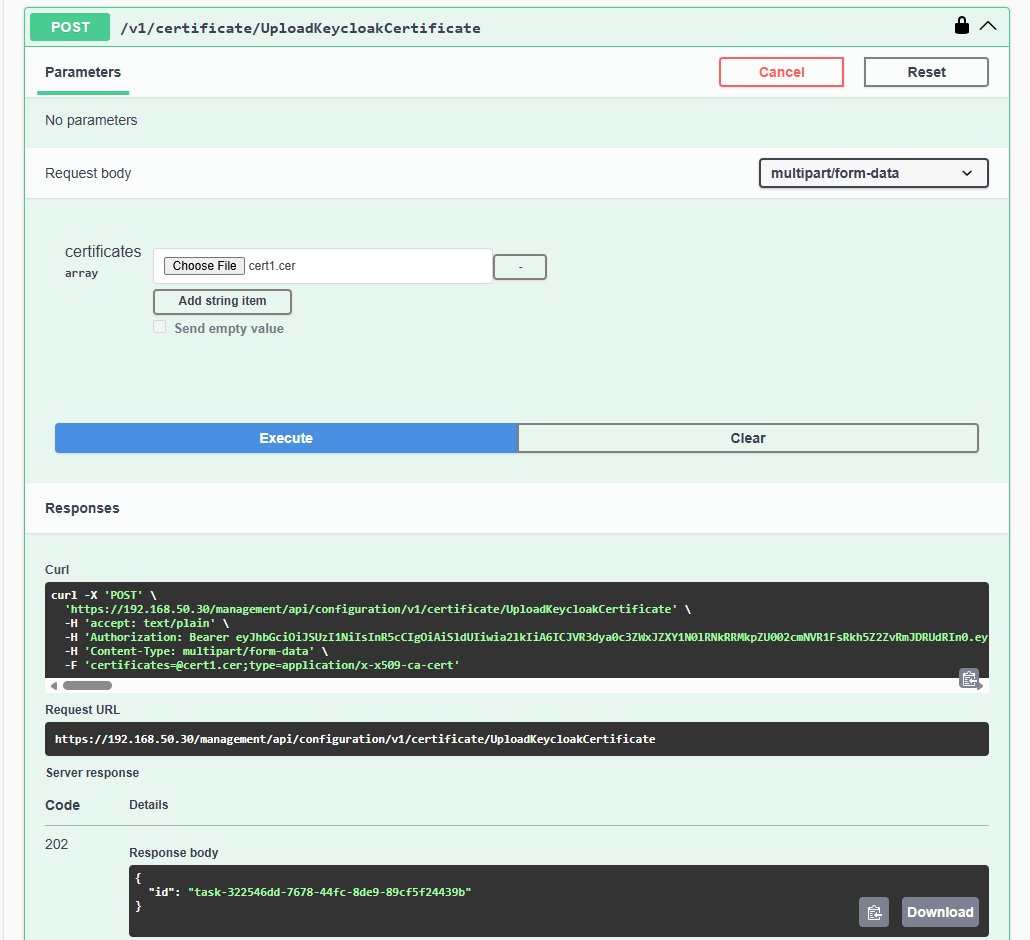
What I recommend is running the GET api again. This time you should see the new certificate in the list.
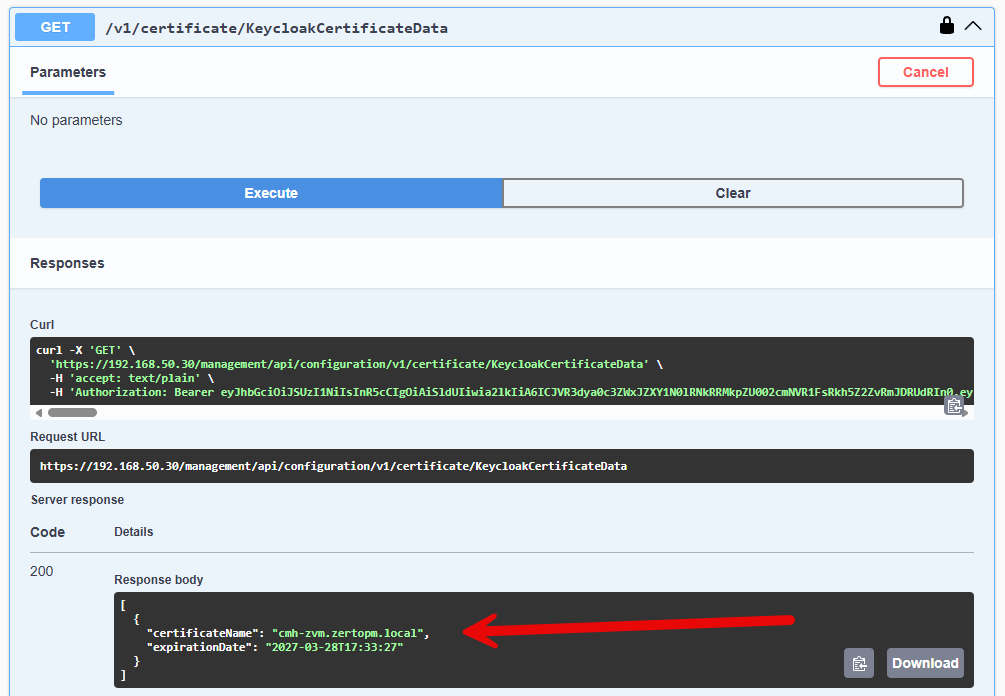
Above I have added a test certificate.
At this point pretty much all of the integrations that are possible should work. LDAP, LDAPS, OIDC, and SAML should all have what they need to work. But sometimes we know there can still be issues. So next let’s look at how we can watch the Keycloak logs in real time.
Realtime Keycloak Log Monitoring
So, when things are still causing you problems the best thing to do is watch the keycloak logs while you are trying to auth. This is actually pretty easy to do if you have access to the ZVM appliance. I recommend using putty or some other SSH connection into the ZVM to do these steps.
Here are a couple examples of the help monitoring the log can help with.
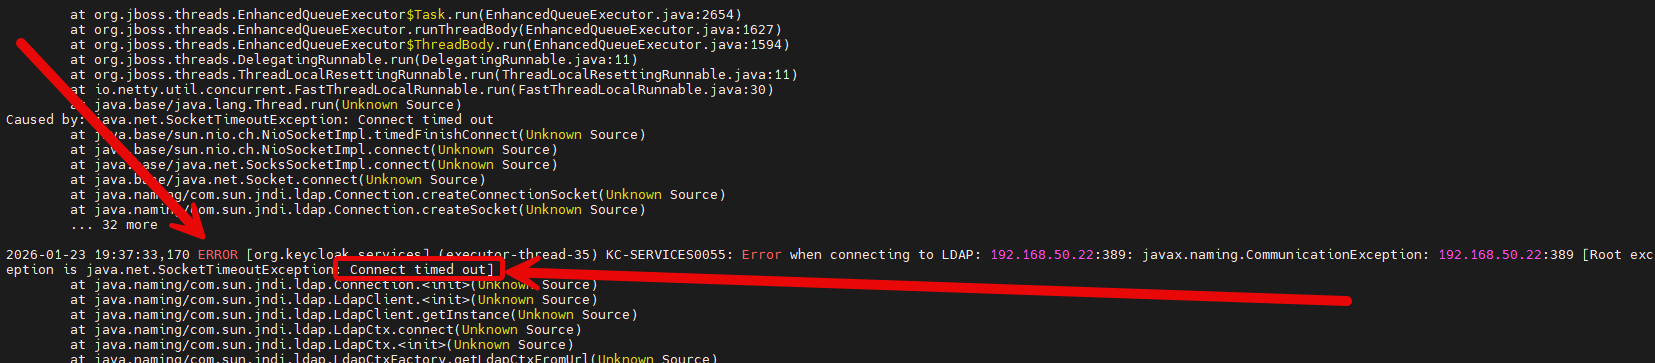
Troubleshooting Connectivity
In this screenshot you can see that the Keycloak service is unable to connect to the ip address i specified. Not going to lie I meant to type 192.168.50.2 …. but ended up with .22 instead.
Troubleshooting Certificates
In this second example we can see that Keycloak doesnt have a certificate for my AD server.
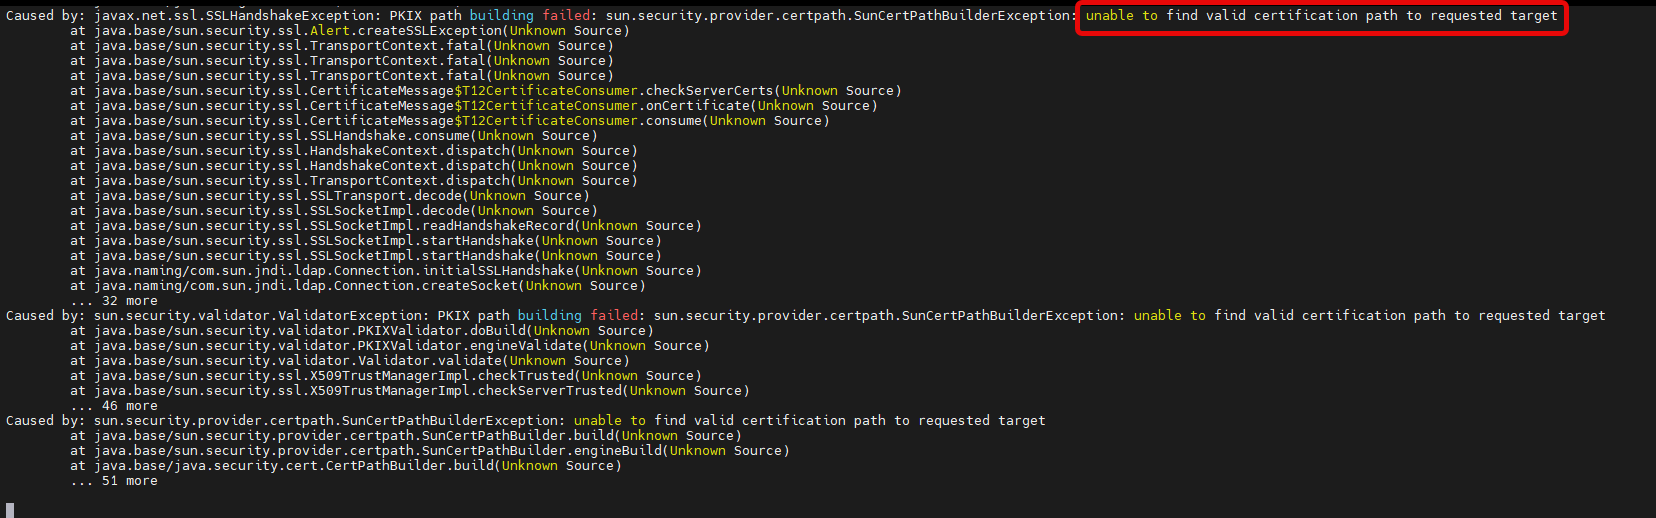
A great rule of thumb is if you see a bunch of lines that say “at java………” then you should scroll up because above them you will see the actual exception that is causing the issue.
When all else fails…
If you made it this far and you are still having issues, then it’s time to call in the experts. Zerto support is open 24x7x365. Open a ticket, explain what you are trying to configure, and if you have executed the steps above it will speed the process up if you are able to provide screenshots and a description of all the steps you have already taken to try to resolve the issue.
![]()