If you follow my blog you know that I’ve been working with the ExaGrid backup appliances a lot lately and that I was lucky enough to actually get a couple units to do some further testing with.
Well, when I received the two boxes I powered them on and ran through the initial setup, but soon found that Veeam was not an option in the “Share Type” drop-down box. I scooted over to the “About” page and found that the software that they were running was the revision before the version that supported Veeam.
Disclaimer: You will need to contact ExaGrid to get the updated software. While the process is very simple, Exagrid support will actually remote in and do the upgrade for you if you are uncomfortable with it. Therefore I take no responsibility if you nuke your box, or if you cause data loss for some weird reason. If you are in doubt call support… they are great!
Anyhow, after talking with the support they sent me the download link for the 4.1 software. After a 540ish MB download, I was ready to apply the patch.
How to upgrade the ExaGrid software:
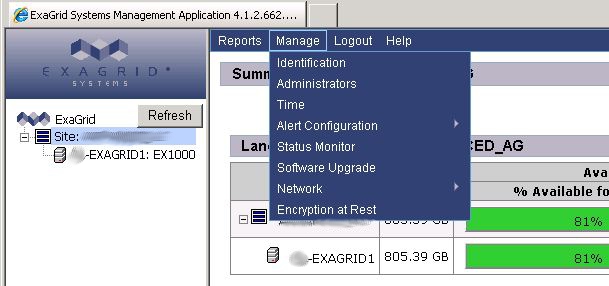
After logging into your ExaGrid go to the Manage menu and select Software Upgrade.
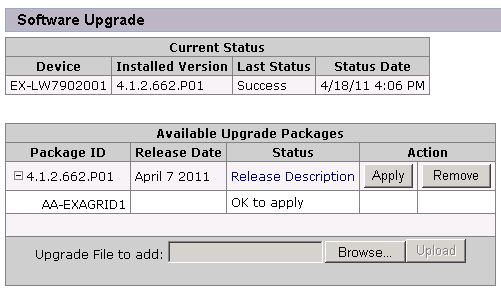
The next screen will let you upload the software update file that you downloaded. You will need to get the download link from ExaGrid support as they will have the latest version. Besides that, it will also show you the version that is already installed on your system. In this screenshot, I already have the latest version on the box. But if you have an older version you just click browse, select the file that support gave you, and then click upload.
After the upload has finished the new version will be listed in the Available Upgrade Packages section, then all you need to do is click Apply. The upgrade process can take as long as 45 minutes. After that amount of time, you can relaunch a browser window and you should be able to reconnect to your system which is now on the latest version.
![]()


