So if Veeam = Good, then Veeam + ExaGrid = Better!, I explained why in the first part of this post series here. Now let’s talk about why.
So let’s say you bought an ExaGrid, now we have to set it up and create a Veeam backup job to push data to it… that’s what this post will cover. I won’t cover the initial unboxing, or overall config of the ExaGrid because they have manuals for that, and their support has always been very good.
All of the ExaGrid administration is done through a web interface, it can be accessed by browsing out to the IP address or DNS name of your ExaGrid. Once there you will need to login to see the admin interface.
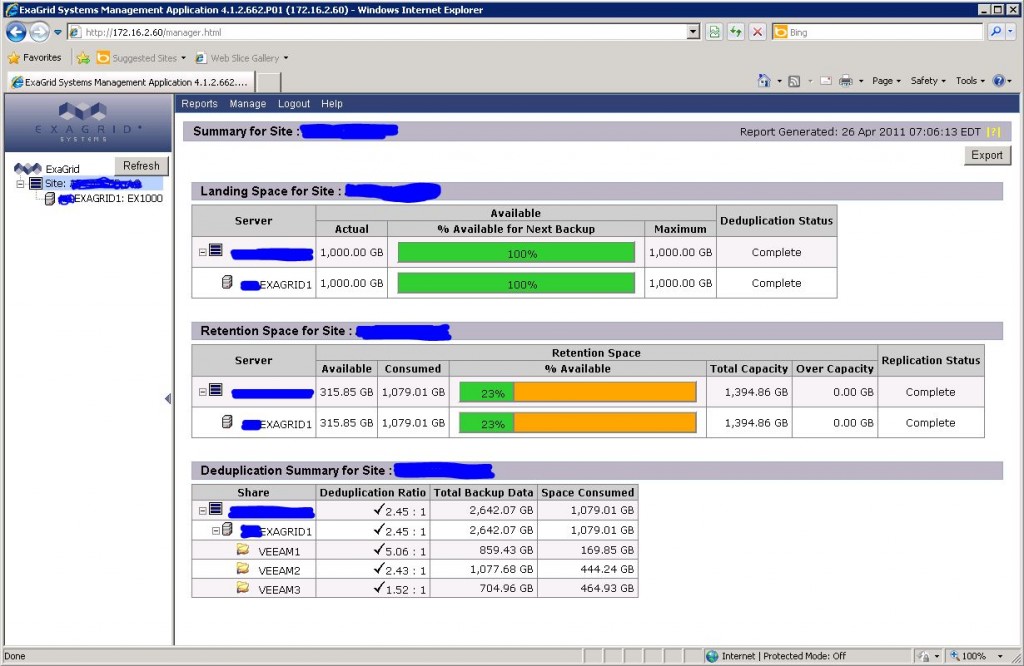
Here is the homepage of ExaGrid interface
As you can see in the homepage it gives you a quick easy way to see what you have on the ExaGrid. It shows you how much of the landing pad is free for the next backup and how much of the “cold storage” (or deduped/compressed area) is still available to hold those unique blocks of data. Finally, at the bottom, it also shows you which shares you have and how much data is in them as well as the dedupe/compression ratio and actual space consumed.
Creating a Share
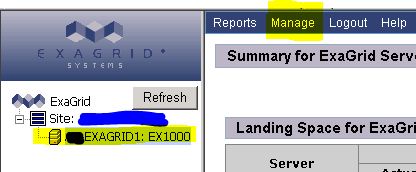
This is probably a 2-minute task at the absolute most once you have done it once. To start we need to select which ExaGrid server we want to put the share on since we only have one just click the server on the left, then click “Manage” from the top menu, and then select “Shares”.
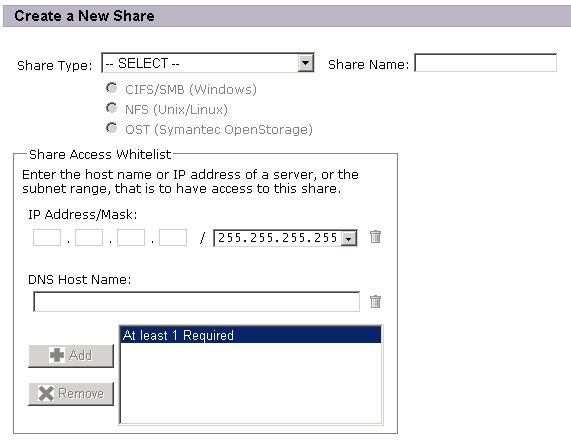
It will display a list of all of your current shares, and on the right, there is a button to create a “New” share. Click that, and the options form for a new share is displayed.
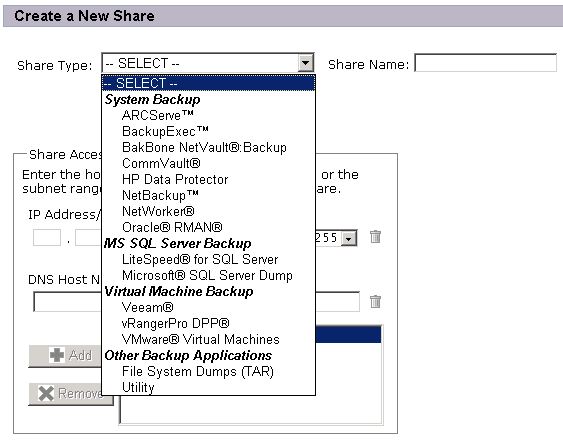
Take notice of the “Share Type” this must be set properly for the type of data we are sending it in order to get good backups. Make sure to select Veeam(R) from the list of types.
After selecting the share type, put in the share name, this can be anything you want. then the last thing you need to do is put in the IP addresses or FQDN of the backup servers. These are your Veeam servers in this case. Then hit “Create” at the bottom right. That’s it! that is really all you need to do to use ExaGrid with Veeam (At least on the ExaGrid Side).
I will post the Veeam job settings tomorrow, so be sure to stop back.
![]()


I would really like to see how Exagrid performs as compared to HP D2D Storeonce from a performance and dedupe perspective. I have seen the Storeonce interface on a demo, and it looks as easy as Exagrid.
I have contacted some people at HP as well as talked with my local guy and am trying to arrange a trail so I can review it as well. I will keep you posted if I get my hands on one.
I would also like to see how ExaGrid and HP D2D compares both from perfromance and cost perspective.