VMware vSphere Data Protection
Lab Duration: Approximately 45 minutes
Lab Skill level: Basic
Overview
In this lab you will use VMware vDP (vSphere Data Protection), the bundled backup software based on EMC Avamar technology, to backup and restore a virtual machine and restore a file from a virtual machine.
The goal of this lab is for you to get to know the new vDP product as it is probably bundled with your existing vSphere licensing, and may be a proper solution for your environment.
Prerequisites
It is recommended that lab users have some familiarity with VMware vCloud Director, therefore Lab 0 – Intro to vCloud Director is recommended before taking any other labs.
This lab uses the VMware vSphere Web Interface exclusively, therefore lab users should be familiar with it. Lab 1 is a suggested prerequisite, but not required.
Tasks Include:
- Create a backup schedule
- Backup a VM
- Monitor a backup job
- Restore a VM
- Discuss file level restore with VDP
For the Best Experience
For the best experience use a device with two monitors. Ideally you would use one screen for displaying this lab manual, and the other for the VMware View Desktop/vCloud Lab environment. If two monitors are not available, other suggestions include using an iPad or other tablet for the lab manual or working with another person and using their device for one thing and yours for the other. Printed lab manuals may be available if none of the above are possible.
Step 1 – Login and Lab Deployment
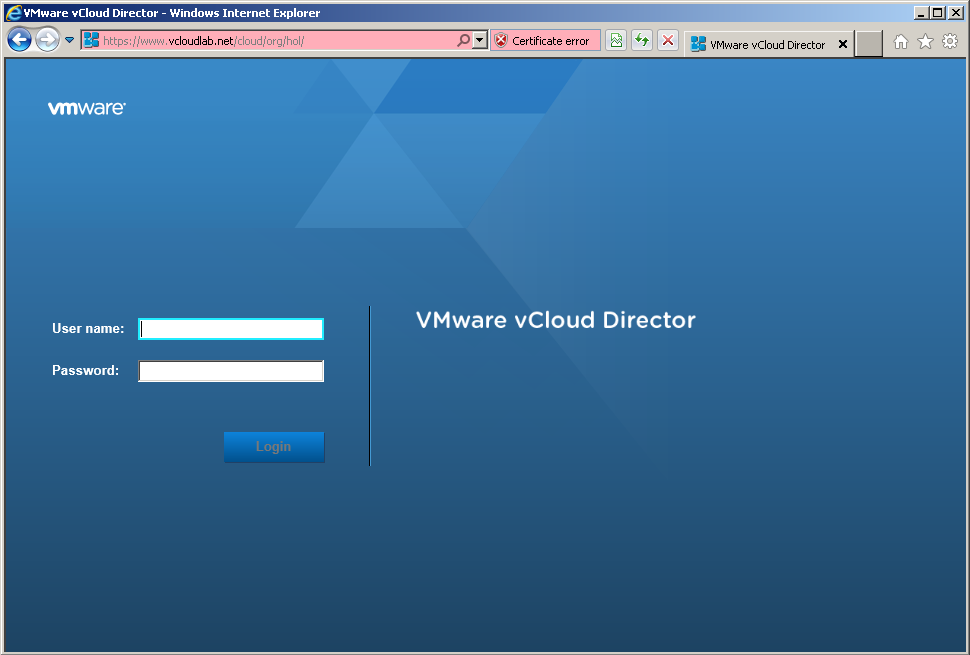
This lab will leverage VMware vCloud, in order to access the lab you will need to navigate to this URL:
https://www.vcloudlab.net/cloud/org/<username>/
(your username and password was in your welcome email)
Login with the username and password assigned to you or your group.
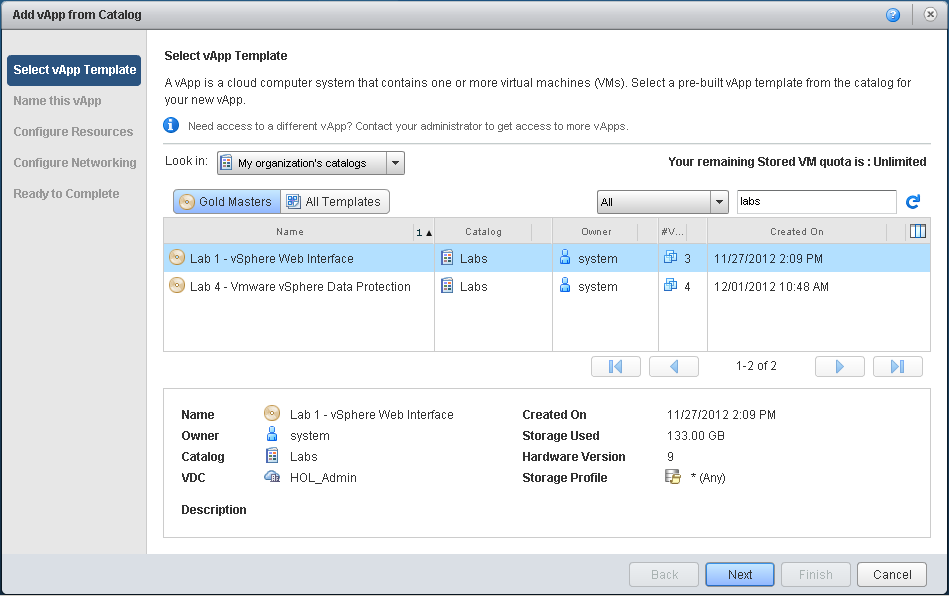
Once logged in you will need to deploy the “Lab 4 – VMware vSphere Data Protection” vApp, to do this click on the “Add vApp from Catalog” button. Next Select “Public Catalogs” from the “Look in:” drop down menu. You should now see a list of the available labs, Select the “Lab 4 – VMware vSphere Data Protection” lab and click “Next”. You can now name the vApp if you would like or leave it at the default. The lease settings can be left alone. Click “Finish” to deploy your lab.
vCloud Director will now deploy all of the virtual machines and networking components necessary for your lab. This process should not take more than a few seconds.
Step 2 – Power Up your Lab
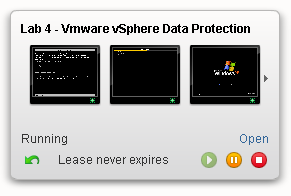
Once the lab has been provisioned it will be in a “Stopped” state, to power it up simply click the green play button on the vApp.
Because vCenter has many services to start, it will take about five minutes to fully boot up. We can review some lab info while we wait.
Step 3 – Lab Information and Setup
This lab is built on top of VMware vCloud Director. vCloud Director leverages VMware vSphere and adds a layer of abstraction so that resources can be offered to consumers through a self service interface, and without them needing knowledge of how those resources are configured on the backend.
This technology is the same thing you would get from a vCloud Powered VMware Service Provider, and can be leveraged for anything from test/dev environments to mission critical business applications.
This lab consists of several pieces:
1.) A manager workstation – which will be used to access the vCenter server and contains all of the needed tools and files.
2.) An ESXi 5.1 Server – 192.168.2.20 – Credentials: root / vmware1
3.) A vCenter Server Appliance VM – 192.168.2.10 – Credentials: root / vmware1
4.) A VMware vDP appliance running inside of your ESXi Server – 192.168.2.30 – Credentials: root / changeme
5.) A Windows 2008 R2 server running DNS services – 192.168.2.35
4.) A virtual network that is completely isolated from other lab users.
How the lab works
At this point the boot process of vCenter should be getting close to finishing up, let’s take a minute and explain how you will interact with your lab.
The ‘manager’ virtual machine will be our jumping point to access the vCenter web interface. Because the lab is 100% isolated, the only way to access anything in your lab is through that management host.
The lab can be accessed from a VMware View desktop, or directly from your personal machine, as the www.vcloudlab.net URL is publicly accessible. However for best video performance, using the VMware View Desktop is preferred. Check your welcome email for more information on how to access the View Desktops.
Step 4 – Opening the Manager’s Console
Let’s first open up the vApp so that we can see our individual virtual machines. Click open on the vApp.
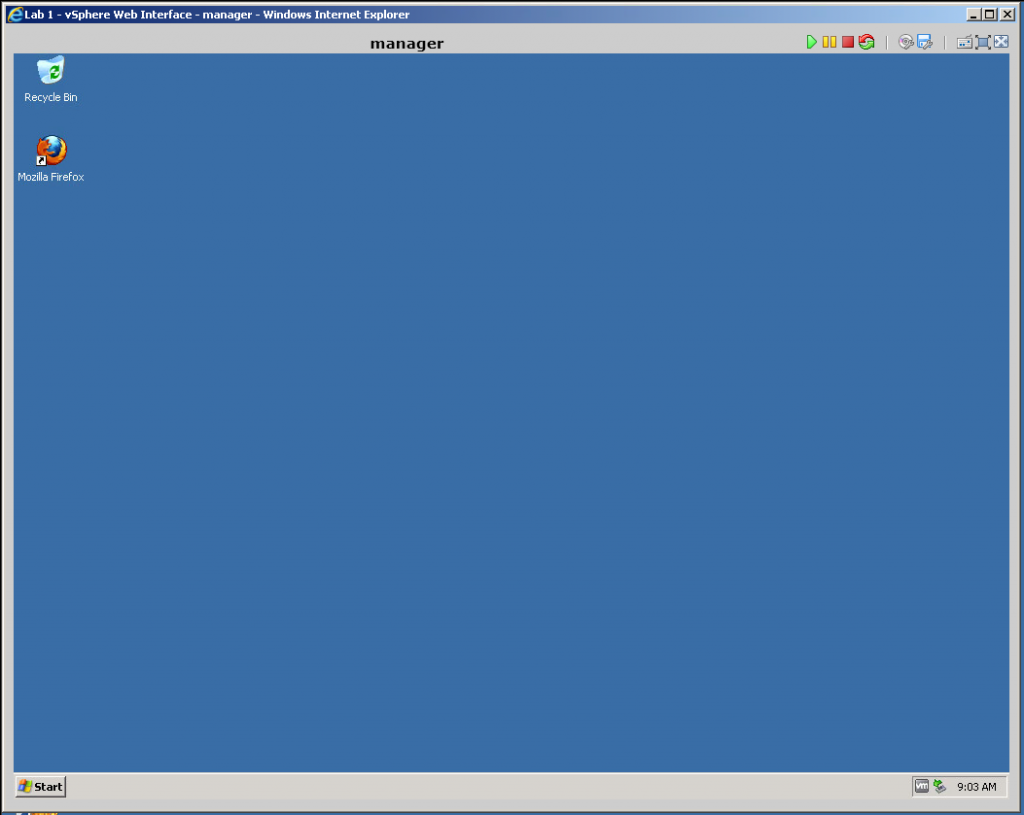
Next, click once on the Manager VM, then click again on the console thumbnail. This will open the console of the VM. Click continue or accept on any SSL warnings. You may also need to allow popups in the browser.
NOTE: You will need to click “Allow” on the Remote Console plugin the first time that you open a console. It will appear at the bottom of the Internet explorer window at the same time that a popup box telling you to install it appears. YOU DO NOT need to install it, just click allow at the bottom as seen in the following screenshot.
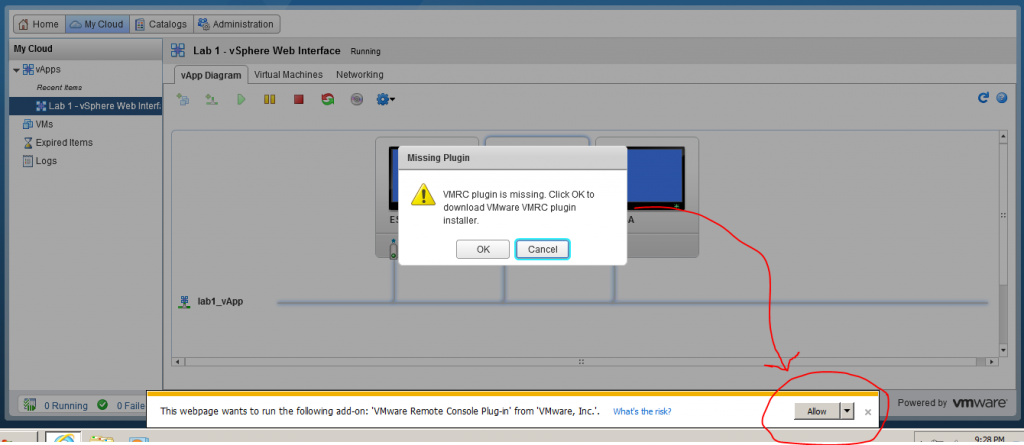
Note: it can takes 3 attempts before the console will open due to popups and allowing the “Add on” to run, this will largely depend on if you are using a view desktop or if you are using your local machine.
Step 5 – Checking vCenter’s boot status
After the Manager VM’s console is open, start a web browser and navigate to the following URL:
https://192.168.2.10:9443/vsphere-client/
Alternatively, you can just browse to https://192.168.2.10 and then click “vSphere Web Client on the right side.
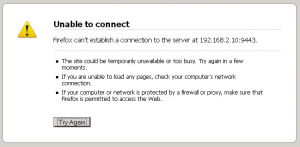
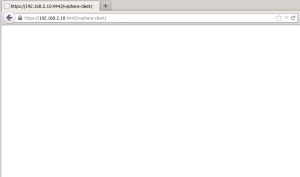
If vCenter has not fully started, you will receive one of the following in the browser:
If you receive any of the issues above simply wait for one or two minutes and refresh the page. vCenter can take up to 5 minutes to fully start depending on how many other users are running labs. In the labs we are also running vCenter on a limited amount of RAM which also slows down the boot process compared to what you could expect from a production system.
Once vCenter is ready you will see a login prompt like the one below, login to vcenter using root as the user name and vmware1 as the password.
Step 6 – Connecting to the vDP Appliance
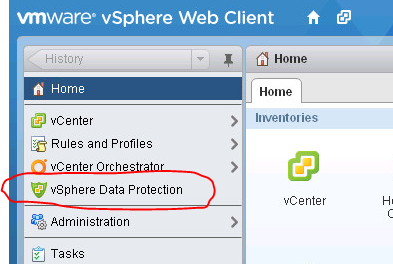
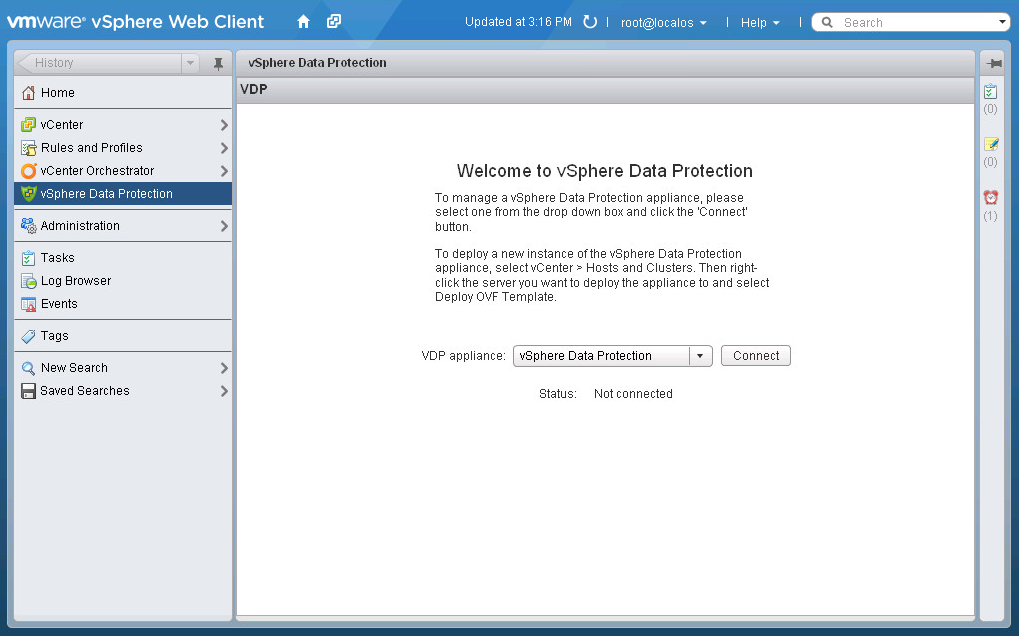
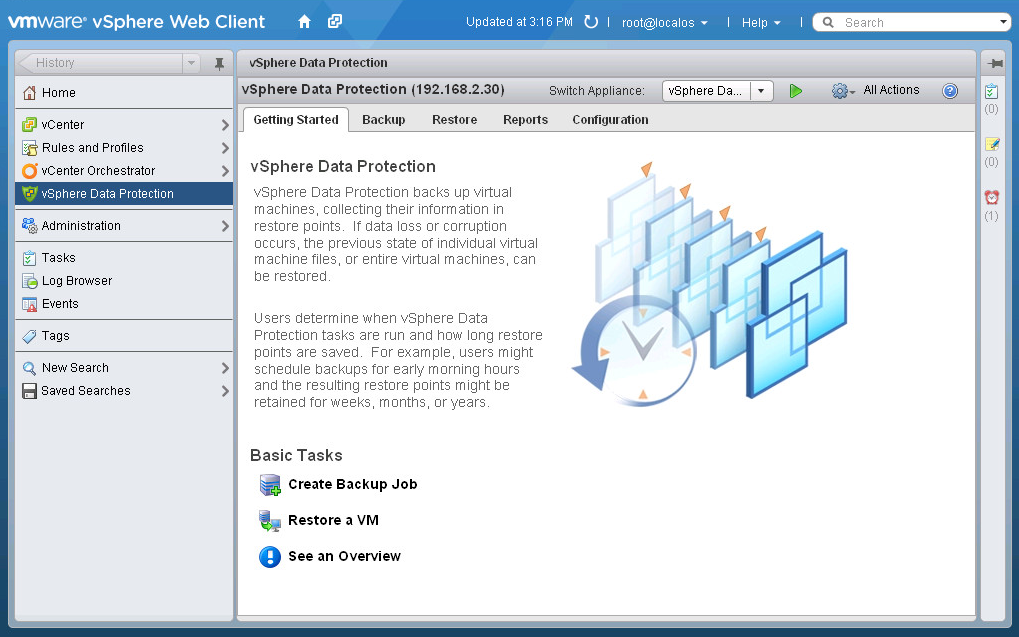
After logging into the vCenter Web Interface you will see vSphere Data Protection listed in the left menu. Click on vSphere Data protection.
Next you will need to click “Connect” in the main panel, but make sure that “vSphere Data Protection” is listed in the VDP Appliance drop down menu. If it is not first refresh the web interface by clicking the refresh circle icon at the top of the page.
After clicking Connect it will appear as though nothing is happening for a few moments, be patient and once it is connected the page will change to the VDP Getting started page.
Step 7 – Checking VDP Settings
Before we start backing up and restoring VM’s we should first check out settings out and make sure everything is correct.
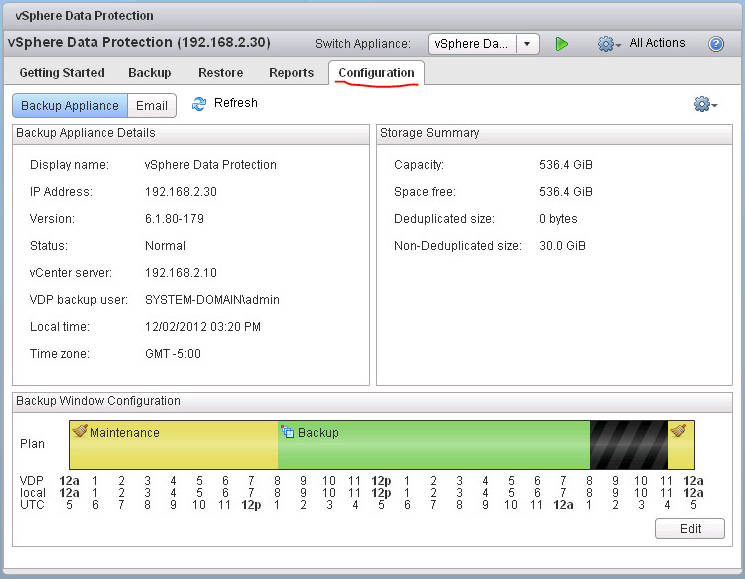
Click on the Configuration Tab.
This page lists out all of the details for the VDP appliance, at the bottom you see the Backup Window Configuration. This is the schedule that VDP uses to know when to do things. By default the backup window on a production VDP system will allow backups to run at night, and will then do its blackout window from 8am to 11am, and then do its maintenance the rest of the morning/afternoon.
However because this is the lab the backup window has been adjusted to allow VDP to run backups during the day.
Notice that this is also where you setup your email settings so that you can get reporting and alerts from VDP.
Step 8 – Creating a Backup Job
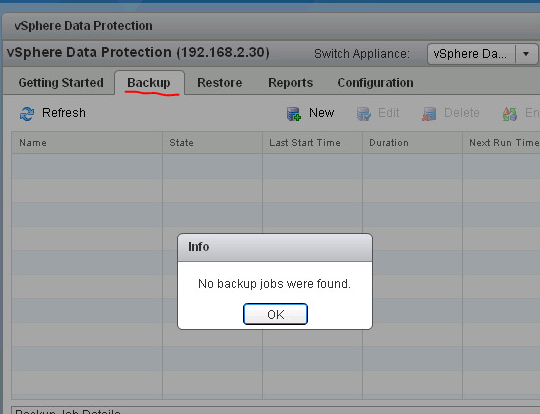
Start by clicking on the “Backup” tab at the top. Then click OK on the Information pop up telling you that no jobs were found.
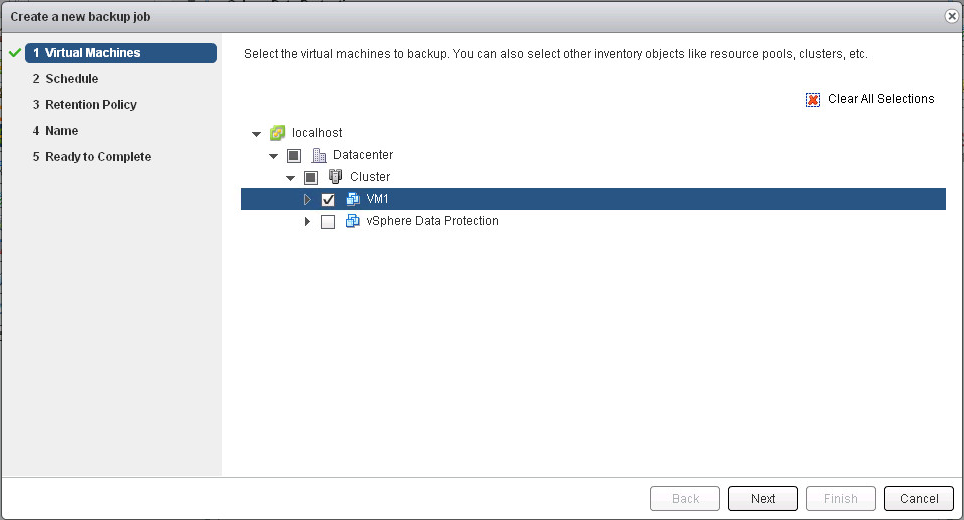
Click “New” to start the New Backup Job wizard.
On the first page of the new job wizard we need to expand out the vCenter object so that we can see the virtual machines. Then check the box beside of VM1 only and click next.
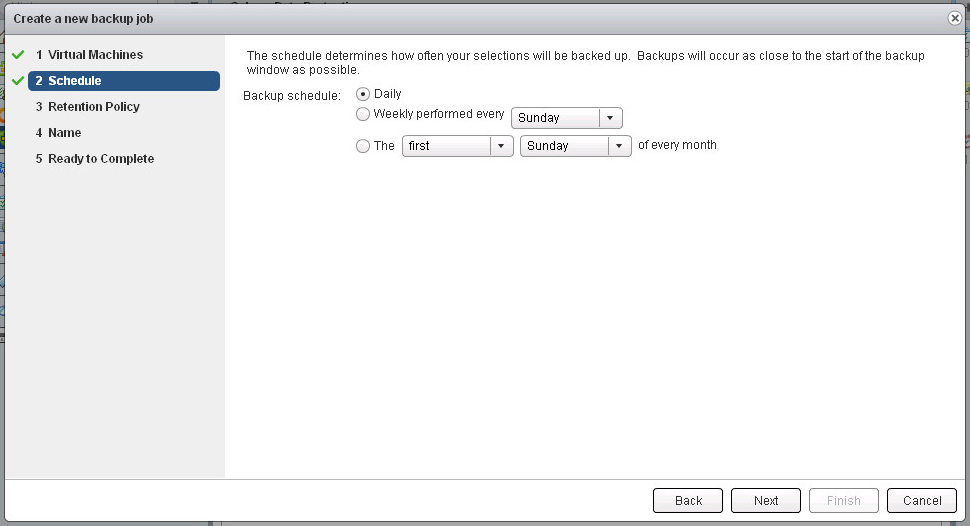
On the next page of the wizard we need to define how often we want the backup job to run. Since this is just a lab we can leave the default setting of “daily” in place and click next.
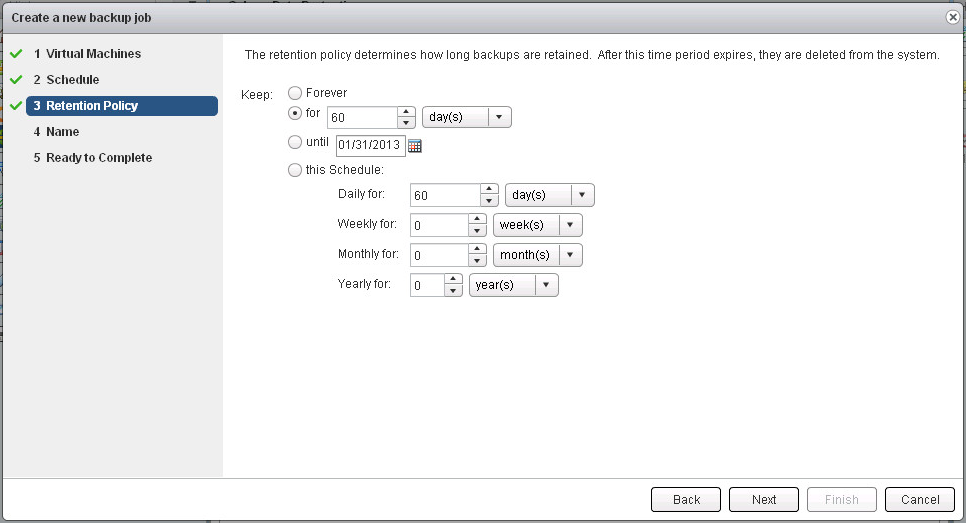
The third page is where we define our retention policy. Again since this is just a lab we will leave the default setting of 60 days in place, but note that you can be very granular in how long you keep your backups.
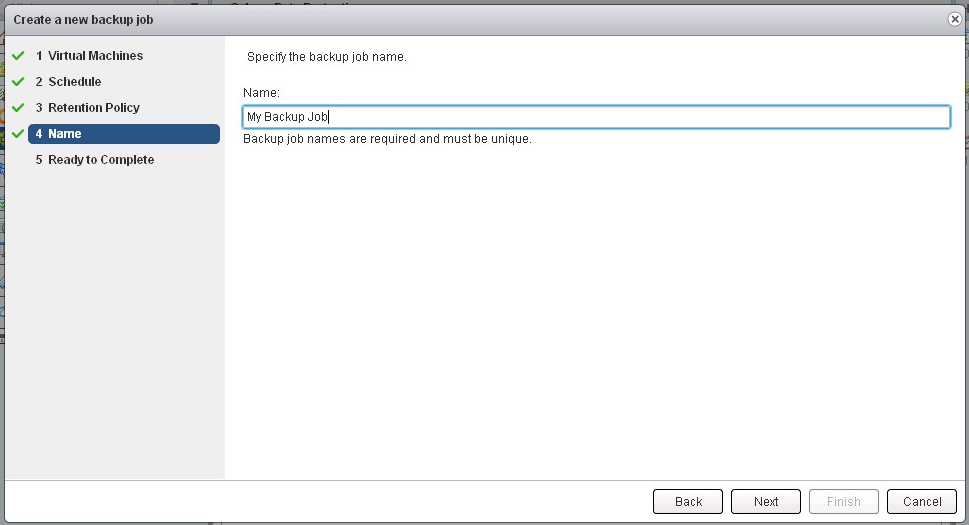
The fourth page is where you name the job, you can set this to whatever you would like.
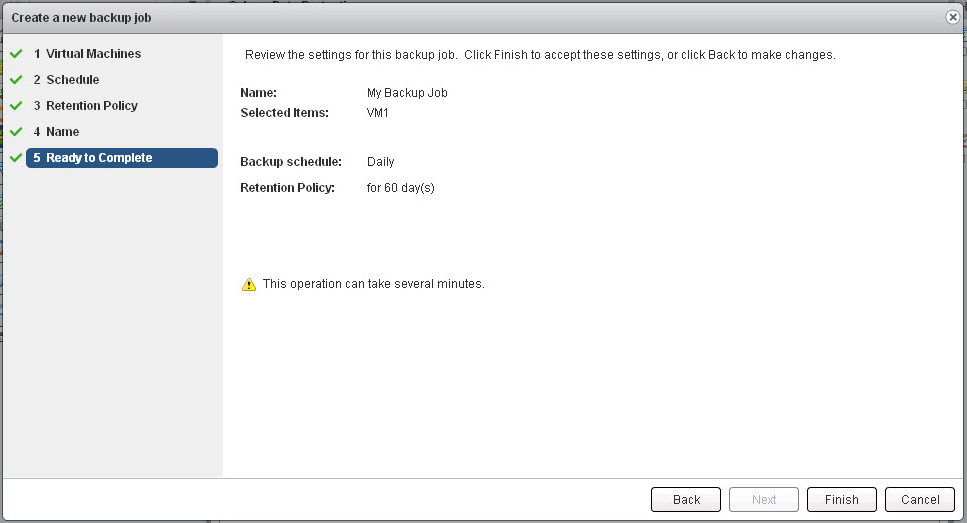
On the fifth, and final page of the wizard we can review our job and click Finish to initiate the job creation.
After clicking Finish on the wizard a popup will appear that says your backup job was created, click ok on it.
Step 9 – Running your backup job
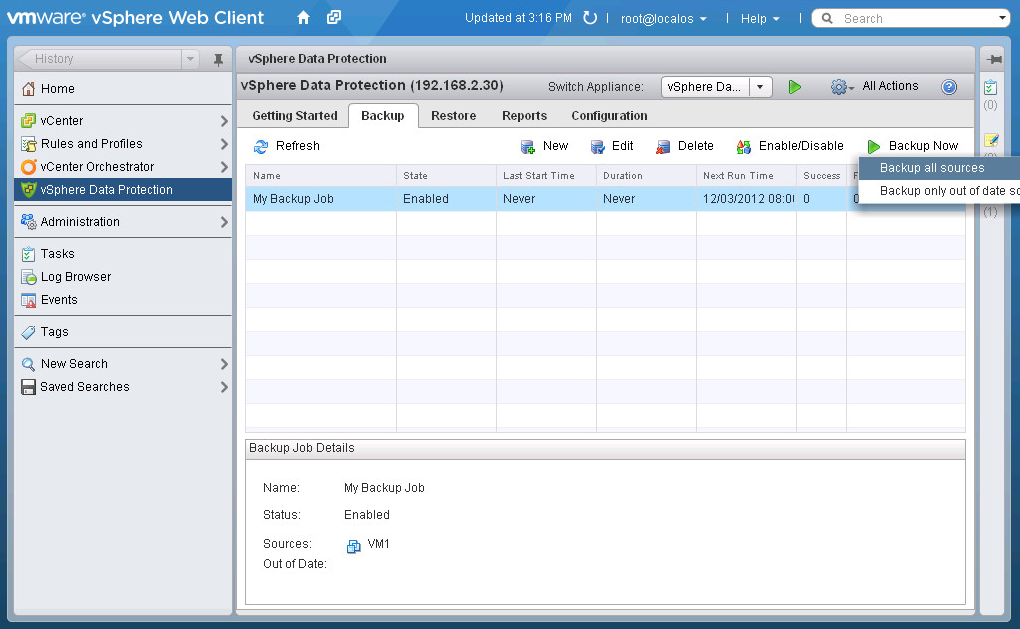
If this was a production environment you would be done, and you backup job would kick off that evening to backup your VM. However since we do not want to wait for it to start we can run it manually by clicking on the job, and then selecting “Backup Now” on the right side of the page. You then select “Backup all sources”.
After clicking on Backup all sources you will see a popup letting you know that the job was successfully initiated.
Step 10 – Monitoring a Backup Job
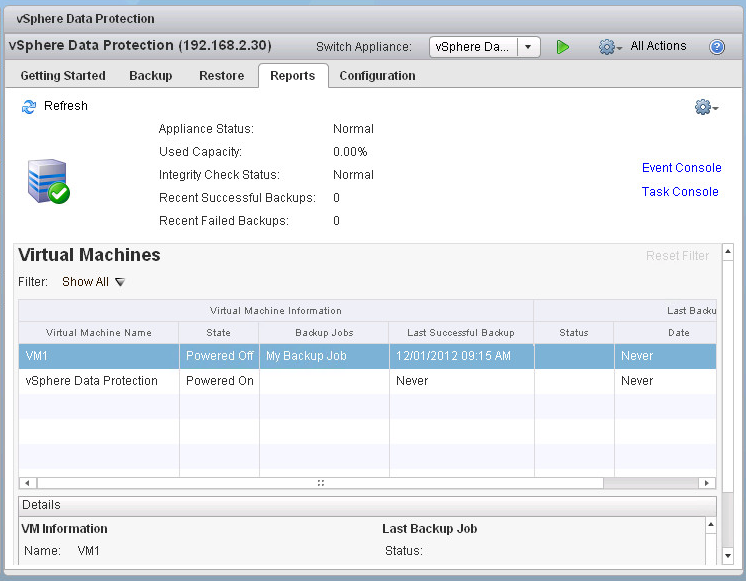
In order to see how your backup job is doing you need to click the “Reports” tab at the top of the panel.
On this page we can see a list of virtual machines on our cluster and which backup job they are in, as well as the overall capacity usage and health status of our VDP appliance. Also note the Event and Console links on the left, these are links to where you can find real-time information about running backup jobs.
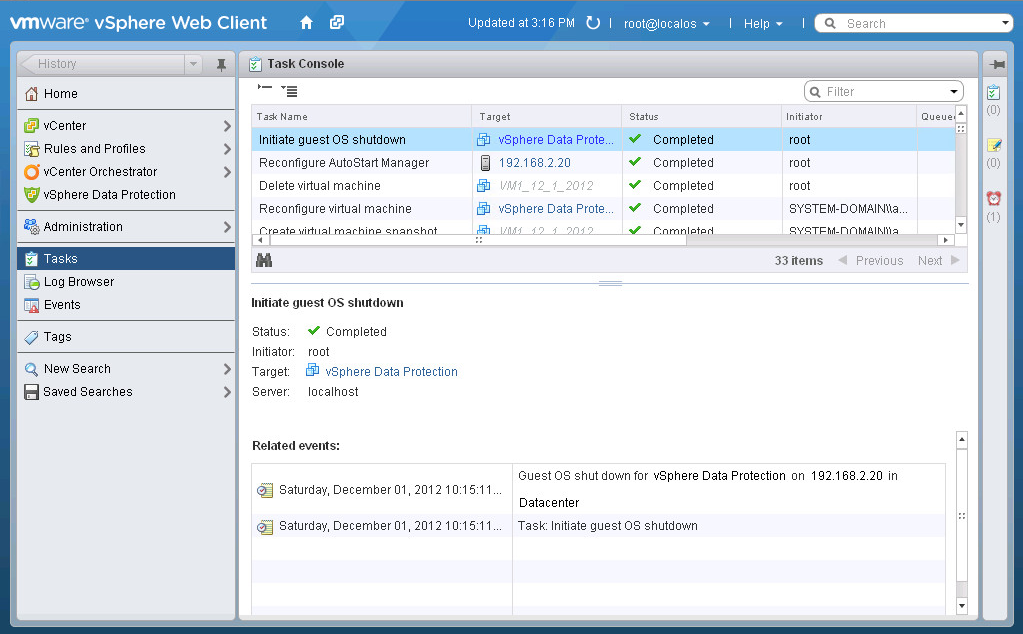
Here is the tasks panel, however there are no backup jobs running in this example.
Step 11 – Restoring a Virtual Machine
This lab was developed with one backup job having already been ran before you logged in. For this restore we will use that backup as the source. To get started click the “Restore” tab inside of the VDP panel.
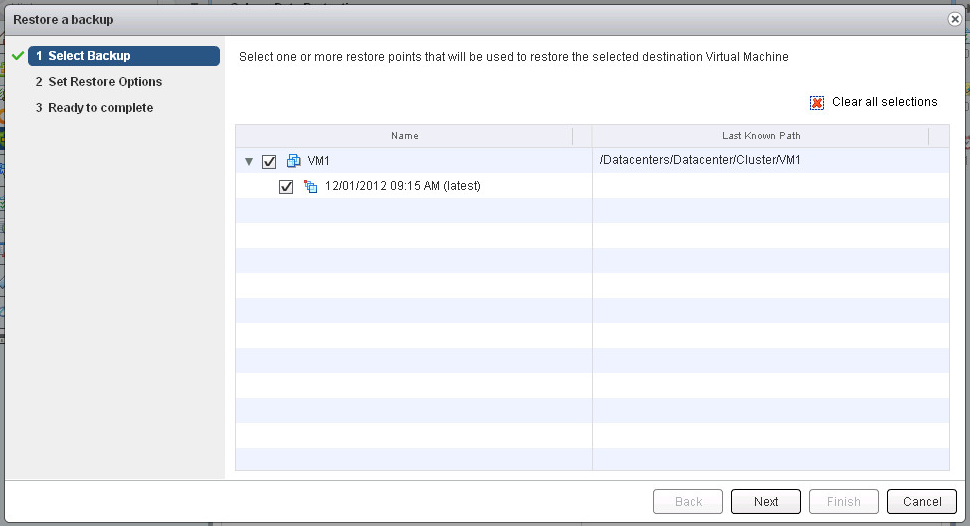
The first thing to do is select the backup that we want to restore, in the case of this lab we want to restore the VM1 backup from December 01 2012. Expand out the VM1 object and check the box beside of the 12/01/2012 backup point. Then click the “Restore” link.
A wizard will appear to guide you through the VM restore process. On the first page of the wizard you can verify that the backup point we want to restore is checked and then click Next.
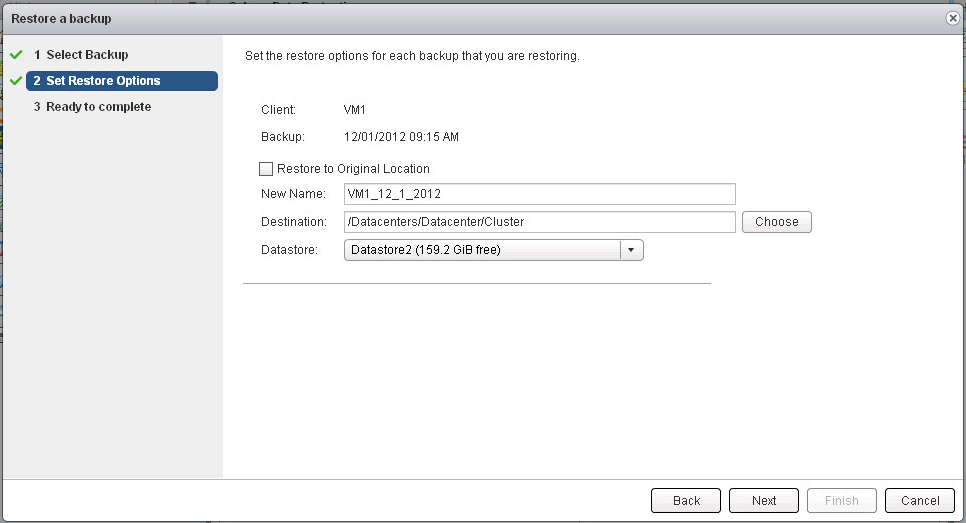
On page two we can choose to restore the VM to its original location (including original name), or we can uncheck that box and choose any name we want and pick whatever datastore we want. For this lab, we will uncheck the Restore to Original Location box. Also change the datastore to “Datastore2”, then click Next.
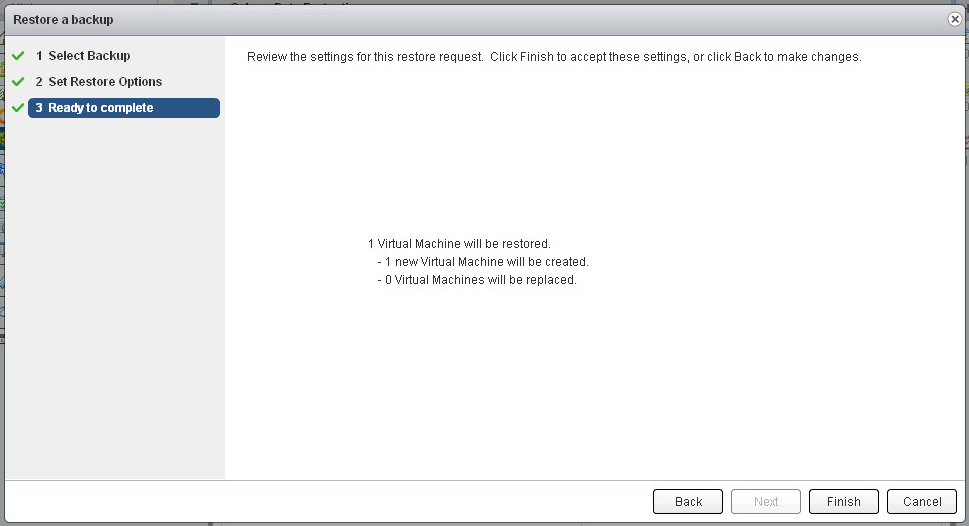
On the final page we can review the number of VM’s to be restored and then click Finish to initiate the task. Click ok on the popup telling you that your task was scheduled.
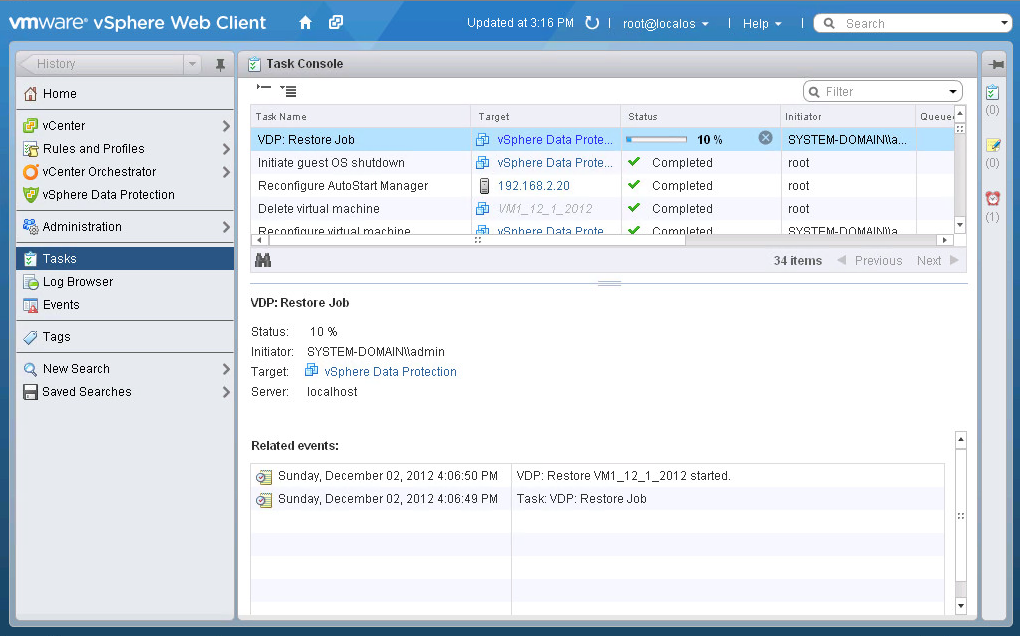
If you wish to monitor the restore process, click on “Tasks” in the left menu and select the job from the list. Slightly more detailed information appears below.
Step 12 – File Level Restores
In order to conserve lab resources we will only be talking about file level recovery with VDP. In its most basic form, VDP requires an administrator to login to the server which needs a file restored and then browse to the VDP appliance web page. After logging in the administrator can then mount a backup point and restore files out of it. However there are many limitation with FLR and VDP.
File Level Recovery Supported Configurations:
File Level Recovery can be performed on backups of the following file systems:
- NTFS (Primary Partition with MBR)
- Ext2 (Primary Partition with MBR)
- Ext3 (Primary Partition with MBR)
- LVM with ext2 (Primary Partition with MBR and a Standalone [without MBR] LVM w/ ext2)
- LVM with ext3 (Primary Partition with MBR and a Standalone [without MBR] LVM w/ ext3)
File Level Recovery Limitations
File Level Recovery does not support the following virtual disk configurations:
- Unformatted disks
- Dynamic disks (Windows) / Multi-Drive Partitions (that is, any partition which is composed of 2 or more virtual disks)
- GUID Partition Table (GPT) disks
- ext4 filesystems
- FAT16 filesystems
- FAT32 filesystems
- Extended partitions
- Encrypted partitions
- Compressed partitions
The procedure from the VDP Administrators Guide:
The Restore Client allows you to mount specific virtual machine backups as file systems and then “browse”
the file system to find the files you want to restore.
The Restore Client operates in one of two modes:
- Basic—allows you to only mount backups that were made from the machine you are logging in with, and any files that you restore will be restored to this client. For example, if you were logging in to the Restore Client in Basic mode from a Windows host named “WS44” then you would only be able to mount and browse backups of “WS44.”
- Advanced—allows you to mount and browse any backups that are contained in vSphere Data Protection.
You can only have a maximum of eight backups mounted at a given time.
NOTE In order to restore files with file level recovery, the virtual machine you are connecting to the restore
client from has to have VMware tools installed. A virtual machine with VMware tools installed can use the
restore client to restore files from backups of machines that did not have VMware Tools installed, but virtual
machines without VMware Tools won’t be able to successfully restore any backed up files at all with the restore
client.
NOTE The restore client does not support using VMware vSphere vMotion or VMware vSphere Storage
vMotion.
Because of these limitations VDP may or may not be the best backup solution for your environment. Also remember that in this version of VDP there is no option to “Tape out” your backups, or to replicate them. These are probably the two biggest limitations of VDP and will limit its adoption.
Congratulations! You completed Lab 4.
Housekeeping and Cleanup
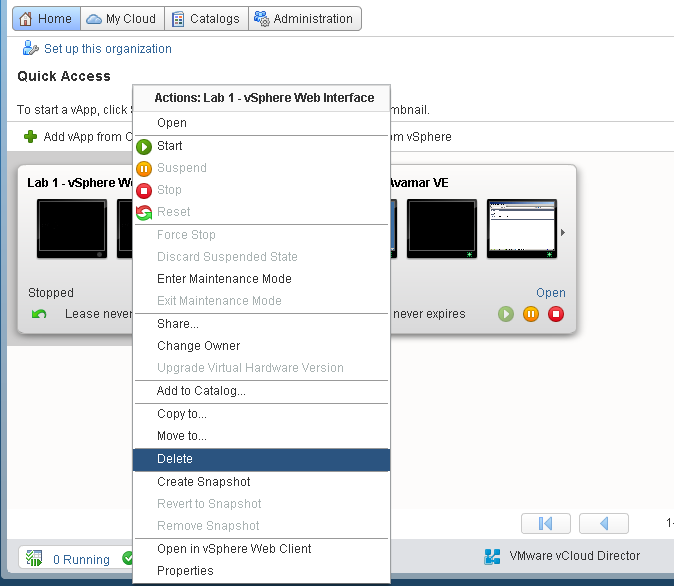
When you are done with the lab, you can delete it from the HOL Cloud. To do this click on the “Home” button in vCloud Director (on the left upper part of the vcd web page). Next find your lab vApp that you deployed at the beginning of the lab and press the Red Stop Button. after your vApp has stopped you can right click on it and select “Delete”.
Note: If you want to do another one of the labs with your HOL Account you will need to stop and delete one lab BEFORE starting the next lab, as there is a limit on the number of VM’s your account can have.
Questions and Feedback
Once you have finished the lab please complete the HoL Survey by clicking this link:
Any questions can be sent to [email protected] or submitted via the survey.
![]()

