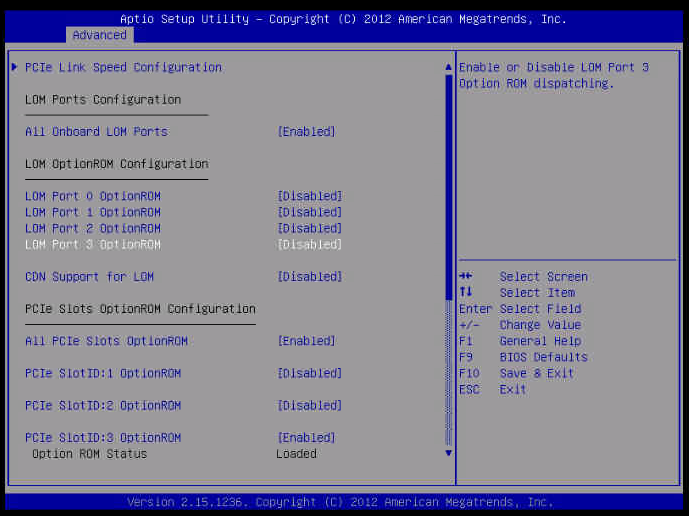
I thought I’d through a quick guide together for configing Cisco C240 M3 Servers to boot from SAN. Out of the box they can throw you off a little because the Fiber Channel HBA’s don’t show up during POST and ask you to configure them. This is because Cisco disabled all of the “Option ROMs” for PCIe add in cards by default, which I might add is a big pain in the ass… especially since they leave all 4 network ports Option Rom enabled. So if you aren’t smart enough to disable those you have to wait an extra minute or two to get past those during boot.
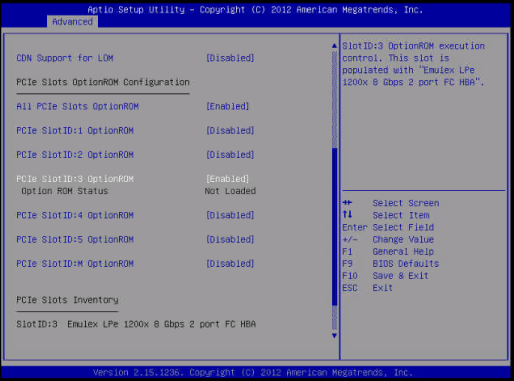
Anyhow the first step in getting a Cisco server to boot from SAN is to enable the HBA’s option ROM. You can do this in the BIOS under the PCIe options menu. If you scroll all the way to the botom you will see your PCIe Cards listed as well as what slot they are in. Here you can see mine is in slot 3.
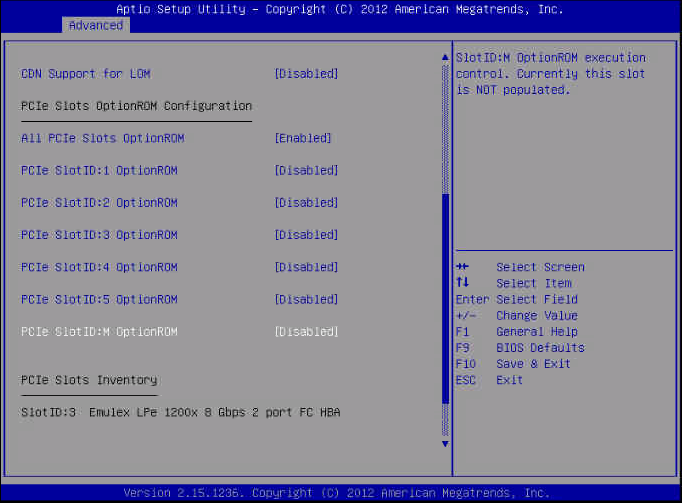
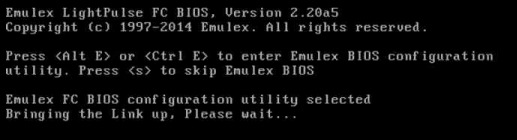
After you find the proper slot you can then scroll up a little and change that Option ROM from disabled to enabled. Then when you reboot you will see the familiar Emulex config screen.
Hit Alt+E to configure the HBA.
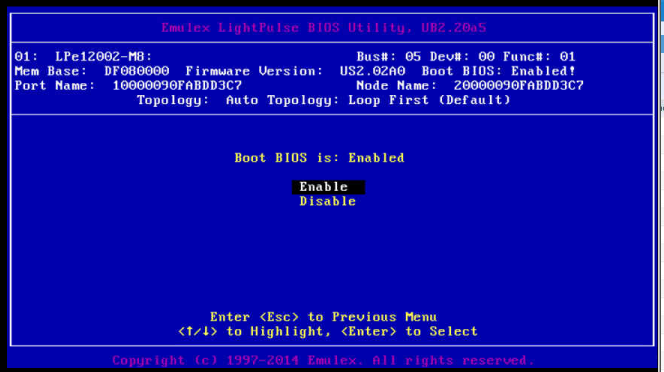
Once inside of the HBA config utility you will need to configure the settings for both of the ports on the HBA if you have dual port card. Make sure to do this before exiting otherwise if port 0 is down you host may not boot up properly. To start select the one of the HBA ports then navigate to the Boot from SAN enable / disable menu and select enable.
Next I always do a rescan of the HBA so that I know it can actually talk to the array and see LUNs. Once it can then you can proceed to the section where you actually select the LUN to boot from.
[stextbox id=”info”]Alternatively you can also tell the HBA to auto select LUN 0 from whatever it can see. This is a little risky but if you like to live dangerously you could do this. Where I see this is useful is if you have a lab or something, you could just tell it to boot from LUN 0 no matter what, and then on the SAN side you could move it from one storage group to another when you wanted to change OS’s (say from ESXi to Windows or something crazy like that.)
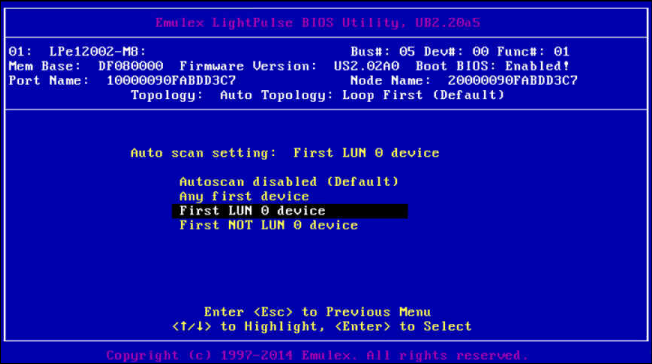
If you choose to do that make sure to enable auto boot as well.
 [/stextbox]
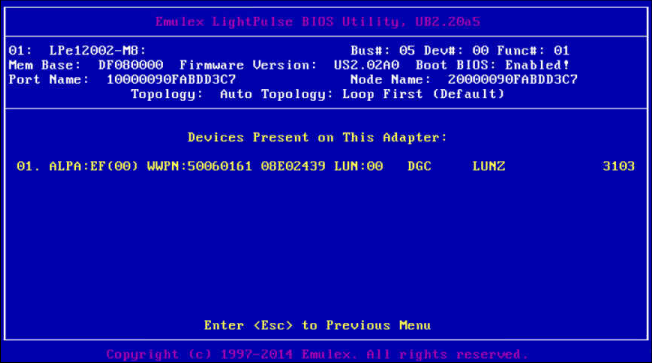
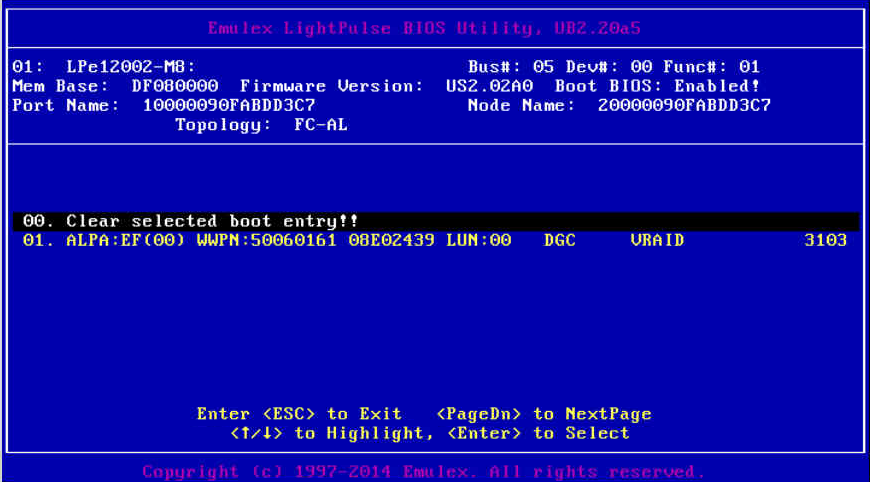
Anyhow, back to the normal config. Once you have rescanned you can go into the Boot Device Selection menu and it will list out all of the LUN’s it see’s. Select the appropriate LUN and hit enter.
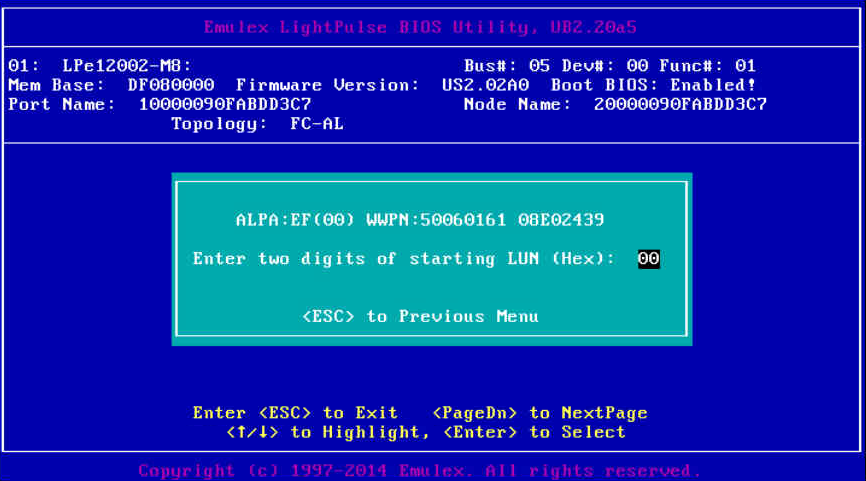
These next steps can normally just be confirmed (by hitting enter). If LUN 00 isn’t your boot LUN then you may want to change these settings.
Here we see LUN 00 and 01. 00 is by boot lun and 01 is the VMware Datastore for VM’s.
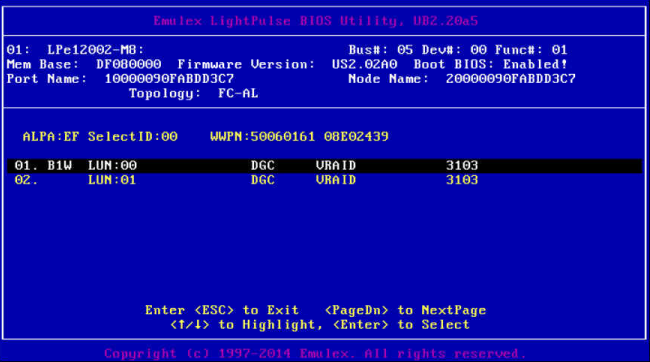
I will identify by WWPN so I can just hit enter again.
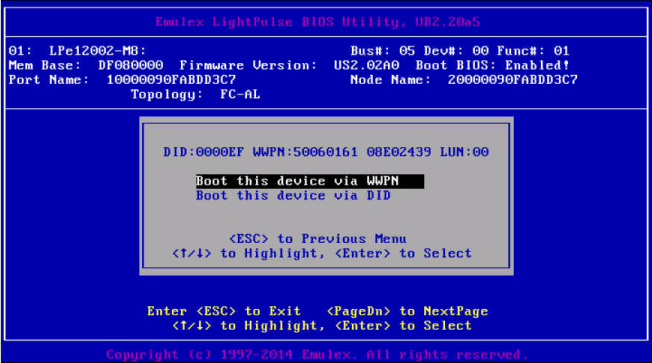
and then I repeat for any other ports on the SAN that this port on the HBA can see. It is important to select as many ports on the array as possible so that if one is down booting will still take place.
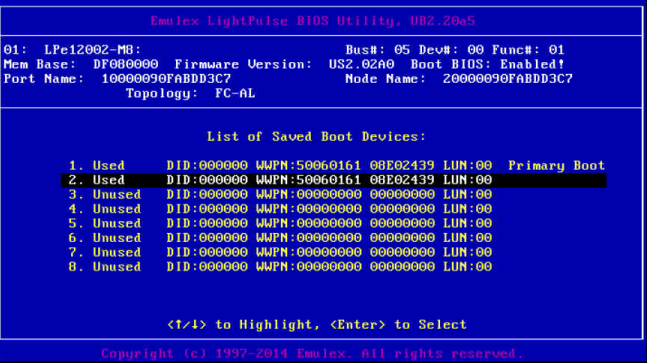
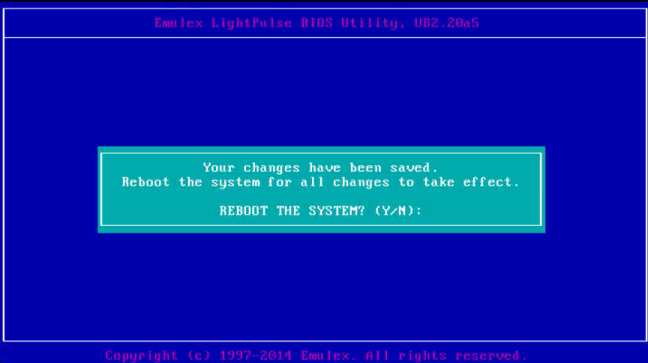
Once you have configured the other port’s settings then you can Escape all the way back out and hit Y to reboot the system.
At this point you can then go into the BIOS screen and you will see the HBA listed in the devices that can be added to the boot order. I typically configure the virtual DVD from the KVM as the first boot device and the HBA as the second device.
That’s it, you should be all set and ready to boot your C-Series server.
[stextbox id=”info”]One last tip… If you don’t want to wait on all the NIC cards to initialize on boot, you can disable their Option ROMs in the BIOS and you wont see them or have to wait anymore.
 [/stextbox]
![]()

Dear Mr.Justin,
I always used to see your all posts, as i am a beginner for cisco UCS i had a question regarding this so kindly reply me and help me to move further.
1) If i want to start from the scratch to implement UCS in a new data center, what is the steps i need to start from like example: i have to first configure FI’s and create pools(etc) or what??
(I mean which are the things i need to configure one by one)
waiting for your reply…
Probably the best way is to follow the installation guide.
Generally though, you are on the right track
1.) Configure FI cluster
2.) Setup the physical ports as needed (uplink ports, Fiber Channel ports, server ports, etc)
3.) acknowledge the chassis and servers
4.) Setup all of the various pools (IP pools, mac pools, WWPN NN pools, etc)
5.) create nic and hba profiles
6.) create boot profiles
7.) create server profile templates with all other information
8.) create server profiles from profile template as needed
9.) go back and fix all the stuff you missed
10.) enjoy your new UCS environment
Hope that helps
Dear Mr.Justin,
Heartly thanks for your reply…
As i am a beginner and i am thinking to change my field from network support (R&S) to Data Center Engineer.So just i am practicing using Cisco Platform Emulator (hope it looks very funny for you to listen this).
Let me know If you have any learning guide for Cisco UCS from basics and sorry once again i am disturbing you…
Dear Mr.Justin,
Heartly thanks for your reply…
Let me know If you have any learning guide for Cisco UCS from basics and sorry once again i am disturbing you…
Best place to look is Cisco.com. They have howto guides and config guides for almost all their products.
Thanks, very usefull to figure out how to enable the boot from SAN on a c-Series UCS. I use Qlogic card with CTRL-Q combo but your blog was very usefull to get into that menu in the first place. Thanks
Hi – we are trying to set one of these up and while we can get the server to boot from SAN with the boot LUN, but it freezes when it sees the data LUN and fails to boot. If we boot from SAN, and don’t present the data LUN until after the server has booted, then we can successfully mount the data LUNs. Have you seen this before?
I haven’t seen that one. It sounds like maybe the FC card BIOS settings are confused about which LUN to boot from.